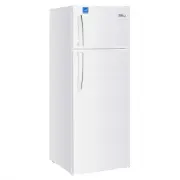
Premium Levella PRN165DX - Manuals
Premium Levella PRN165DX Refrigerator – User Manual in PDF format online.
Manuals:
User Manual Premium Levella PRN165DX


Summary
2 ■ Shelf installation A. Hook shelf clips onto clip hanger B. Place shelves on shelf clips making sure all corners are seated properly C. Hook the plastic frame of price tag on shelves Remove the glass door bracket from the door before use
3 ■ Casters or adjustable feet are available for the units -- Universal caster with support ) -- Universal caster ELECTRICAL ■ Please ensure that the required voltage of the compressor is being supplied at all times CAUTION: Low or high voltage can detrimentally affect the refrigeration unit. ■ All ...
4 Temperature controller operation instructions Setting the set point (desired temperature value) To display or set the set point, proceed as follows: 1) Press SET for 1s, the set value will start flashing ; 2) Increase or decrease the value by per click ; 3) Press the SET button again to confirm th...
Premium Levella Refrigerators Manuals
-
 Premium Levella PRF1257DX
User Manual
Premium Levella PRF1257DX
User Manual
-
 Premium Levella PRF125DX
User Manual
Premium Levella PRF125DX
User Manual
-
 Premium Levella PRF1557DX
User Manual
Premium Levella PRF1557DX
User Manual
-
 Premium Levella PRF155DX
User Manual
Premium Levella PRF155DX
User Manual
-
 Premium Levella PRF33DX
User Manual
Premium Levella PRF33DX
User Manual
-
 Premium Levella PRF7350HW
User Manual
Premium Levella PRF7350HW
User Manual
-
 Premium Levella PRF907DX
User Manual
Premium Levella PRF907DX
User Manual
-
 Premium Levella PRF90DX
User Manual
Premium Levella PRF90DX
User Manual
-
 Premium Levella PRFIM1256DX
User Manual
Premium Levella PRFIM1256DX
User Manual
-
 Premium Levella PRFIM1257DX
User Manual
Premium Levella PRFIM1257DX
User Manual
-
 Premium Levella PRN185DX
User Manual
Premium Levella PRN185DX
User Manual
-
 Premium Levella PRN210DX
User Manual
Premium Levella PRN210DX
User Manual
-
 Premium Levella PRN290DX
User Manual
Premium Levella PRN290DX
User Manual