Page 2 - for advice before returning unit; and should not be used for other purposes.; THIS PRODUCT IS FOR HOUSEHOLD USE ONLY; RETAIN THIS MANUAL FOR FUTURE REFERENCE
1 Important Issues Regarding the Proper Use of this Air Conditioner Please contact Polo on 1 800 087 840 for advice before returning unit Use this air conditioner only as described in this instruction manual. • This appliance is fitted with a special safety device. When the compressor switches off o...
Page 3 - CONTENTS
CONTENTS Introduction .............................................................................. 3 Installation ............................................................................... 5 Control panel ........................................................................... 8 Operation ...
Page 4 - INTRODUCTION; GUIDELINES FOR OPTIMISING COOLING EFFECTIVENESS
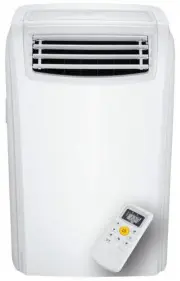
3 INTRODUCTION This portable air conditioner can alter the room temperature and humidity. It has multiple functions of cooling dehumidifying (drying) and fan ventilation, and can be moved from room to room and transported from building to building easily. The air conditioner can maintain set room in...
Page 6 - INSTALLATION; hose; ASSEMBLY OF EXHAUST HOSE, HOSE INLET, HOSE OUTLET AND WINDOW SLIDER; SELECTION OF INSTALLATION LOCATION
5 INSTALLATION window slider hose outlet hose hose inlet ASSEMBLY OF EXHAUST HOSE, HOSE INLET, HOSE OUTLET AND WINDOW SLIDER • Fully extend each end of the exhaust hose by about 10cm and attach the hose inlet and hose outlet to opposite ends by rotating the inlet/outlet in a counter clockwise direct...
Page 7 - MOUNTING OF ASSEMBLED AIR EXHAUST HOSE; NOTE
MOUNTING OF ASSEMBLED AIR EXHAUST HOSE • Make certain the air intake and outlet grills are unobstructed. • Push the hose inlet into the air exhaust hose housing lining up the slots with the side lugs. Twist anti clockwise to secure. Twist clockwise to remove. • Place the hose outlet to the nearest w...
Page 9 - CONTROL PANEL; OPERATING FROM THE CONTROL PANEL
8 CONTROL PANEL OPERATING FROM THE CONTROL PANEL The operating temperature ranges for cooling and dehumidifying are 18°C to 32°C.A temperature within this range may be set, but the room may not necessarily reach this set temperature.If the appliance is turned off during cooling or dry (dehumidifying...
Page 10 - OPERATION
9 OPERATION Plug into mains socket – do not plug into power boards being used for other appliances. DEHUMIDIFYING (DRY) MODE for quieter operation In dehumidifying mode the appliance must have the exhaust hose fitted to allow air to be discharged externally. The unit will not cool or dehumidify in t...
Page 11 - DESCRIPTION OF THE REMOTE CONTROL
10 7 / DESCRIPTION OF THE REMOTE CONTROL 1. Mode indicator 2. Sleep indicator 3. Powerful indicator 4. Timer selection 5. Auto-speed indicator 6. Fan Speed indicator 7. (a) Increase (+) temperature button . (b) Decrease (-) temperature button 8. FAN button - Press this button to select fan speed of ...
Page 15 - WATER DRAINAGE METHOD; CONTINUOUS DRAINAGE
14 WATER DRAINAGE METHOD This air conditioner is equipped with the very latest MIST technology which means that the water tank NEVER needs emptying even in high humidity areas. Water drainage will generally only be required at the end of the season (see End of Season Operations – page 15)However, th...
Page 16 - MAINTENANCE AND SERVICE; MAINTENANCE METHODS
15 MAINTENANCE AND SERVICE MAINTENANCE METHODS • Before undertaking cleaning or maintenance, turn the appliance off by pressing the ON/OFF button, then always unplug the appliance from the power supply outlet. • Do not use chemical solvent to clean the surface of the unit. Never spray insecticides o...
Page 17 - TROUBLESHOOTING
16 TROUBLESHOOTING Before seeking repair or service, please check the following: PROBLEM CHECK ACTION No power to Air Conditioner • Is A/C plugged into power supply outlet? • Has fuse blown (circuit breaker switched off) or A/C switched off? • Insert power plug securely into power supply outlet and ...
Page 18 - SPECIFICATIONS
17 SPECIFICATIONS TECHNICAL SPECIFICATIONS Polocool - KN 10C Rated voltage – 240 voltsRated power input – 1130 wattsRefrigerant – R410a – 440gmCooling capacity – 2,900 watts (10,000 BTU) Polocool – KN 12C Rated Voltage – 240 voltsRated power input 1200 wattsRefrigerant – R410a – 600gmCooling capacit...