Page 2 - About this unit; WARNING; Avoid exposure to moisture.; If you experience problems; Before you start
Thank you for purchasing this PIONEER product To ensure proper use, please read through thismanual before using this product. It is especiallyimportant that you read and observe WARN- ING s and CAUTION s in this manual. Please keep the manual in a safe and accessible place forfuture reference. If yo...
Page 3 - Head unit; a b; CAUTION; Display indication; After installation of this unit, turn the; English; Using this unit
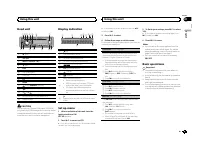
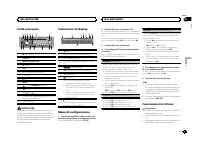
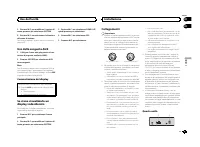
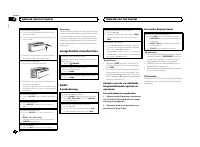
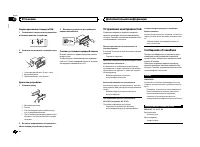
Head unit 7 1 4 6 3 2 9 a de 8 5 c b 1 h (eject) 2 SRC / OFF 3 MULTI-CONTROL ( M.C. ) 4 (list) 5 DISP 6 Disc loading slot 7 USB port 8 EQ 9 BAND a (back)/ DIMMER (dimmer) b c / d c 1 / to 6 / d AUX input jack (3.5 mm stereo jack) e Detach button CAUTION Use an optional Pioneer USB cable (CD-U50E)to ...
Page 4 - Important; Radio; Basic operations; Notes; Using preset tuning buttons
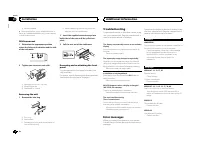
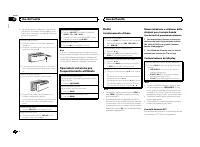
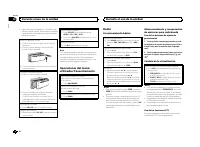
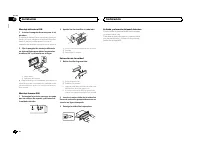
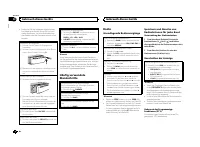
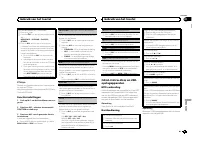
Removing the front panel 1 Press the detach button to release the frontpanel. 2 Push the front panel upward ( M ) and then pull it toward ( N ) you. 3 Always store the detached front panel in a pro-tective case or bag. Re-attaching the front panel 1 Slide the front panel to the left. 2 Press the rig...
Page 5 - Switching the display; Using PTY functions; Function settings; and press to select FUNCTION.; MTP connection
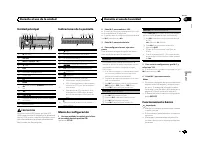
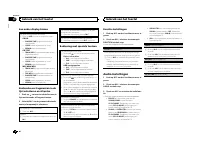
2 Turn M.C. to change the menu option and press to select FUNCTION. 3 Turn M.C. to select the function. Once selected, the following functions can beadjusted. # If MW/LW band is selected, only BSM , LOCAL and SEEK are available. FM SETTING (FM sound quality settings) The sound quality level can be s...
Page 6 - Note; Press; Operations using special buttons; iPod
Viewing a list of the files (or folders) in the se-lected folder 1 When a folder is selected, press M.C. Playing a song in the selected folder 1 When a folder is selected, press and hold M.C. Operations using special buttons Selecting a repeat play range 1 Press 6 / to cycle between the following: C...
Page 8 - For iPhone users; Starting procedure for iPhone users; Audio adjustments
Using an AUX source 1 Insert the stereo mini plug into the AUX input jack. 2 Press SRC/OFF to select AUX as the source. Note AUX cannot be selected unless the auxiliary set-ting is turned on. For more details, refer to AUX (auxiliar y input) on page 7. Switching the display Selecting the desired tex...
Page 9 - System menu
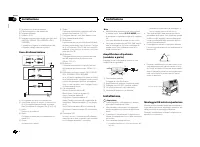
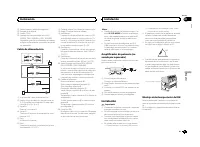
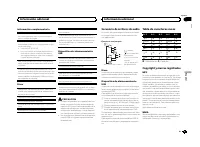
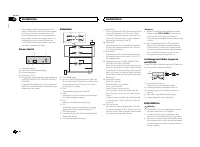
Power cord 1 3 3 2 4 4 5 5 6 6 b 8 9 7 a e d c 1 To power cord input 2 Depending on the kind of vehicle, the func-tion of 3 and 5 may be different. In this case, be sure to connect 4 to 5 and 6 to 3 . 3 YellowBack-up (or accessory) 4 YellowConnect to the constant 12 V supply termi-nal. 5 RedAccessor...
Page 10 - Selecting the illumination color; Illumination function menu; Customizing the illumination color; MIXTRAX menu
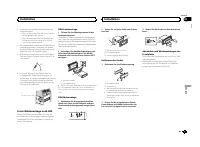
2 Mounting sleeve # Make sure that the unit is installed securely in place. An unstable installation may cause skippingor other malfunctions. DIN Rear-mount 1 Determine the appropriate position where the holes on the bracket and the sideof the unit match. 2 Tighten two screws on each side. 1 2 3 1 T...
Page 12 - Connections; This unit; Installation
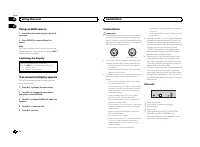
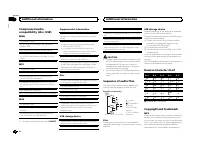
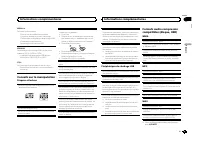
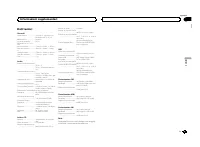
Compressed audiocompatibility (disc, USB) WMA File extension: .wma Bit rate: 48 kbps to 320 kbps (CBR), 48 kbps to384 kbps (VBR) Sampling frequency: 32 kHz, 44.1 kHz, 48 kHz Windows Media ä Audio Professional, Lossless, Voice/DRM Stream/Stream with video: Not com-patible MP3 File extension: .mp3 Bit...
Page 13 - Removing the unit; Removing the front panel
streaming via internet, intranets and/or othernetworks or in other electronic content distribu-tion systems, such as pay-audio or audio-on-de-mand applications. An independent license forsuch use is required. For details, please visithttp://www.mp3licensing.com. WMA Windows Media is either a registe...
Page 14 - Common; Additional information
Nous vous remercions d ’ avoir acheté cet ap- pareil PIONEER Pour garantir une utilisation correcte, lisez bience mode d ’ emploi avant d ’ utiliser cet appareil. Il est particulièrement important que vous lisiez etrespectiez les indications ATTENTION et PRÉ- CAUTION de ce mode d ’ emploi. Conser ve...
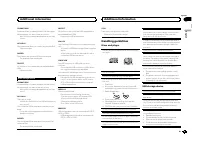
Page 15 - Apps; Handling guidelines; Discs and player
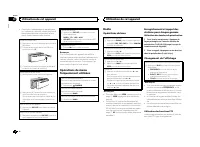
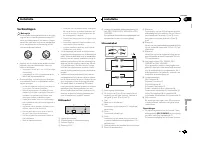
Appareil central 7 1 4 6 3 2 9 a de 8 5 c b 1 h (éjection) 2 SRC / OFF 3 MULTI-CONTROL ( M.C. ) 4 (liste) 5 DISP 6 Fente de chargement des disques 7 Port USB 8 EQ 9 BAND a (retour)/ DIMMER (atténuateur de lumi- nosité) b c / d c 1 / à 6 / d Jack d ’ entrée AUX (jack stéréo 3,5 mm) e Touche de retrai...
Page 16 - USB MTP; iPod compatibility; Sequence of audio files
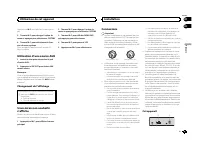
! Pour éviter d ’ endommager le périphérique ou l ’ intérieur du véhicule, retirez tous les câ- bles et périphériques connectés à la faceavant, avant d ’ enlever cette dernière. Retrait de la face avant 1 Appuyez sur la touche de retrait pour libérer laface avant. 2 Poussez la face avant vers le hau...
Page 17 - iTunes; Made for iPod; Android; Android is a trademark of Google Inc.; MIXTRAX
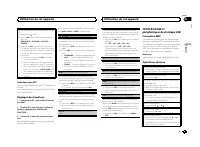
Recherche d ’ une station RDS en utilisant le code PTY 1 Appuyez sur (liste). 2 Tournez M.C. pour sélectionner le type de pro- gramme. NEWS/INFO — POPULAR — CLASSICS — OTHERS 3 Appuyez sur M.C. pour lancer la recherche. Cet appareil recherche une station qui diffusece type de programme. Quand une st...
Page 18 - Specifications
Retour au dossier racine 1 Appuyez sur BAND de façon prolongée. Commutation entre les modes audio compresséet CD-DA 1 Appuyez sur BAND . Changement de périphérique de mémoire de lec-tureVous pouvez basculer entre les périphériques demémoire sur les périphériques de stockage USBayant plus d ’ un péri...
Page 20 - Nous vous remercions; Quelques mots sur cet appareil; ATTENTION; APPAREIL À LASER DE CLASSE 1; Avant de commencer
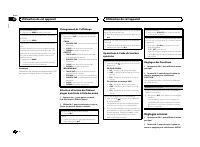
1 Appuyez sur M.C. pour afficher le menu principal. 2 Tournez M.C. pour changer l ’ option de menu et appuyez pour sélectionner SYSTEM. 3 Tournez M.C. pour sélectionner la fonc- tion du menu système. Une fois sélectionnées, les fonctions du menusystème suivantes peuvent être ajustées. ! MUTE MODE et...
Page 21 - Appareil central; PRÉCAUTION; importe quel périphérique relié directement à; Indications affichées; Après avoir installé l; Français; Utilisation de cet appareil
Appuyez sur M.C. pour afficher le menu princi- pal. 3 Tournez M.C. pour changer l ’ option de menu et appuyez pour sélectionner SYSTEM. 4 Tournez M.C. pour sélectionner la fonc- tion du menu système. Pour les détails, reportez-vous à la page 19, Menu système . Utilisation d ’ une source AUX 1 Insére...
Page 22 - Opérations de base; Remarques
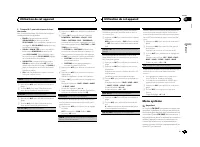
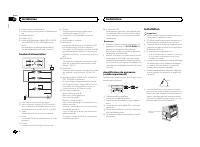
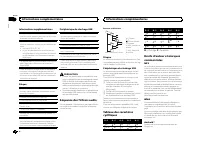
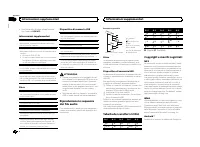
1 Entrée cordon d ’ alimentation 2 Sortie arrière ou haut-parleur d ’ extrêmes gra- ves 3 Entrée antenne 4 Fusible (10 A) 5 Entrée télécommande câblée (DEH-1600UB,DEH-1600UBG et DEH-1600UBB unique-ment)Un adaptateur de télécommande câblée(vendu séparément) peut être connecté. Cordon d ’ alimentation...
Page 23 - Utilisation des touches de présélection; Changement de l; Utilisation des fonctions PTY; Vous pouvez rechercher une station à l; Liste des codes PTY; Réglages des fonctions
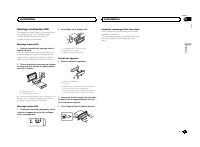
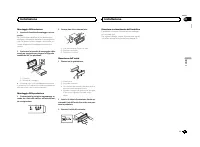
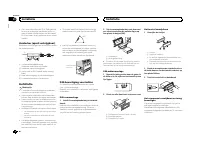
Montage avant/arrière DIN Cet appareil peut être installé correctement soiten montage frontal ou en montage arrière.Utilisez des pièces disponibles dans lecommerce lors de l ’ installation. Montage frontal DIN 1 Insérez le manchon de montage dans le tableau de bord. Lors de l ’ installation de cet a...
Page 24 - Appuyez sur
Dépannage Les symptômes apparaissent en gras et les cau-ses sous la forme de texte régulier non indenté.Le texte régulier indenté est utilisé pour indiquerles actions à mettre en œ uvre. L ’ écran revient automatiquement à l ’ affichage ordinaire. Vous n ’ avez exécuté aucune opération pendant 30 se...
Page 25 - option de
ERROR-19 Panne de communication. Effectuez une des opérations suivantes. – Coupez et remettez le contact d ’ allumage. – Déconnectez le périphérique de stockage USB. – Choisissez une autre source. Revenez ensuite à la source USB. ERROR-23 Le périphérique de stockage USB n ’ a pas été for- maté avec ...
Page 27 - appareil connecté; Pour les utilisateurs d; un iPhone; Réglages sonores
Caractéristiques techniques Généralités Tension d ’ alimentation ..... 14,4 V CC (10,8 V à 15,1 V ac- ceptable) Mise à la masse ............... Pôle négatifConsommation maximale ................................... 10,0 A Dimensions (L × H × P) :DINChâssis ............................ 178 mm × 50 mm ...
Page 28 - Menu système
Grazie per aver acquistato questo prodotto PIONEER Leggere attentamente questo manuale prima diutilizzare il prodotto, per assicurarne il correttoutilizzo. È particolarmente importante leggere eosservare le precauzioni contrassegnate da AV- VERTENZA e ATTENZIONE contenute in questo manuale. Conser v...
Page 29 - éclairage; Menu des fonctions d; appuyez pour sélectionner.
Unità principale 7 1 4 6 3 2 9 a de 8 5 c b 1 h (espulsione) 2 SRC / OFF 3 MULTI-CONTROL ( M.C. ) 4 (lista) 5 DISP 6 Vano d ’ inserimento dei dischi 7 Porta USB 8 EQ 9 BAND a (indietro)/ DIMMER (varialuce) b c / d c Da 1 / a 6 / d Connettore di ingresso ausiliario (AUX) (con-nettore stereo da 3,5 mm...
Page 30 - Remarque; Menu MIXTRAX; Menu initial
! Per evitare danni ai dispositivi o agli internidel veicolo, accertarsi di scollegare gli even-tuali cavi e i dispositivi collegati al frontalino,prima di rimuoverlo. Rimozione del frontalino 1 Premere il tasto di rimozione per sganciare ilfrontalino. 2 Spingere il frontalino verso l ’ alto ( M ) e...
Page 32 - Connexions; Cet appareil
Esegue l ’ avanzamento rapido/la modalità inversa rapida 1 Premere e tenere premuto c o d . ! Quando si riproducono file audio compressi,durante l ’ avanzamento rapido e la modalità in- versa non viene emesso audio. Ritorno alla cartella principale 1 Premere e tenere premuto BAND . Passaggio da audi...
Page 33 - Montage avant/arrière DIN; Montage frontal DIN
3 Ruotare M.C. per selezionare la funzione audio. Dopo aver effettuato la selezione, è possibile re-golare le funzioni audio descritte di seguito. ! FADER non è disponibile se l ’ impostazione SUB.W/SUB.W è selezionata in SP-P/O MODE . Per ulteriori dettagli, vedere SP-P/O MODE (uscita posteriore e ...
Page 34 - Retrait et remontage de la face avant; appareil contre le vol.; Dépannage; entretien agréé par Pioneer le plus; Informations complémentaires
1 Premere M.C. per visualizzare il menu principale. 2 Ruotare M.C. per modificare l ’ opzione di menu; premere per selezionare SYSTEM. 3 Ruotare M.C. per selezionare la funzione del menu di sistema. Dopo aver effettuato la selezione, è possibile re-golare le funzioni del menu di sistema descrittedi ...
Page 35 - Conseils sur la manipulation; Disques et lecteur
3 Ruotare M.C. per modificare l ’ opzione di menu; premere per selezionare SYSTEM. 4 Ruotare M.C. per selezionare la funzione del menu di sistema. Per ulteriori dettagli, vedere Menu di sistema a pagina 33. Uso della sorgente AUX 1 Collegare il cavo mini plug stereo al con- nettore di ingresso ausil...
Page 36 - Informations supplémentaires
1 Ingresso cavo di alimentazione 2 Uscita posteriore o del subwoofer 3 Ingresso antenna 4 Fusibile (10 A) 5 Ingresso telecomando cablato (solo per i mo-delli DEH-1600UB, DEH-1600UBG e DEH-1600UBB)È possibile collegare un adattatore per tele-comando cablato (venduto a parte). Cavo di alimentazione 1 ...
Page 37 - Compatibilité iPod; Séquence des fichiers audio; Disque
Montaggio DIN anteriore 1 Inserire la fascetta di montaggio nel cru- scotto. Se l ’ unità viene installata in uno spazio poco profondo, utilizzare la fascetta di montaggio for-nita. Se dietro l ’ unità vi è spazio sufficiente, uti- lizzare la fascetta di montaggio fornita con ilveicolo. 2 Assicurare...
Page 39 - Caractéristiques techniques; Généralités
ERROR-19 Errore di comunicazione. Eseguire una delle operazioni riportate diseguito. – Portare l ’ interruttore della chiave di avviamento in posizione OFF e quindi di nuovo su ON. – Scollegare il dispositivo di memoria USB. – Passare a una sorgente diversa. Quindi, tornare alla sorgente USB. ERROR-...
Page 40 - Informazioni sull; AVVERTENZA; PRODOTTO LASER DI CLASSE 1; In caso di problemi; Prima di iniziare
! Non è possibile utilizzare questa funzionecon l ’ opzione USB MTP . Informazioni supplementari Per i nomi dei file (incluse le estensioni) o i nomidelle cartelle, è possibile visualizzare esclusiva-mente i primi 32 caratteri. Il testo cirillico da visualizzare su questa unitàdeve essere codificato...
Page 41 - ATTENZIONE; Dopo aver installato l; Italiano
Dati tecnici Generali Alimentazione .................. 14,4 V di c.c. (variazioni con- sentite da 10,8 V a 15,1 V) Messa a terra ................... NegativaConsumo massimo .......... 10,0 ADimensioni (L × A × P):DINUnità principale ............... 178 mm × 50 mm × 165 mmPannello anteriore ............
Page 42 - Nota; Funzionamento di base
Gracias por haber adquirido este producto PIONEER Lea con detenimiento este manual antes de utili-zar el producto por primera vez para que puedadarle el mejor uso posible. Es muy importanteque lea y cumpla con la información que apare-ce bajo los mensajes de ADVERTENCIA y PRECAUCIÓN de este manual. ...
Page 43 - Uso dei tasti di preselezione sintonia; ) fino a quando il numero; Commutazione del display; Uso delle funzioni PTY; Per ulteriori dettagli sull; Impostazioni delle funzioni; opzione di; Uso dell
Unidad principal 7 1 4 6 3 2 9 a de 8 5 c b 1 h (expulsar) 2 SRC / OFF 3 MULTI-CONTROL ( M.C. ) 4 (lista) 5 DISP 6 Ranura de carga de discos 7 Puerto USB 8 EQ 9 BAND a (parte posterior)/ DIMMER (reductor de luz) b c / d c 1 / a 6 / d Conector de entrada AUX (conector estéreode 3,5 mm) e Botón de sol...
Page 44 - Premere
! Para evitar que el dispositivo o el interior delvehículo sufran daños, retire todos los cableso dispositivos conectados al panel delanteroantes de extraerlo. Extracción del panel frontal 1 Pulse el botón de soltar para liberar el paneldelantero. 2 Empuje el panel delantero hacia arriba ( M ) y tir...
Page 45 - Operazioni col pulsante MIXTRAX; Per passare al menu superiore della ricer-
Búsqueda de una emisora RDS por informaciónPTY 1 Pulse (lista). 2 Gire M.C. para seleccionar el tipo de progra- ma. NEWS/INFO — POPULAR — CLASSICS — OT- HERS 3 Pulse M.C. para comenzar la búsqueda. La unidad busca una emisora que transmitaese tipo de programa, cuando la encuentra, sevisualiza el nom...
Page 46 - Operazioni con i pulsanti speciali; unità dall
Cambio de la visualización Selección de la información de texto deseada 1 Pulse DISP para desplazarse entre las siguien- tes opciones: CD-DA ! ELAPSED TIME (número de pista y tiempo de reproducción) ! CLOCK (nombre de la fuente y reloj) ! SPEANA (analizador de espectro) CD-TEXT ! TRACK INFO (título ...
Page 47 - Per gli utenti iPhone
La sonoridad compensa las deficiencias en los in-tervalos de frecuencias bajas y altas cuando se es-cucha a un volumen bajo. 1 Pulse M.C. para seleccionar el ajuste deseado. OFF (desactivado) — LOW (bajo) — MID (medio) — HI (alto) SUB.W (ajuste de subgraves activado/desactiva- do) Esta unidad está e...
Page 48 - Menu di sistema; Importante
SP-P/O MODE (ajuste de la salida posterior y del preamplificador) La salida de cables de altavoces traseros y la sali-da RCA de esta unidad se puede usar para co-nectar altavoces de gama completa o desubgraves. Seleccione la opción adecuada parasu conexión. 1 Pulse M.C. para mostrar el modo de ajust...
Page 49 - illuminazione
2 Salida trasera o salida de subgraves 3 Entrada de la antena 4 Fusible (10 A) 5 Entrada remota conectada (solo DEH-1600UB, DEH-1600UBG y DEH-1600UBB)Es posible conectar un adaptador de mandoa distancia físicamente conectado (se vendepor separado). Cable de alimentación 1 3 3 2 4 4 5 5 6 6 b 8 9 7 a...
Page 50 - Menu iniziale
Montaje delantero DIN 1 Inserte el manguito de montaje en el sal- picadero. Si realiza la instalación en un espacio poco pro-fundo, utilice el manguito de montaje suminis-trado. Si hay suficiente espacio, utilice elmanguito de montaje que venía con el vehículo. 2 Fije el manguito de montaje utilizan...
Page 52 - Collegamenti; Questa unità; Installazione
ERROR-19 Error de comunicación. Realice una de las siguientes operaciones: – Cambie la llave de encendido del automóvil a la posición de desactivación y luego pase de nuevoa activación. – Desconecte el dispositivo de almacenamiento USB. – Cambie a una fuente diferente. Después vuelva a la fuente USB...
Page 53 - Montaggio DIN anteriore/posteriore; Montaggio DIN anteriore; Inserire la fascetta di montaggio nel cru-; Montaggio DIN posteriore; Determinare la posizione appropriata, in
Información complementaria Solo se pueden visualizar los primeros 32 caracte-res como nombre de archivo (incluida la exten-sión) o nombre de carpeta. Los textos en ruso que se visualizarán en esta uni-dad se deben codificar con los siguientes conjun-tos de caracteres: ! Unicode (UTF-8, UTF-16) ! Los...
Page 54 - Rimuovere la guarnizione.; Rimozione e reinserimento del frontalino; Per ulteriori dettagli, vedere; Risoluzione dei problemi; Messaggi di errore; Problemi comuni; Lettore CD; Informazioni supplementari
Este producto incluye tecnología propiedad deMicrosoft Corporation, y no se puede usar ni dis-tribuir sin una licencia de Microsoft Licensing,Inc. Android ä Android es una marca comercial de Google Inc. Especificaciones Generales Fuente de alimentación .... 14,4 V cc (10,8 V a 15,1 V per- misible) S...
Page 55 - Linee guida per l; Dischi e lettori
Page 56 - opzione
Vielen Dank , dass Sie sich für dieses PIONEER-Produkt entschieden haben Bitte lesen Sie diese Anleitung vor der Verwen-dung dieses Produkts zur Gewährleistung seinerordnungsgemäßen Verwendung durch. Lesenund befolgen Sie dabei insbesondere die Hin-weise WARNUNG und VORSICHT . Bewahren Sie die Anlei...
Page 57 - Compatibilità iPod; Disco; Tabella dei caratteri cirillici
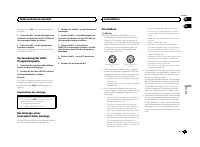
Hauptgerät 7 1 4 6 3 2 9 a de 8 5 c b 1 h (Auswurf) 2 SRC / OFF 3 MULTI-CONTROL ( M.C. ) 4 (Liste) 5 DISP 6 Disc-Ladeschacht 7 USB-Anschluss 8 EQ 9 BAND a (Zurück)/ DIMMER (Dimmer) b c / d c 1 / bis 6 / d AUX-Eingang (3,5-mm-Stereoanschluss) e Taste zum Entriegeln der Frontplatte VORSICHT Verwenden ...
Page 58 - Copyright e marchi registrati; Android è un marchio di fabbrica di Google Inc.
! Entfernen Sie alle etwaigen angeschlosse-nen Kabel und Geräte, bevor Sie die Front-platte abnehmen, um eine Beschädigungdes Geräts oder des Fahrzeuginneren zu ver-meiden. Abnehmen der Frontplatte 1 Drücken Sie die Taste zum Entriegeln derFrontplatte. 2 Drücken Sie die Frontplatte nach oben ( M ) u...
Page 59 - Dati tecnici
Suchen nach RDS-Stationen anhand eines Pro-grammtyps 1 Drücken Sie auf (Liste). 2 Drehen Sie M.C. , um einen Programmtyp zu wählen. NEWS/INFO — POPULAR — CLASSICS — OTHERS 3 Drücken Sie M.C. , um die Suche zu starten. Das Gerät sucht nach einer Station, die einProgramm des gewählten Typs ausstrahlt....
Page 60 - Acerca de esta unidad; ADVERTENCIA; Evite la exposición a la humedad.; PRODUCTO LASER CLASE 1; Antes de comenzar
Rückkehr zum Stammordner 1 Halten Sie BAND gedrückt. Umschalten zwischen dem komprimierten Audio-format und CD-DA 1 Drücken Sie BAND . Umschalten zwischen Wiedergabespeichergerä-tenSie können zwischen Wiedergabespeichereinhei-ten eines USB-Speichermediums wechseln, wel-ches über mehrere Massenspeich...
Page 61 - Unidad principal; PRECAUCIÓN; Indicaciones de la pantalla; Una vez instalada la unidad, gire la llave; Español; Durante el uso de la unidad
3 Drehen Sie M.C., um die gewünschte Audio-Funktion zu wählen. Nach der Auswahl können die folgenden Audio-funktionen angepasst werden. ! FADER steht nicht zur Verfügung, wenn in SP-P/O MODE die Option SUB.W/SUB.W ge- wählt wurde. Für detaillierte Informationenhierzu siehe SP-P/O MODE (Heckausgang- ...
Page 62 - Funcionamiento básico; Notas
1 Drücken Sie auf M.C., um das Hauptmenü anzuzeigen. 2 Drehen Sie M.C., um die Menüoption zu wechseln, und drücken Sie auf SYSTEM, umdie angezeigte Option zu wählen. 3 Drehen Sie M.C., um die Systemmenü- Funktion zu wählen. Nach der Auswahl können die folgenden Sys-temmenüfunktionen angepasst werden...
Page 63 - Cambio de la visualización; Uso de las funciones PTY; Ajustes de funciones; menú y pulse para seleccionar FUNCTION.; Conexión MTP
Drücken Sie auf M.C. , um das Hauptmenü an- zuzeigen. 3 Drehen Sie M.C., um die Menüoption zu wechseln, und drücken Sie auf SYSTEM, umdie angezeigte Option zu wählen. 4 Drehen Sie M.C., um die Systemmenü- Funktion zu wählen. Für detaillierte Informationen hierzu siehe Sys- temmenü auf Seite 61. Verw...
Page 64 - Operaciones con el botón MIXTRAX; Pulse; Operaciones con botones especiales
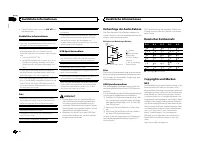
! Das schwarze Kabel gewährleistet die Er-dung. Dieses Kabel wie auch die Erdungska-bel anderer Produkte (insbesondere vonHochstromprodukten wie Leistungsverstär-ker) müssen separat verdrahtet werden. An-derenfalls kann es zu einem Brand odereiner Funktionsstörung kommen, wenn sichdie Kabel versehen...
Page 65 - Para ir al menú superior de la búsqueda
! Installieren Sie dieses Gerät keinesfalls anfolgenden Orten: — Orte, an denen das Gerät die Steuerung desFahrzeugs behindern könnte. — Orte, an denen das Gerät die Insassen desFahrzeugs im Anschluss an eine Schnell-bremsung verletzen könnte. ! Der Halbleiterlaser kann durch Überhitzungbeschädigt w...
Page 67 - Para usuarios de iPhone; El dispositivo tiene un iOS 5.0 o superior.; Ajustes de audio; menú y pulse para seleccionar AUDIO.
ERROR-19 Kommunikation gestört. Führen Sie einen der folgenden Bedienvorgängedurch: – Schalten Sie die Zündung aus (OFF) und wieder ein (ON). – Trennen Sie das USB-Speichermedium vom Gerät. – Schalten Sie auf eine andere Programmquelle um.Kehren Sie anschließend wieder zurProgrammquelle USB zurück. ...
Page 68 - Menú del sistema
! Diese Funktion kann nicht mit USB MTP ver- wendet werden. Zusätzliche Informationen Von Dateinamen (einschließlich der Dateierweite-rung) bzw. von Ordnernamen können jeweils nurdie ersten 32 Zeichen angezeigt werden. Damit kyrillische Buchstaben auf diesem Gerätangezeigt werden können, müssen dies...
Page 69 - Menú de funciones de iluminación
WMA Windows Media ist eine eingetragene Markeoder eine Marke der Microsoft Corporation inden USA und/oder anderen Ländern.Dieses Produkt enthält Technologie, die Eigen-tum der Microsoft Corporation ist und nichtohne Lizenz von Microsoft Licensing, Inc. vertrie-ben werden darf. Android ä Android ist ...
Page 70 - Menú MIXTRAX; Menú inicial; Para obtener más información, consulte; Uso de una fuente AUX
Hartelijk dank voor uw keuze voor dit Pioneer-product Lees deze handleiding voordat u het product ingebruik neemt zodat u het goed leert gebruiken.Lees vooral de gedeelten die met WAARSCHU- WING en LET OP gemarkeerd zijn aandachtig. Bewaar deze handleiding na het lezen op een vei-lige, voor de hand ...
Page 71 - Función de silenciamiento; Conexiones; Esta unidad; Entrada del cable de alimentación; Instalación
Hoofdtoestel 7 1 4 6 3 2 9 a de 8 5 c b 1 h (uitwerpen) 2 SRC / OFF 3 MULTI-CONTROL ( M.C. ) 4 (lijst) 5 DISP 6 Laadsleuf voor disc 7 USB-poort 8 EQ 9 BAND a (terug)/ DIMMER (dimmer) b c / d c 1 / tot 6 / d AUX-ingang (3,5 mm-stereoplug) e Verwijderen LET OP Sluit een USB-opslagapparaat via een Pion...
Page 72 - Cable de alimentación
Het voorpaneel verwijderen 1 Druk op de toets Verwijderen om het voorpa-neel los te maken. 2 Duw het voorpaneel naar boven ( M ) en trek het naar u toe ( N ). 3 Bewaar het losgemaakte voorpaneel altijd ineen beschermende tas of een doosje. Het voorpaneel terugzetten 1 Schuif het voorpaneel naar link...
Page 73 - Montaje delantero/posterior de DIN; Montaje delantero DIN; ción del panel frontal
RDS-zenders zoeken via PTY-informatie 1 Druk op (lijst). 2 Draai aan M.C. om een programmatype te kie- zen. NEWS/INFO — POPULAR — CLASSICS — OTHERS 3 Druk op M.C. om het zoeken te beginnen. Het toestel zoekt naar een zender die het gese-lecteerde programmatype uitzendt. Als er eenzender is gevonden,...
Page 74 - Comunes; Información adicional
Een ander display kiezen De gewenste informatie selecteren 1 Druk op DISP om over te schakelen tussen: CD-DA ! ELAPSED TIME (fragmentnummer en weergavetijd) ! CLOCK (naam signaalbron en klok) ! SPEANA (spectrumanalyzer) CD-TEXT ! TRACK INFO (fragmenttitel/naam artiest fragment/disctitel) ! ELAPSED T...
Page 75 - Aplicaciones; Pautas para el manejo; Discos y reproductor
1 Druk op M.C. om de instellingenmodus weer te geven. 2 Draai aan M.C. om de equalizer te selecteren. POWERFUL — NATURAL — VOCAL — CUS- TOM1 — CUSTOM2 — FLAT — SUPER BASS De equalizerband en het equalizerniveau kun-nen worden aangepast van CUSTOM1 en CUSTOM2 . Volg de onderstaande procedure als u CU...
Page 76 - No puede usar esta función con; Información complementaria; Compatibilidad con iPod; iPod classic
Het geluid van dit toestel kan automatisch wordenuitgeschakeld of gedempt wanneer een ander ap-paraat met uitschakelingsfunctie daarom vraagtmet een speciaal signaal. 1 Druk op M.C. om de instellingenmodus weer te geven. 2 Draai aan M.C. en selecteer de gewenste in- stelling. ! MUTE – Tijdelijk uits...
Page 77 - Secuencia de archivos de audio; Tabla de caracteres rusos
Verbindingen Belangrijk ! Als dit toestel wordt geïnstalleerd in een voer-tuig met een contactschakelaar zonder ACC-stand (accessoirestand), kan de accu leeglo-pen als de rode kabel niet wordt aangeslotenop de aansluiting die de bediening van decontactschakelaar herkent. O N S T A R T O F F ACC -sta...
Page 78 - Especificaciones
! Als u een subwoofer van 70 W (2 W ) gebruikt, moet u de subwoofer aansluiten op de vio-lette en zwart-violette draden van dit toestel.Sluit niets aan op de groene en groen-zwartedraden. Versterker (apart verkrijgbaar) Maak deze verbindingen als de optionele verster-ker wordt gebruikt. 1 3 ...
Page 80 - Zu diesem Gerät; WARNUNG; LASER KLASSE 1; Im Problemfall; Bevor Sie beginnen
ERROR-19 Communicatiefout. Probeer de volgende mogelijkheden. – Zet het contact uit en dan weer aan. – Ontkoppel het USB-opslagapparaat. – Schakel over naar een andere signaalbron. Schakel vervolgens terug naar de USB-signaalbron. ERROR-23 Het USB-opslagapparaat was niet geformatteerdmet de indeling...
Page 81 - Hauptgerät; VORSICHT; Drehen Sie nach der Installation des Ge-; Deutsch; Gebrauch dieses Geräts
Bijkomende informatie Alleen de eerste 32 tekens van de bestandsnaam(inclusief de extensie) of mapnaam worden weer-gegeven. Russische tekst kan alleen op dit toestel wordenweergegeven als die met een van de volgende te-kensets is gecodeerd: ! Unicode (UTF-8, UTF-16) ! Andere tekensets dan Unicode di...
Page 82 - Wichtig; Grundlegende Bedienvorgänge; Hinweise
Technische gegevens Algemeen Spanningsbron ................ 14,4 V gelijkstroom (10,8 tot 15,1 V toelaatbaar) Aarding ........................... NegatiefMaximaal stroomverbruik ................................... 10,0 A Afmetingen (B × H × D):DINChassis ............................ 178 mm × 50 mm ×...
Page 83 - Verwendung der Stationstasten; Zum Speichern: Drücken Sie eine der; Umschalten der Anzeige; Funktionseinstellungen
Page 84 - Hinweis; Drücken Sie
Благодарим Вас за покупку этого изделия компании PIONEER Для обеспечения правильности эксплуата - ции внимательно прочитайте данное руко - водство перед началом использованияизделия . Особенно важно , чтобы Вы прочли и соблюдали инструкции , помеченные в дан - ном руководстве заголовками ПРЕДУПРЕ - ...
Page 89 - Systemmenü; Wählen der Beleuchtungsfarbe; Beleuchtungsfunktionsmenü
Настройка функций 1 Нажмите M.C. , чтобы открыть главное меню . 2 Поворачивайте M.C. для прокрутки пунктов меню ; нажмите , чтобы выбрать FUNCTION . Выбранные функции , которые можно на - страивать , перечислены ниже . S.RTRV (sound retriever, технология преобраз - ования звука ) Автоматически улучш...
Page 91 - Für detaillierte Informationen hierzu siehe
SP-P/O MODE ( настройка выхода заднего ка - нала и предварительного усилителя ) Выход на провода заднего громкоговорителя ивыход заднего канала RCA можно использо - вать для подключения широкополосного гром - коговорителя или сабвуфера . Выберите настройку , подходящую для Вашего соедине - ния . 1 Д...
Page 92 - Stummschaltung; Anschlüsse
Соединения Важно ! При установке данного устройства в авто - мобиле , в котором отсутствует положение ключа зажигания АСС , красный кабель должен быть подключен к клемме , кото - рая определяет рабочее положениеключа зажигания ; в противном случае может возникнуть утечка тока аккумуля - торной батар...
Page 94 - Entfernen des Geräts; Abnehmen der Frontplatte
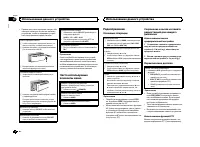
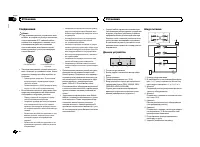
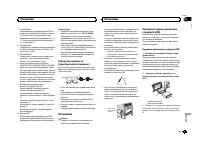
Заднее крепление стандарта DIN 1 Совместите отверстия на кронштейне и боковых панелях устройства . 2 Затяните по два винта с каждой сторо - ны . 1 2 3 1 Самонарезающий винт (5 мм × 8 мм ) 2 Монтажная рамка 3 Приборная панель или консоль Демонтаж устройства 1 Снимите рамку . 1 Декоративная рамка 2 Яз...
Page 95 - Allgemeines; Zusätzliche Informationen
ERROR-07, 10, 11, 12, 15, 17, 30, A0 Электрическая или механическая неисправ - ность . Установите ключ зажигания в положение OFF, а затем – в положение ON или переключитесь на другой источник сигнала , а затем обратно на проигрыватель компакт - дисков . ERROR-15 Вставлен пустой диск . Замените диск ...
Page 96 - Handhabungsrichtlinien; Discs und Player
Конденсация может временно ухудшить рабо - ту проигрывателя . Оставьте его для адаптации к более высокой температуре примерно начас . Также удалите влагу с дисков с помощью мягкой ткани . Воспроизведение дисков может быть невоз - можно из - за характеристик диска , формата диска , приложения , при п...
Page 97 - Diese Funktion kann nicht mit
Количество воспроизводимых файлов : не более 15 000 Воспроизведение защищенных от копирова - ния файлов : не поддерживается Запоминающее устройство USB, содержащее разделы : воспроизводится только первый раз - дел . При начале воспроизведения аудиофайлов назапоминающем устройстве USB, содержащем раз...
Page 98 - Reihenfolge der Audio-Dateien; Russischer Zeichensatz
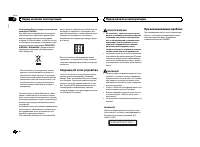
Серийный номер На этом рисунке показана информация о месяце и годе изготовления устройства . L Год Год Символ 2001 2002 2003 2004 2005 2006 2007 2008 2009 2010 2011 2012 2013 2014 2015 2016 2017 2018 2019 2020 K L M N O P Q R S T A B C D E F G H I J Символ P1 - Год изготовления 1 Символ 2 3 4 5 6 7 ...
Page 99 - Technische Daten; Allgemein; USB
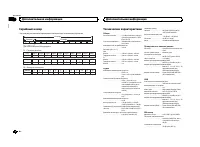
MW- тюнер Диапазон частот ............. от 531 кГц до 1 602 кГц Полезная чувствительность ................................... 25 мкВ ( отношение сигнал / шум : 20 дБ ) Отношение сигнал / шум ................................... 62 дБ ( сеть IEC-A) LW- тюнер Диапазон частот ............. от 153 кГц до...
Page 100 - Informatie over dit toestel; WAARSCHUWING; LET OP; KLASSE 1 LASERPRODUCT; Vóór u begint
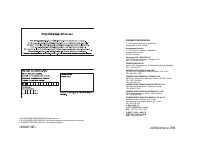
PIONEER CORPORATION 1-1, Shin-ogura, Saiwai-ku, Kawasaki-shi,Kanagawa 212-0031, JAPAN Корпорация Пайонир 1-1, Син - Огура , Сайвай - ку , г . Кавасаки , префектура Канагава , 212-0031, Япония Импортер ООО “ ПИОНЕР РУС ” 125040, Россия , г . Москва , ул . Правды , д .26 Тел .: +7(495) 956-89-01 PIONE...


 Pioneer AVH-P3100DVD
Manual
Pioneer AVH-P3100DVD
Manual
 Pioneer AVH-P3200BT
Manual
Pioneer AVH-P3200BT
Manual
 Pioneer AVH-P3300BT
Manual
Pioneer AVH-P3300BT
Manual
 Pioneer AVH-P4000DVD
Manual
Pioneer AVH-P4000DVD
Manual
 Pioneer AVH-P4100DVD
Manual
Pioneer AVH-P4100DVD
Manual
 Pioneer AVH-P5000DVD
Manual
Pioneer AVH-P5000DVD
Manual
 Pioneer AVH-P5100DVD
Manual
Pioneer AVH-P5100DVD
Manual
 Pioneer AVH-P5200BT
Manual
Pioneer AVH-P5200BT
Manual
 Pioneer AVH-P6000DVD
Manual
Pioneer AVH-P6000DVD
Manual
 Pioneer AVH-P6500DVD
Manual
Pioneer AVH-P6500DVD
Manual
 Pioneer AVH-P6800DVD
Manual
Pioneer AVH-P6800DVD
Manual
 Pioneer AVH-P7500DVD
Manual
Pioneer AVH-P7500DVD
Manual
 Pioneer AVH-P7800DVD
Manual
Pioneer AVH-P7800DVD
Manual
 Pioneer AVH-X1500DVD
Manual
Pioneer AVH-X1500DVD
Manual
 Pioneer AVH-X1800DVD
Manual
Pioneer AVH-X1800DVD
Manual
 Pioneer AVH-X2500BT
Manual
Pioneer AVH-X2500BT
Manual
 Pioneer AVH-X2800BT
Manual
Pioneer AVH-X2800BT
Manual
 Pioneer AVH-X4800DVD
Manual
Pioneer AVH-X4800DVD
Manual
 Pioneer AVH-X5800BT
Manual
Pioneer AVH-X5800BT
Manual
 Pioneer AVH-X7500BT
Manual
Pioneer AVH-X7500BT
Manual