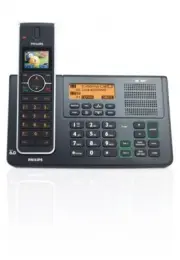
Page 3 - Table of contents
1 Table of contents 1 Important Safety Instructions 4 2 Environment and safety 6 2.1 Safety information 6 2.2 Power requirements 6 2.3 Battery requirements 6 2.4 Telephone connection 6 2.5 Environmental care 7 2.6 Precautions 7 2.7 Equipment Approval Information 8 2.7.1 Notification to the Local Tel...
Page 4 - Using your Phonebook 43
2 Table of contents 8.3 Answer a call on the other line 36 8.4 End a call 36 8.5 Using the Redial list 36 8.5.1 Access Redial list 36 8.5.2 View redial number details 36 8.5.3 Save a redial number into the phonebook 36 8.5.4 Delete a redial number 37 8.5.5 Delete all redial numbers 37 9 Use more of ...
Page 5 - Advanced settings
3 Table of contents 12.4 Select the Display Wallpaper (Handset only) 50 12.5 Select the Color Theme (Handset only) 50 12.6 Set the Display Contrast 50 12.7 Set the Backlight Time (Handset only) 51 12.8 Deactivate/Activate Auto Hang-Up (Handset only) 51 12.9 Changing the Line Setting (Base Station on...
Page 6 - Impor tant Safety
4 Impor tant Safety Instr uctions 1 Impor tant Safety Instructions Some of the following information may not apply to your particular product; however, when using telephone equipment, basic safety precautions should always be followed to reduce the risk of fire, electric shock and injury to persons,...
Page 8 - SAVE THESE INSTRUCTIONS; Environment and; Safety information
6 Environment and safety the discharged battery(ies). (Applies to products employing more than one separately replaceable primary battery.) 8 When inserting battery(ies) into this product, the proper polarity or direction must be observed. Reverse insertion of battery(ies) can cause charging, and th...
Page 9 - Environmental care
7 Environment and safety 60950). Following a power cut, the call in progress is lost. Users should ensure for their own protection that the electrical ground connections of the power utility, telephone lines and internal metallic water pipe system, if present, are connected together. This precaution...
Page 10 - Telephone Company; Company
8 Environment and safety meets certain radio communications and operational requirements. 2.7 Equipment Approval Information Your telephone equipment is approved for connection to the public switched telephone network and is in compliance with parts 15 and 68, FCC Rules and Regulations and the Techn...
Page 11 - Interference Information
9 Environment and safety temporary discontinuance of service may be required.Where prior notice is not practicable and the circumstances warrant such action, the telephone company may temporarily discontinue service immediately. In case of such temporary discontinuance, the telephone company must:(1...
Page 12 - Impor tant
10 Impor tant Commission has prepared a helpful booklet, “How To Identify and Resolve Radio/TV Interference Problems”. This booklet is available from the U.S. Government Printing Office, Washington, D.C. 20402.Please specify stock number 004-000-00345-4 when ordering copies. Notice: The changes or m...
Page 13 - Power requirements; Warning
11 Impor tant NOTES: This equipment may not be used on coin service provided by the telephone company. 3.1 Power requirements • This product requires an electrical supply of 100-240 volts AC. In case of power failure, the communication can be lost. • The Electrical network is classified as hazardous...
Page 14 - Recycle your batteries; The RBRC
12 The RBRC ® seal 3.2 Electric, Magnetic and Electromagnetic Fields (“EMF”) 1. Philips Royal Electronics manufactures and sells many consumer oriented products which usually, as with any electronic apparatus, have the ability to emit and receive electro magnetic signals. 2. One of Philips’ leading ...
Page 15 - Service Centers
13 The RBRC ® seal 4.1 Service Centers US service centerPhilips Accessories & ComputerPeripherals North America1881 Route 46 WestLedgewood, NJ 07852Phone: (800) 233-8413E-mail support:http://www.support.philips.com/support
Page 16 - Your phone
14 Your phone 5 Your phone Congratulations on your purchase and welcome to Philips! To fully benefit from the support that Philips offers, register your product at www.philips.com/welcome. 5.1 What’s in the box * The black line cord is a 4-pin telephone line cord, and the gray line cord is a 2-pin t...
Page 19 - Headset jack
17 Your phone very high level. Make sure the handset is not too close to your ear. T Headset jack U Battery door
Page 23 - X Y Z
21 Your phone L Event LED The event LED on the base blinks during handset locating. It is steady on when a handset has taken the line. M Volume Keys +- In idle mode: Increase or decrease the ring volume. Ring volume can be set separately for each of Line 1 and Line 2.During a conversation or during ...
Page 24 - Conventions Used
22 Conventions Used in this Manual 5.5 Base station display A Sub-screen display area Shows answering machine status. See below. B Main display area In idle mode: Displays the time and date or new events.In menu mode: Displays the options in the menu. C Ringer Off Icon Turns on when the ringer volum...
Page 25 - Getting star ted
23 Getting star ted used on the handset and base station have different shapes or different lettering.The procedures in this manual use the handset key icons. This table shows the corresponding keys for the base station. Refer to it when needed. These keys are used to access the main menu and utiliz...
Page 26 - Wall mounting the base
24 Getting star ted 4 Connect the power cable to the power outlet. Line adaptors may not be attached to the line cords. In this case, you have to connect line adaptors to the line cords first before plugging the line cords into the line sockets. Avoid placing the base station too close to large meta...
Page 27 - Install your phone
25 Getting star ted 7.3 Install your phone Before using the handset, the batteries have to be installed and fully charged. When the batteries are inserted for the first time, the unit will not be able to start normally due to the low battery. You must charge the batteries on the base station before ...
Page 28 - Remove/Attach belt clip; Tip
26 Getting star ted hours) and discharging, allowing approximately 12 hours of talk-time and 150 hours of stand-by time.The indoor and outdoor range of the phone is up to 50 metres and 300 metres respectively. When the handset moves beyond the operation range, the antenna icon will blink. When you r...
Page 29 - Using multipacks
27 Getting star ted The display will show the word “Searching” and Antenna icon flashing until it locks onto its subscribed base. Then the display shows the standby display. 7.7 Using multipacks If you have purchased a multipack you will have additional handsets, chargers, power adaptors and AAA rec...
Page 31 - Personal Settings
29 Getting star ted Personal Settings Personal Set Handset Name Enter name (Handset only) Handset Tones Ring Volume Line 1 No bar (off) or Base Tones (Handset only) One bar … Five bars Progressive Line 2 No bar (off) One bar … Five bars Progressive Ring Tones Line 1 (Handset) Name of tones 1 … Name ...
Page 32 - Clock and Alarm
30 Getting star ted Clock and Alarm Clock & Alarm Set Date/Time Enter date & time (Handset) Set Format Time Format 12 Hours or 24 Hours Clock (Base station) Date Format DD/MM MM/DD Alarm Off (Handset only) On Once On Daily Alarm Tone Melody 1 (Handset only) Melody 2 Melody 3
Page 34 - Answer Machine
32 Getting star ted Network Services (Handset only) Answer Machine Netw. Services Li n e 1 Voice m ail Call (Ha n dset o n ly) Li n e 2 Setti ng s E n ter N um ber Answer Play Line 1 Repeat Machine (Handset only) Line 2 Next Previous Delete Delete All Line 1 (Handset only) Line 2 Answer On/Off Line ...
Page 35 - Using your phone
33 Using your phone 8 Using your phone 8.1 Make a call 8.1.1 Predialling 1 Enter the number. (A maximum of 24 digits including * and # are allowed. Press c Clear to delete the last digit. Or long press to delete all.) 2 From the handset: Press t . The line selection menu appears and the default line...
Page 37 - Danger
35 Using your phone or l on the base. For the line setting, see section 13.14 for the handset and section 12.9 for the base station. 8.1.7 Call using Direct Access Memory Press a number key 3 to 9 for more than 2 seconds. This invites you to select a line, then dials a stored direct access memory nu...
Page 40 - Use more of your
38 Use more of your phone 9 Use more of your phone 9.1 Switch the handset off/on To switch the handset off, press and hold h in idle mode for at least 5 seconds. To switch it on, press and hold h for at least one second. 9.2 Handset keypad lock/unlock Press and hold * for 3 seconds to lock/ unlock t...
Page 45 - 0 Using your
43 Using your Phonebook 2 Scroll n to Alarm and press o Select . 3 Scroll n to Off , On Once , or On Daily and press o Select . 4 If you select On Once or On Daily , enter the time (HH-MM) for the alarm. (If using the 12 hour format, you can switch between AM and PM by pressing * key.) Press o OK to...
Page 48 - 1 Using the Call log
46 Using the Call log memory number and press o Select . 6 Press o OK to confirm. • A validation tone is emitted and the screen returns to the previous menu. 10.7.2 Delete Direct Access Memory 1 Press m in idle mode. Phonebook is highlighted. Press o Select . 2 Scroll n to Direct Memory and press o ...
Page 50 - 2 Personal settings
48 Personal settings • A validation tone is emitted, the call list entry is deleted, and the display goes to the next entry in the call list. Press c Back to discard the deletion. The screen returns to the Call List menu. 11.4 Delete all call list entries 1 Press u in idle mode, then press o Menu . ...
Page 54 - 3 Advanced settings
52 Advanced settings • A validation tone is emitted and the screen returns to the Personal Set menu. 13 Advanced settings These settings can be made from any registered SE659 handset. They cannot be made from the base station. 13.1 Easy Call When activated, this feature allows you to dial a preset n...
Page 58 - Caution
56 Advanced settings 13.8 Reset Unit You can reset your phone to its default settings with this feature. (see 13.15 “Default Settings”) Upon reset, all your personal settings, call log and redial list entries will be deleted and the phone will return to its default settings. However, your phonebook ...
Page 61 - 4 Network Ser vice; Voice Mail
59 Network Ser vice 13.15 Default Settings 14 Network Ser vice The network service function provides a convenient way for you to access some network provider services. A subscription is required in order to benefit from this service. Contact your network provider for details. Depending on your subsc...
Page 62 - answering machine
60 Telephone answering machine (TAM) 14.1.1 Access Voice Mail 1 Press m in idle mode, scroll n to Netw. Services , and press o Select . 2 Scroll n to select Line 1 or Line 2 and press o Select . 3 Scroll n to Voicemail and press o Select . 4 You are now at the Voicemail menu and Call is highlighted....
Page 67 - 6 Technical data
65 Technical data 15.6.4 Setting the Outgoing Message Language The language of the default outgoing messages and the voice prompts is originally set to English. However you can change the language of the default outgoing messages as follows. 1 Press the m key in idle mode, scroll n to Answer Machine...
Page 68 - 7 Frequently asked
66 Frequently asked questions 17 Frequently asked questions www.philips.com/support In this chapter, you will find the most frequently asked questions and answers about your phone. 17.1 Connection The handset does not switch on! • Charge the batteries: Put the handset on the base station to charge. ...
Page 69 - Caller does not hear me clearly!
67 Frequently asked questions Caller does not hear me clearly! • Move closer to the base station.• Move the base station at least one metre away from any electronic appliances. Frequent noise interference on my radio or television! • Move the base station as far away as possible from the electrical ...
Page 70 - Note
68 Frequently asked questions the power adaptor is plugged into mains supply which is switched on. • Check if the answer machine is off, or Answer only mode is selected. • Check to see if the answering machine is memory full. If so, delete some or all messages. • Try switching off the power at the m...