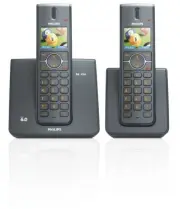
Page 3 - Table of contents
1 Table of contents 1 Important Safety Instructions 4 2 Environment and safety 6 2.1 Safety information 6 2.2 Power requirements 6 2.3 Battery requirements 6 2.4 Telephone connection 6 2.5 Environmental care 7 2.6 Precautions 7 2.7 Equipment Approval Information 8 2.7.1 Notification to the Local Tel...
Page 4 - Personal settings
2 Table of contents 8.3 Text or number entry 30 8.4 Call in progress 30 8.4.1 Adjust earpiece or speaker volume 30 8.4.2 Mute/Unmute microphone 30 8.4.3 Activate/Deactivate loudspeaker mode 30 8.5 Chain dialing 31 8.6 Using your Phonebook 31 8.6.1 Store a contact in the phonebook 31 8.6.2 Access pho...
Page 5 - Network Service
3 Table of contents 10.6.1 Easy registration 46 10.7 Unregister 46 10.8 Reset Unit 46 10.9 Set Area Code 47 10.10 Set Auto Prefix 47 10.11 Change Flash time 48 10.12 Change the Dial Mode 48 10.13 Set First Ring Detection 48 10.14 Default Settings 49 11 Network Service 49 11.1 Call Forward 50 11.1.1 ...
Page 6 - Impor tant Safety
4 Impor tant Safety Instr uctions 1 Impor tant Safety Instr uctions Some of the following information may not apply to your particular product; however, when using telephone equipment, basic safety precautions should always be followed to reduce the risk of fire, electric shock and injury to persons...
Page 8 - SAVE THESE INSTRUCTIONS; Environment and; Safety information
6 Environment and safety the discharged battery(ies). (Applies to products employing more than one separately replaceable primary battery.) 8 When inserting battery(ies) into this product, the proper polarity or direction must be observed. Reverse insertion of battery(ies) can cause charging, and th...
Page 9 - Environmental care
7 Environment and safety 60950). Following a power cut, the call in progress is lost. Users should ensure for their own protection that the electrical ground connections of the power utility, telephone lines and internal metallic water pipe system, if present, are connected together. This precaution...
Page 10 - Telephone Company; Company
8 Environment and safety meets certain radio communications and operational requirements. 2.7 Equipment Approval Information Your telephone equipment is approved for connection to the public switched telephone network and is in compliance with parts 15 and 68, FCC Rules and Regulations and the Techn...
Page 11 - Interference Information
9 Environment and safety temporary discontinuance of service may be required.Where prior notice is not practicable and the circumstances warrant such action, the telephone company may temporarily discontinue service immediately. In case of such temporary discontinuance, the telephone company must:(1...
Page 12 - Impor tant
10 Impor tant Commission has prepared a helpful booklet, “How To Identify and Resolve Radio/TV Interference Problems”. This booklet is available from the U.S. Government Printing Office, Washington, D.C. 20402.Please specify stock number 004-000-00345-4 when ordering copies. Notice: The changes or m...
Page 13 - Power requirements; Warning
11 Impor tant NOTES: This equipment may not be used on coin service provided by the telephone company. 3.1 Power requirements • This product requires an electrical supply of 100-240 volts AC. In case of power failure, the communication can be lost. • The Electrical network is classified as hazardous...
Page 14 - Recycle your batteries; The RBRC
12 The RBRC ® seal 3.2 Electric, Magnetic and Electromagnetic Fields (“EMF”) 1. Philips Royal Electronics manufactures and sells many consumer oriented products which usually, as with any electronic apparatus, have the ability to emit and receive electro magnetic signals. 2. One of Philips’ leading ...
Page 15 - Service Centers
13 The RBRC ® seal 4.1 Service Centers US service centerPhilips Accessories & ComputerPeripherals North America1881 Route 46 WestLedgewood, NJ 07852Phone: (800) 233-8413E-mail support:http://www.support.philips.com/support
Page 16 - Your phone
14 Your phone 5 Your phone Congratulations on your purchase and welcome to Philips! To fully benefit from the support that Philips offers, register your product at www.philips.com/welcome. 5.1 What’s in the box In multihandset packs, you will find one or more additional handsets, chargers with power...
Page 20 - Overview of the base station
18 Your phone 5.4 Overview of the base station A Paging key a Page handset.Long press to start registration procedure. A
Page 21 - Getting star ted; Connect the base station; Note
19 Getting star ted 6 Getting star ted 6.1 Connect the base station 1 Place the base station in a central location near the telephone line socket and electricity socket. 2 Connect the line cord and the power cable to their corresponding connectors at the back of the base station. 3 Connect the other...
Page 22 - Install your phone
20 Getting star ted bracket and ➁ rotating the bracket outward. 2 Turn the bracket around. 3 Attach the bracket to the opposite side of the base station. 4 Use the pedestal wall mounting to plug your base station. 6.3 Install your phone Before using the handset, the batteries have to be installed an...
Page 23 - Remove/Attach belt clip
21 Getting star ted 2 Place the batteries in the correct polarity as indicated and replace the cover. 6.3.2 Charge battery The handset must be charged for at least 24 hours before using it for the first time. When the battery level becomes low, the low battery sensor warns you by blinking the batter...
Page 24 - Install optional headset
22 Getting star ted 6.5 Install optional headset Your phone may be used with an optional headset (not included in the box). To use this feature, insert the headset plug into the headset jack. Your phone is ready for hands-free conversations. 6.6 Using multipacks If you have purchased a multipack you...
Page 26 - Personal Settings
24 Getting star ted Personal Settings Personal Set Handset Name Enter name Handset Tones Ring Volume No bar (off) One bar … Five bars Progressive Ring Tones Name of tones 1 … Name of tones 15 Key Beep On Off Language List of languages Wallpaper Wallpaper 1 Wallpaper 2 Wallpaper 3 Wallpaper off Color...
Page 27 - Clock and Alarm
25 Getting star ted Clock and Alarm Clock & Alarm Set Date/Time Enter date & time Set Format Time Format 12 Hours 24 Hours Date Format DD/MM MM/DD Alarm Off On Once On Daily Alarm Tone Melody 1 Melody 2 Melody 3
Page 28 - Advanced Settings
26 Getting star ted Advanced Settings Advanced Set Easy Call Mode On Enter Number: Off (by default) Number Enter number Conference On (by default) Off Call Barring Enter PIN Mode On Off (by default) Number Number 1 … Number 4 XHD Sound On (by default) Off Change PIN Register Unregister Reset Reset? ...
Page 29 - Network Services
27 Getting star ted Network Services Netw. Services Call Forward Activate Enter Number: Deactivate Change Code Activation Prefix (enter code) Suffix (enter code) Deactivation Change Code Call Fwd Busy Activate Enter Number: Deactivate Change Code Activation Prefix (enter code) Suffix (enter code) De...
Page 30 - Using your phone
28 Using your phone 7 Using your phone 7.1 Make a call 7.1.1 Predialling 1 Enter the number. (A maximum of 24 digits including * and # are allowed. Press c Clear to delete the last digit.) Or long press to delete all. 2 Press t . • The call is initiated. 7.1.2 Direct dialling 1 Pick up the handset a...
Page 31 - Danger
29 Using your phone 3 Press o Select . • The call is initiated. 7.1.7 Call using Direct Access Memory Press a number key 3 to 9 for more than 2 seconds to dial a stored direct access memory number. • In multihandset packs, each handset has its own direct access memories. • See section 8.6.7 for inst...
Page 32 - Use more of your
30 Use more of your phone 8 Use more of your phone 8.1 Switch the handset off/on To switch the handset off, press and hold h in idle mode for at least 5 seconds. To switch it on, press and hold h for at least one second. 8.2 Keypad lock/unlock Press and hold * for 3 seconds to lock/ unlock the keypa...
Page 45 - 0 Advanced settings
43 Advanced settings 1 Press m in idle mode, scroll n to Personal Set , and press o Select . 2 Scroll n to Auto Hang-up and press o Select . 3 Scroll n to On or Off and press o Select to confirm. • A validation tone is emitted and the screen returns to the Personal Set menu. 10 Advanced settings 10....
Page 48 - Caution
46 Advanced settings By default, the PIN is 0000. 1 On the base station, press and hold a for 3 seconds. If no action is taken on the handset within 90 seconds, the registration procedure will be aborted. If this happens, repeat from Step 1. 2 On the handset, press m , scroll n to Advanced Set and p...
Page 51 - 1 Network Ser vice
49 Networ k Ser vice The default setting for first ring detection is On . The setting automatically switches to Off when you receive a call containing caller line identification. However, this occurs only if you do not first manually change the setting. (It does not change automaticallyif you manual...
Page 58 - 2 Technical data; Connection
56 Technical data 12 Technical data Display • Color LCD with backlight • Selectable wallpaper• Selectable color theme General telephone features • Caller name & number identification• 5 standard + 10 polyphonic ringer melodies • Wideband synthesis for receiver and loudspeaker Phonebook list, Red...
Page 60 - Caller number is not displayed!
58 Frequently asked questions The handset cannot be registered to the base station! • Maximum number of handsets (8) has been reached. To register a new handset, unregister an existing handset. • Remove and replace the handset batteries. • Try again by disconnecting and connecting the base station p...