Page 2 - Contents
2 Contents 1 Important 4 Impor tant safety instructions 4 Notice 8 2 Your portable DVD player 11 Introduction 11 What’s in the box 12 Over view of the main unit 12 Over view of the remote control 15 3 Get started 17 Charge the batter y 17 Install remote control batter y 19 Connect headphones 20 Conn...
Page 3 - Troubleshooting
3 Restrict access 28 Change password 29 Restore original settings 30 6 Troubleshooting 31 7 Product information 33 English EN PET716_12_Book 1.indd Sec1:3 PET716_12_Book 1.indd Sec1:3 2008-08-08 4:25:37 PM 2008-08-08 4:25:37 PM
Page 4 - Important; Important safety instructions
4 1 Important Important safety instructions a Read these instructions. b Keep these instructions. c Heed all warnings. d Follow all instructions. e Do not use this apparatus near water. f Clean only with dry cloth. g Do not block any ventilation openings. Install in accordance with the manufacturer’...
Page 6 - Hearing safety
6 p Apparatus shall not be exposed to dripping or splashing. q Do not place any sources of danger on the apparatus (e.g. liquid fi lled objects, lighted candles). r This product may contain lead and mercury. Disposal of these materials may be regulated due to environmental considerations. For dispos...
Page 8 - Notice; Disposal of old equipment and Used batteries
8 Notice Any changes or modi fi cations made to this device that are not expressly approved by Philips Consumer Electronics may void the user’s authority to operate the equipment. Disposal of old equipment and Used batteries Information for Users on Collection and Disposal of Old Equipment and Used ...
Page 11 - Introduction
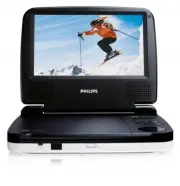
11 2 Your portable DVD player Congratulations on your purchase, and welcome to Philips! To fully bene fi t from the suppor t that Philips offers, register your product at www.philips.com/welcome. Introduction Your por table DVD player plays digital video discs that conform to the universal DVD Video...
Page 12 - What’s in the box; Overview of the main unit
12 MP3 CD DivX Discs with JPEG fi les What’s in the box Check and identify the contents of your package: Por table DVD player Remote control AC power adaptor, DSA-9W-09 F (DVE) or AY4132 (Philips) Car adaptor AV cables User Manual Quick Star t Guide Overview of the main unit ••••••• a b c d e MENU D...
Page 15 - Overview of the remote control
15 Overview of the remote control a SETUP Access or exit the setup menu. b DISPLAY Display play information. c ZOOM Zoom in or out. d SUB Select DVD subtitle language. • • • • i j k l m e f h a b c d g i j k l m e f h a b c d g English EN PET716_12_Book 1.indd Sec1:15 PET716_12_Book 1.indd Sec1:15 2...
Page 17 - Get started; Charge the battery
17 3 Get started Caution Use the controls only as stated in this user manual. • Always follow the instructions in this chapter in sequence. If you contact Philips, you will be asked for the model and serial number of your player. Find the model number and serial number of this player at the back or ...
Page 19 - Install remote control battery
19 Install remote control battery Caution Risk of explosion! Keep batteries away from heat, sunshine or fi re. Never discard batteries in fi re. Risk of decreased batter y life! Never mix different brands or types of batteries. Risk of product damage! When the remote control is not used for long per...
Page 20 - Connect headphones; Connect additional equipment
20 Connect headphones Plug the headphones into the jack of the player. Connect additional equipment Caution Turn off your player before connecting to any additional equipment. • You can connect the player to a TV or an ampli fi er to enjoy DVDs or Karaoke. Connect a TV Match the color of the AV cabl...
Page 21 - Select OSD language
21 Select OSD language You can choose a different language for the on-screen display text. 1 Press SETUP . The setup menu is displayed. 2 Select [-- General Setup Page --] > [OSD Language] . 3 Press to select an option. 4 Press ENTER to con fi rm. 5 Press SETUP to exit. » TV Displ ayAngle MarkOSD...
Page 22 - Use your player; Turn on
22 4 Use your player Turn on Slide the OFF ON switch to the ON position. The POWER indicator turns on. Play discs 1 Press OPEN on the player. 2 Inser t the disc with label side facing up. 3 Push down to close the disc compar tment. Play star ts automatically. If not, press . If a menu appears, selec...
Page 23 - Play options; Search; Select audio language; Select subtitle language; Repeat
23 Play options Skip to a title/track/chapter To select the previous/next title, track or chapter, press or . To skip directly to any title/track/chapter, enter the corresponding number with the numerical keys (0-9), then press ENTER . Search During play, press to select a search speed. Press or ENT...
Page 24 - Repeat a section
24 [ ALL] [Repeat Off] For VCD [ Track] [ ALL] [Repeat Off] For CD/MP3/JPEG/DivX [Repeat One] [Repeat Folder] [Repeat Off] Tip For VCDs, if PBC is on, you cannot repeat items. • Repeat a section You can repeat a speci fi c section of audio/video within a title/ chapter/track (repeat A-B). 1 During p...
Page 25 - Zoom; Select audio mode; Rotate pictures
25 Zoom For DVDs, VCDs and JPEG CDs, you can zoom in and out for video images or pictures. 1 Press ZOOM repeatedly to zoom in and out. 2 When the video image or picture is enlarged, press , , , to pan through it. Select audio mode When you play VCDs, you can select an audio mode. Press AUDIO repeate...
Page 26 - Adjust settings; Select display ratio
26 5 Adjust settings Select display ratio 1 Press SETUP . 2 Select [-- General Setup Page --] > [TV Display] . 3 Press to select an option. [4:3 PS] : The top and bottom or the sides of the picture are trimmed. The picture is not distor ted. [4:3 LB] : Black bars may appear on the top and bottom ...
Page 27 - Select picture contrast; Get DivX registration code
27 Select picture contrast 1 Press SETUP . 2 Select [-- Video Setup Page --] > [Brightness] or [Contrast] . 3 Press . A con fi rmation box is displayed. 4 Press to set brightness and contrast. 5 Press ENTER to con fi rm. 6 Press SETUP to exit. Get DivX registration code DivX is a popular media te...
Page 28 - Restrict access
28 5 Write down the number for future reference. 6 Press ENTER to exit. “DivX, DivX” Cer ti fi ed, and associated logos are trademarks of DivX, Inc. and are used under license. Of fi cal DivX® Cer ti fi ed product. Plays all versions of DivX® video (including DivX® 6) with standard playback of DivX®...
Page 29 - Change password
29 [7 NC17] : No Children under age 17; not recommended viewing for children under age 17. [8 ADULT] : Mature Material; should be viewed only by adults. 4 Press ENTER . You are prompted to enter the password. 5 Press ENTER to con fi rm. 6 Press SETUP to exit. Tip For how to change the password, see ...
Page 30 - Restore original settings
30 Restore original settings 1 Press SETUP . 2 Select [-- Preference Page --] > [Default] . 3 Press to select [Reset] . 4 Press ENTER to con fi rm. EN PET716_12_Book 1.indd Sec1:30 PET716_12_Book 1.indd Sec1:30 2008-08-08 4:25:57 PM 2008-08-08 4:25:57 PM
Page 33 - Product information
33 7 Product information Note Product information is subject to change without prior notice. • Dimensions 210 x 178 x 39 mm Weight 0.79 kg/0.36 pounds Power supply Input: 100-240V 50/60Hz 0.3A Output: DC 9V 1A Power consumption 9 W Operating temperature range 0-45°C Laser wavelength 650 nm Video sys...