Page 4 - Contents
Contents 1 Important 6 Safety 6 Notice 14 2 Your Portable DVD player 17 Introduction 17 What’s in the box 18 Over view of the main unit 19 Over view of the displays 21 Over view of the remote control 23 3 Get started 26 Preparation 26 Connect audio/video cables 28 Connect power 29 Install remote con...
Page 5 - Important; Safety
1 Important Safety a Read these instructions. b Keep these instructions. c Heed all warnings. d Follow all instructions. e Do not use this apparatus near water. f Clean only with dry cloth. g Do not block any ventilation openings. Install in accordance with the manufacturer’s instructions. h Do not ...
Page 8 - Hearing safety
Obser ver : Nettbr yteren er sekunder t innkoplet. Den innebygde netdelen er derfor ikke fraktoplet nettet så lenge apparatet er tilsluttet nettkontakten. For å redusere faren for brann eller elektrisk støt, skal apparatet, ikke utsettes for regn eller fuktighet. Hearing safety Listen at a moderate ...
Page 9 - Notice; Disposal of product and packing
Notice This product complies with the radio interference requirements of the European Community. This product complies with the requirements of the following directives and guidelines: 73/23/EEC + 89/336/EEC + 93/68/EEC Any changes or modifications made to this device that are not expressly approved...
Page 10 - Your Portable; Introduction
Please obser ve the local regulations regarding the disposal of packing materials. This player includes this label: 2 Your Portable DVD player Congratulations on your purchase, and welcome to Philips! To fully benefit from the suppor t that Philips offers, register your product at www.Philips. com/w...
Page 11 - What’s in the box
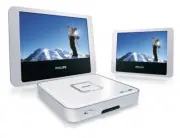
DVD video disc Video CDs MP3s Audio CDs CD with JPEG files What’s in the box Check and identify the contents of your package: Por table DVD player 7” LCD screen x 2 Remote control AC power adaptor Car adaptor (12V) AV cable x 2 Car pouch x 2 Y-type power cord • • • • • • • • Overview of the main uni...
Page 12 - Overview of the displays
b / Skip to previous/next chapter, track or title Move cursor to left/right c Star t or interrupt play d MENU Enter or exit DVD menu e Stop play f SETUP Enter or exit system setup menu g Headphones jack h – VOL + Adjust headphone volume i POWER Turn DVD player on/off j POWER/IR Power/Remote sensor i...
Page 13 - Overview of the remote
a DISPLAY Setup screen display b POWER ON/OFF Turn the screen on/off c Adjust display value of the screen d Headphone jack e – VOL + Adjust volume f DC IN Power supply from the DVD player g Audio In L(left) and R(right) Audio/Video input jacks h VIDEO IN Video input jack • • • • • • • • Overview of ...
Page 15 - Get started; Preparation
3 Get started Caution Use the controls only as stated in this user manual. • Always follow the instructions in this chapter in sequence. If you contact Philips, you will be asked for the model and serial numbers. Find the model number and serial number of this player at the back or the bottom of you...
Page 16 - Connect audio/video cables; Connect power
Connect audio/video cables Note Match the color of the AV cable with the jacks: the yellow cable is for the yellow video jack, the red/white cable is for the red/white audio jacks. • 1 Connect AV cable to the main unit and to the screen. Connect power Caution Risk of product damage! Ensure that the ...
Page 17 - Install remote control batteries
To connect power from inside a car : Connect the car adaptor cable to the DC IN jack of the main unit and to the car cigarette lighter socket. To connect power from household power sources: Connect the AC adaptor cable to the DC IN jack of the main unit and to the power outlet. • • Car Cigarette Lig...
Page 18 - Connect headphones; Select display language
Connect headphones Caution Philips guarantees compliance with the maximum sound power of its audio players as determined by relevant regulator y bodies only with the original model of provided headphones. In case this one needs replacement, we recommend that you contact your retailer to order a mode...
Page 19 - Use your player; Adjust volume
4 Use your player Turn on1 Slide the POWER switch on the DVD player to the ON position. 2 Press the POWER ON/OFF button on the screens. Play discs1 Press OPEN on the main unit. 2 Inser t the disc with label side facing up. 3 Push down to close the CD compar tment. Play star ts automatically. If a me...
Page 20 - Play options; Select audio language
Tip When headphones are connected, no sound emits from the screen speakers. • Adjust display1 Press DISPLAY on the screen repeatedly to select: [Brightness] : adjust the brightness ( ) of the screen [Contrast] : adjust the contrast ( ) of the screen [Display ratio] : select 16:9 display mode ( ) or ...
Page 21 - Random play
Select audio mode When you play VCDs/CDs, you can select an audio mode. 1 Press AUDIO repeatedly until the audio mode is selected. Zoom For DVDs, VCDs and picture CDs, you can zoom in and out for video images or pictures. 1 Press ZOOM repeatedly to zoom in and out. 2 When the video image or picture ...
Page 22 - Adjust settings
4 Press OSD again to exit. 5 Adjust settings Playback control options1 Press SETUP . 2 Select [General] > [PBC settings] . 3 Select an option, then press OK to confirm. 4 Press SETUP to exit. DivX Video-on-Demand code DivX is a popular media technology created by DivX, Inc.DivX media files contai...
Page 23 - Set password
code of this player. For more information and instructions, visit www.divx.com/vod. 1 Press SETUP . 2 Select [General] > [DivX (VOD)] . The DivX registration code appears 3 Write down the number for future reference. 4 Press SETUP to exit. “DivX, DivX” Cer tified, and associated logos are tradema...
Page 24 - Return to default settings; Select TV display aspect ratio
Return to default settings Note When you return to default settings, the access restriction password will not be reset. • 1 Press SETUP . 2 Select [General] > [Factory settings] , then press OK . The settings return to their default setting. 3 Press SETUP to exit. Select TV display aspect ratio S...
Page 25 - Select digital audio output; Troubleshooting
Select audio output1 Press SETUP . 2 Select [Audio] > [Dolby] . 3 Select an option, then press OK to confirm. 4 Press SETUP to exit. Select digital audio output If you connect the player to a sound system that suppor ts digital sound, select a compatible digital audio output format. 1 Press SETUP...