Page 2 - Norge; Typeskilt finnes på apparatens under side.; Italia; DICHIARAZIONE DI CONFORMITA’; Fatto a Eindhoven; CAUTION
2 Norge Typeskilt finnes på apparatens under side. Observer : Nettbryteren er sekundertinnkoplet. Den innebygde netdelen erderfor ikke frakoplet nettet så lengeapparatet er tilsluttet nettkontakten. For å redusere faren for brann eller elektriskstøt, skal apparatet ikke utsettes for regn ellerfuktig...
Page 4 - SF; Luokan 1 laserlaite
4 DK Advarsel: Usynlig laserstråling ved åbningnår sikkerhedsafbr ydere er ude af funktion.Undgå utsættelse for stråling. Bemærk: Netafbr yderen er sekundærtindkoblet og ofbryder ikke strømmen franettet. Den indbyggede netdel er derfortilsluttet til lysnettet så længe netstikketsidder i stikkontakte...
Page 5 - rançais; Index
5 Nederlands Italiano Dansk English F rançais Español Deutsch Nederlands Italiano Sv enska Dansk Index English ------------------------------------------------ 6 Français -------------------------------------------- 43 Español --------------------------------------------- 82 Deutsch ----------------...
Page 6 - English; Contents
6 English General Information Features .................................................................. 8Supplied accessories ............................................ 8Environment information ................................... 8Installation .......................................................
Page 7 - System Menu Options; Disposal of your old product; Your product is designed and
English 7 Contents System Menu Options Basic Operations ................................................ 29GENERAL SETUP PAGE ........................... 29~30 TV DISPLAYOSD LANGUAGESCREEN SAVERDIVX(R) VOD AUDIO SETUP PAGE ................................ 30~31 SPDIF SETUPDOLBY DIGITAL SETUP3D PROCE...
Page 8 - Features; Other features include:; Supplied accessories; General Information
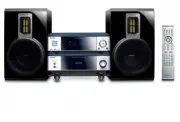
8 English Congratulations on your purchase and welcome to Philips! To fully benefit from the suppor t that Philips offers, register your product at www.philips.com/welcome. Features Your DVD Micro Theatre with 2.0 channel full digital amplifier creates the same dynamic soundqualities that you find i...
Page 9 - Maintenance; Listen at a moderate volume.; Set your volume control at a low setting.; Listen for reasonable periods of time:
English 9 General Information Maintenance ● When a disc becomes dir ty,clean it with a cleaning cloth.Wipe the disc from the centerout, in a straight line. ● Do not expose the player,batteries or discs to humidity,rain, sand or excessive heat(caused by heating equipment or direct sunlight).Always ke...
Page 10 - Connections; Speaker; Step 1: Placing speakers; Place the front left and right speakers at equal
10 English IMPORTANT!– The type plate is located at thebottom of the system.– For users in the U.K.: please follow theinstructions on page 2.– Before connecting the AC power cordto the wall outlet, ensure that allother connections have been made.– Never make or change anyconnections with the power s...
Page 11 - Step 2: Connecting speakers; Connect the speaker wires to the SPEAKERS; Step 3: Connecting the control; Connect the serial por t mar ked “; CONTROL; ” at the rear of the DVD player to the; Step 4: Connecting TV; Using SCART jack; SCART; jack to the corresponding
English 11 Step 2: Connecting speakers Connect the speaker wires to the SPEAKERS terminals, right speaker to “R” and left speaker to“L”, coloured (mar ked) wire to “+” and black(unmarked) wire to “–”. Fully inser t the strippedpor tion of the speaker wire into the terminal asshown. 1 2 Notes:– Ensur...
Page 12 - AUX IN; jacks to the corresponding; Using Composite Video jack; jacks to the
12 English Connections Using Component Video jacks (Y Pb Pr) IMPORTANT!– The progressive scan video quality isonly possible when using Y Pb Pr, and aprogressive scan TV is required. 1 2 1 Use component video cables (red/blue/green -not supplied) to connect the DVD system's Y PbPr jacks to the corres...
Page 13 - Using an accessor y RF modulator
English 13 Connections Using an accessor y RF modulator IMPORTANT!– If your TV only has a single Antenna Injack (labeled as 75 ohm or RF In), youwill need an RF modulator in order toview DVD playback on the TV. See yourelectronics retailer or contact Philips fordetails on RF modulator availability a...
Page 14 - Step 6: Connecting the power; Never make or change any connection with the; Connect the supplied FM antenna to the FM (75
14 English Connections Step 6: Connecting the power cord After everything is conec ted properly,plug in the AC power cord to the poweroutlet. Never make or change any connection with the power switched on. Additional: Connectingadditional equipment IMPORTANT!– Some discs are copy-protected. Youcanno...
Page 15 - SOURCE
English 15 Additional connection:Connecting a USB device ormemory card By connecting a USB mass storage device(including USB flash memor y, USB flash playersor memor y cards) to the Hi-Fi system, you canenjoy the device's stored music through thepowerful speakers of Hi-Fi system. ● Inser t the USB d...
Page 16 - Functional Overview; DVD player and power amplifier; Display; ÉÅ; OPEN•CLOSE
16 English Functional Overview DVD player and power amplifier 1 ECO POWER/STANDBY-ON y – Turn on the appar atus or switch to the EcoPower standby mode. 2 Display – shows the current status of the DVD player. 3 ÉÅ – star ts or interr upts disc playback. 4 PRESET + – in tuner mode, selects a preset ra...
Page 17 - Remote control; PROGRAM; to enter or exit the system menu bar.; DISC MENU; Tuner; OK; to exit or confirm the selection.
English 17 Remote control 1 STANDBY-ON y – Turn on the appar atus or switch to the EcoPower standby mode. 2 Numeric Keypad (0-9) – inputs a track/title/chapter number of the disc. Functional Overview 3 PROGRAM – DVD/VCD/CD/MP3-CD/USB: enters theprogram menu. – Picture CD: during playback, to select ...
Page 18 - Standby mode
18 English Functional Overview # VOL +/- – adjusts the volume upward/downward. – adjusts the hours and minutes in clock/timersetting mode. – selects a source in timer setting mode. $ MODE – selects various repeat modes or the shuffle playmode for a disc. % SUBTITLE – selects a subtitle language. ^ S...
Page 19 - Step 1: Inserting batteries into; Remove batteries if; Step 2: Setting up the TV; SYSTEM MENU; Getting Started
English 19 Step 1: Inserting batteries into the Remote Control 1 3 2 1 Open the batter y compar tment. 2 Inser t two AAA batteries following theindications (+/-) inside the compar tment. 3 Close the cover. Using the Remote Control to operatethe Player 1 Aim the Remote Controldirectly at the remote s...
Page 20 - To deactivate Progressive manually
20 English Getting Started 6 Press 1 2 repeatedly to select "VIDEO SETUP PAGE". 7 Select "TV MODE" to "PROGRESSIVE", then OK to confir m. ➜ The instruction menu appear s on the TV. 8 Press 1 2 to highlight OK in the menu and press OK to confirm. There will be a distorted pict...
Page 21 - Step 3: Setting language; Setting the OSD Language; To exit from the menu
English 21 Step 3: Setting language preference You can select your own preferred language settings. This DVD system will automaticallyswitch to the selected language whenever youload a disc. If the language selected is notavailable on the disc, the disc’s default languagewill be used instead. The OS...
Page 22 - The backlight on the display panel turns off.; Volume control; VOL XX; To switch off the volume temporarily; MUTING; Sound control; LOUDNESS; Dimming the display screen; To activate the demonstration; In standby mode; To deactivate the demonstration; DEMO OFF; Basic Functions
22 English Switch to Eco Power standbymode 1 Press ECO POWER/STANDBY-ON B to switch the unit to Eco Power Standby mode. ➜ The backlight on the display panel turns off. ➜ The blue Eco Power indicator turns on. Note:– In the Eco Power mode, you can press CLOCKto switch to the standby mode and view the...
Page 23 - Playable Discs; Disc Operations; Region Codes; ALL
English 23 IMPORTANT!– Depending on the DVD or VIDEO CD,some operations may be different orrestricted.– Do not push on the disc tray or putany objects other than disc on the disctray. Doing so may cause the disc playermalfunction.– If the inhibit icon ( ø ) appears on the TV screen when a button is ...
Page 24 - Using the Disc Menu; To select a playback feature or item; Basic playback controls; To cancel resume mode
24 English Disc Operations Using the Disc Menu Depending on the disc, a menu may appear on the TV screen once you load the disc. To select a playback feature or item ● Use 1 2 3 4 and OK or Numeric Keypad (0-9) on the remote . ➜ Playback will star t automatically. To access or exit from the menu ● P...
Page 25 - OR
English 25 Disc Operations Repeat A-B (DVD/VCD/CD/MP3/DivX/WMA) 1 Press A-B at your chosen star ting point. 2 Press A-B again at your chosen end point. ➜ The section A and B can be set only within the same chapter/track. ➜ The section will now repeat continuously. 3 To exit the sequence, press A-B a...
Page 26 - Special disc features; General operation
26 English Disc Operations For Super VCD/VCD/DivX/CD ➜ Single/Total Elapsed : displays the elapsed time of the current single/total track. ➜ Single/Total Remain : displays the remaining time of the current single/total track. ➜ Display Off : switches time display off. Special disc features Playing a...
Page 27 - Playing JPEG Picture CD; Special JPEG features; To enter the remote key function menu
English 27 Disc Operations Playing JPEG Picture CD General operation 1 Load a JPEG Picture CD. ➜ The data disc menu appear s on the TV screen. 2 Use 3 4 to select a folder and press OK to open the folder. 3 Press 3 4 or use the Numeric Keypad (0-9) to highlight a picture file. 4 Press OK to confirm....
Page 28 - Playing a DivX disc; SUBTITLE
28 English Disc Operations Playback with multi-angles (JPEG) ● During playback, press 1 2 3 4 to rotate the picture on the TV screen. 3 : flip the picture ver tically. 4 : flip the picture horizontally. 1 : rotate the picture anti-clockwise . 2 : rotate the picture clockwise. Playing a DivX disc Thi...
Page 29 - Basic operations; In cases of value setting; To return to the upper-level menu; GENERAL SETUP PAGE; TV DISPLAY
English 29 System Menu Options Basic operations 1 Press SYSTEM MENU to enter the Setup Menu. 2 Press 1 2 to select a page to be set. 3 Press 3 4 to highlight an option. 4 Enter its submenu by pressing 2 or OK . 5 Move the cursor by pressing 3 4 to highlight the selected item. ➜ In cases of value set...
Page 30 - VOD can; AUDIO SETUP PAGE; DIGITAL AUDO SETUP; DOLBY DIGITAL SETUP
30 English System Menu Options DIVX(R) VOD Philips provides you the DivX ® VOD (Video On Demand) registration code that allows you torent and purchase videos using the DivX ® VOD ser vice .For more information, visit us at www.divx.com/vod. 1 In ‘ GENERAL SETUP PAGE ’, press 3 4 to highlight DIVX(R)...
Page 31 - VIDEO SETUP PAGE; COMPONENT
English 31 3D PROCESSING The option included in 3D PROCESSING page is: “REVERB MODE”. REVERB MODE Reverb mode provides a vir tual surround sound experience using just two speakers. ➜ OFF , CONCERT , LIVING ROOM , HALL , BATHROOM , CAVE , ARENA and CHURCH . HDCD The option included in HDCD (High Defi...
Page 32 - PREFERENCE PAGE; PARENTAL
32 English System Menu Options PICTURE SETTING This menu helps you to set the video quality. 1 Press 3 4 to highlight “PICTURE SETTING”. 2 Press 2 or OK to enter PICTURE SETTING. The options included in PICTURE SETTINGpage are: “SHARPNESS”, “BRIGHTNESS”,“CONTRAST”, “GAMMA”, “HUE”,“SATURATION” and “L...
Page 33 - Rating explanations
English 33 System Menu Options Note:– Some DVDs are not encoded with a ratingthough the movie rating may be printed on theDisc cover. The rating level feature does not workfor such Discs. Rating explanations 1 KID SAF– Kids material; recommended especially for children and viewer s of all ages. 2 G–...
Page 34 - Radio Reception; Tuning to radio stations; PROG; Other Functions; Listening to preset radio stations; RDS; SEARCH TM
34 English Radio Reception Tuning to radio stations 1 Press ECO POWER/STANDBY-ON y to switch on the last selected source. 2 Press SOURCE ( TUNER on the remote control) to select TUNER (FM) mode. 3 Press and hold ¡ / ™ (or 2 / 3 on the remote control) until the frequency indication star ts tochange, ...
Page 35 - Setting the clock; CLOCK SET; CLOCK; SLEEP; To deactivate the sleep timer; TIME SET; To deactivate the timer
English 35 Other Functions Setting the clock 1 In Standby mode, press and hold CLOCK on the remote until the time flashes on the display. ➜ ” CLOCK SET ” is displayed briefly. Then, the hour digits flash on the display screen. 2 Turn VOLUME -/+ clockwise or anticlockwise or press VOL +/- on the remo...
Page 36 - External Sources; Using a non-USB device; AUX
36 English External Sources Using a non-USB device 1 Connect the system's AUX IN jacks to the AUDIO OUT jacks on another audio/visual device (such as a VCR, Laser Disc player orcassette desk) using the audio cables (white/ red) . 2 Press AUX to select external equipment. ➜ " AUX " is display...
Page 37 - NO FILE
English 37 External Sources How to transfer music files from PC to aUSB mass storage device By dragging and dropping music files, you can easily transfer your favorite music from PC to aUSB mass storage device. For the flash player, you can also use its musicmanagement software for the music transfe...
Page 38 - Specifications; Speakers
38 English Amplifier Rated output power ........................... 2 x 50W RMSFrequency response ............... 20 - 20000Hz, - 3dBSignal to noise ratio ............................................ > 65dBAux input ............................................. 1V RMS 20kohm Disc Laser type ........
Page 39 - Troubleshooting; Problem; Press
English 39 WARNINGUnder no circumstances should you try to repair the system yourself, as this willinvalidate the warranty. Do not open the system as there is a risk of electric shock. If a fault occurs, first check the points listed below before taking the system for repair. If youare unable to rem...
Page 41 - DEVICE NOT SUPPORTED; ” scrolls on the; Reduce the distance to the player.
English 41 The remote control does not function. The display is dark. Low hum or buzz sound. Low bass response. Unable to select Progressive Scan No sound and picture Some files on the USB device are notdisplayed. “ DEVICE NOT SUPPORTED ” scrolls on the display. ✔ Select the correct source (DISC or ...
Page 42 - Glossary; Component Video Out Jacks:
42 English Glossary Analog: Sound that has not been turned into numbers. Analog sound varies, while digital soundhas specific numerical values. These jacks sendaudio through two channels, the left and right. Aspect ratio: The ratio of ver tical and horizontal sizes of a displayed image. Thehorizonta...
Page 43 - CLASS 1; Meet Philips at the Internet
English F rançais Por tuguês Español Deutsch Nederlands Italiano Svenska Dansk Suomi P olski CLASS 1 LASER PRODUCT MCD716 Meet Philips at the Internet http://www.philips.com © 2010 Koninklijke Philips Electronics N.V. All rights reserved. MCD716_12_UM_V2.0 PageBack_MCD716 2010.6.23, 17:10 76


 Philips 50PFL5907/F7
User Manual
Philips 50PFL5907/F7
User Manual
 Philips 39PFL2908/F7
User Manual
Philips 39PFL2908/F7
User Manual
 Philips 55PFL5907/F7
Quick Guide
Philips 55PFL5907/F7
Quick Guide
 Philips 29PFL4908/F7
User Manual
Philips 29PFL4908/F7
User Manual
 Philips 32PFL5708/F7
Manual
Philips 32PFL5708/F7
Manual
 Philips 50PFL5708/F7
User Manual
Philips 50PFL5708/F7
User Manual
 Philips 20PT643R
User Manual
Philips 20PT643R
User Manual
 Philips 30PW862H
Manual
Philips 30PW862H
Manual
 Philips 30PW850H
Manual
Philips 30PW850H
Manual
 Philips HTS6500
User Manual
Philips HTS6500
User Manual
 Philips 37PF9631D/37
User Manual
Philips 37PF9631D/37
User Manual