Page 2 - Canada; CAUTION; L'utilisation des commandes ou; ATENCIÓN; El uso de mando o ajustes o la
2 Canada English: This digital apparatus does not exceedthe Class B limits for radio noiseemissions from digital apparatus as setout in the Radio InterferenceRegulations of the CanadianDepar tment of Communications. Français: Cet appareil numérique n'emet pasde br uits radioélectriques dépassantles ...
Page 4 - IMPORTANT SAFETY INSTRUCTIONS; Class II equipment symbol; Clean only with dry cloth.
4 IMPORTANT SAFETY INSTRUCTIONS Class II equipment symbol This symbol indicates that the unit has a double insulation system Clean only with dry cloth. materials pg 001-041_MCD708_37 2006.3.1, 16:17 4
Page 5 - English; rançais; Español; Index
5 English F rançais Español Index English ------------------------------------------------ 7 Français -------------------------------------------- 44 Español --------------------------------------------- 81 pg 001-041_MCD708_37 2006.3.1, 16:17 5
Page 6 - Language Code
Abkhazian 6566 Afar 6565 Afrikaans 6570 Amharic 6577 Arabic 6582 Armenian 7289 Assamese 6583 Avestan 6569 Aymara 6589 Azerhaijani 6590 Bahasa Melayu 7783 Bashkir 6665 Belarusian 6669 Bengali 6678 Bihari 6672 Bislama 6673 Bokmål, Norwegian 7866 Bosanski 6683 Brezhoneg 6682 Bulgarian 6671 Burmese 7789...
Page 7 - Contents
7 English General Information Features .................................................................. 9Supplied accessories ............................................ 9Environment information ................................... 9Installation .......................................................
Page 8 - System Menu Options
8 English Contents System Menu Options Basic Operations ................................................ 29General Setup Page ............................................ 29 TV DisplayOSD LanguageScreen SaverDIVX(R) VOD registration code Audio Setup Page ........................................ 30~3...
Page 9 - Features; Other features include:; Supplied accessories; General Information
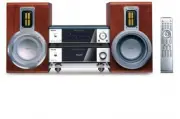
9 English Features Your DVD Micro Theatre with 2.0 channel full digital amplifier creates the same dynamic soundqualities that you find in full-fledged cinemas andincorporates some of the best features in hometheater technology. Other features include: Built-in Dolby Digital decoder, suppor ting Inc...
Page 10 - Maintenance
10 English General Information ● Do not expose your player to extremetemperatures or humidity. ● The apparatus shall not be exposed to drippingor splashing. ● No objects filled with liquids, such as vases, shallbe placed on the apparatus. ● No naked flame sources, such as lighted candles,shall be pl...
Page 11 - Step 1: Placing speakers; Connections; Speaker
11 English IMPORTANT!– The type plate is located at thebottom of the system.– Before connecting the AC power cordto the wall outlet, ensure that allother connections have been made.– Never make or change anyconnections with the power switched on. Step 1: Placing speakers Front speaker ( left ) Front...
Page 12 - AUX IN; Step 2: Connecting speakers; Step 3: Connecting the control
12 English Using Composite Video jack 1 Use the composite video connectors (yellow) ofthe supplied audio and composite video cables(2-in1) to connect the DVD system's VIDEO OUT jack to the video input jack (or labeled as A/ V In, CVBS, Composite or Baseband) on theTV. 2 To hear the TV channels throu...
Page 14 - antennas; Using an accessory RF modulator
14 English Step 5: Connecting FM/AM antennas SUB WOOFER 1 2 FM antenna AM antenna fix the claw into the slot 1 Connect the supplied AM loop antenna to theAM jack. Place the AM loop antenna on a shelfor attach to a stand or wall. 2 Connect the supplied FM antenna to the FM (75 Ω ) jack. Extend the FM...
Page 15 - Step 6: Connecting the power
15 English Connections Viewing and listening to the playback ofother equipment A ● Connect the system's AUX IN (R/L) jacks to the AUDIO OUT jacks on the other audio/visualdevice (such as a TV, VCR, Laser Disc player orcassette deck). Before star ting operation, press SOURCE on the front panel to sel...
Page 16 - Functional Overview; DVD player and power amplifier; Display; OPEN•CLOSE
16 English Functional Overview DVD player and power amplifier 1 ECO POWER/STANDBY-ON y – to switch the system on or to Eco power/normal standby mode. 2 Display – shows the current status of the DVD player. 3 ÉÅ – star ts or inter rupts disc playback. 4 PRESET + – in tuner mode, selects a preset radi...
Page 17 - Remote control; PROG
17 English Remote control 1 B – to switch the system on or to Eco power/normalstandby mode. 2 0 – opens or closes the disc compar tment 3 Numeric Keypad (0-9) – inputs a track/title/chapter number of the disc. – inputs the number of a preset r adio station. Functional Overview 4 PROG – DVD/VCD/CD: e...
Page 19 - Step 1: Inserting batteries into; Getting Started
19 English Step 1: Inserting batteries into the Remote Control 1 3 2 1 Open the batter y compar tment. 2 Inser t two AAA batteries following theindications (+/-) inside the compar tment. 3 Close the cover. Using the Remote Control to operatethe Player 1 Aim the Remote Controldirectly at the remote s...
Page 20 - To deactivate Progressive manually
20 English Getting Started 6 Press 1 2 repeatedly to select " VIDEO SETUP PAGE ". 7 Select " TV MODE " to " P-SCAN ", then OK to confirm. ➜ The instruction menu appears on the TV. 8 Press 1 2 to highlight OK in the menu and press OK to confirm. There will be a distorted pictu...
Page 21 - Step 3: Setting language; Setting the OSD Language
21 English Step 3: Setting language preference You can select your own preferred language settings. This DVD system will automaticallyswitch to the selected language whenever youload a disc. If the language selected is notavailable on the disc, the disc’s default languagewill be used instead. The OS...
Page 22 - Power-saving automatic standby; Sound control; LOUDNESS; Dimming the display screen; Basic Operations
22 English Switching the system on/off ● Press ECO POWER/STANDBY-ON B ( B on the remote). ➜ “ HELLO ” is displayed briefly. The system will switch to the last selected source. ● Press DISC , TUNER or AUX on the remote. ➜ The system will switch to the selected source. To switch the system to standby ...
Page 23 - Playable Discs; Disc Operations; Region Codes; Setting up the TV; ALL
23 English IMPORTANT!– Depending on the DVD or VIDEO CD,some operations may be different orrestricted.– Do not push on the disc tray or putany objects other than disc on the disctray. Doing so may cause the disc playermalfunction.– If the inhibit icon (ø) appears on theTV screen when a button is pre...
Page 24 - Using the Disc Menu
24 English Disc Operations Using the Disc Menu Depending on the disc, a menu may appear on the TV screen once you load the disc. To select a playback feature or item ● Use 1 2 3 4 and OK or Numeric Keypad (0-9) on the remote . ➜ Playback will star t automatically. To access or exit from the menu ● P...
Page 26 - Special disc features; General operation
26 English Disc Operations For Super VCD/VCD/DivX/CD ➜ Single/Total Elapsed : displays the elapsed time of the current single/total track. ➜ Single/Total Remain : displays the remaining time of the current single/total track. ➜ Display Off : switches time display off. Special disc features Playing a...
Page 27 - Playing JPEG Picture CD; Special JPEG features
27 English Disc Operations Playing JPEG Picture CD General operation 1 Load a JPEG Picture CD. ➜ The data disc menu appear s on the TV screen. 2 Use 3 4 to select a folder and press OK to open the folder. 3 Press 3 4 or use the Numeric Keypad (0-9) to highlight a picture file. 4 Press OK to confirm....
Page 28 - Playing a DivX disc; SUBTITLE
28 English Disc Operations Playback with multi-angles (JPEG) ● During playback, press 1 2 3 4 to rotate the picture on the TV screen. 3 : flip the picture ver tically. 4 : flip the picture horizontally. 1 : rotate the picture anti-clockwise . 2 : rotate the picture clockwise. Playing a DivX disc Thi...
Page 29 - Basic operations; TV Display
29 English System Menu Options Basic operations 1 Press SYSTEM to enter the Setup Menu. 2 Press 1 2 to select a page to be set. 3 Press 3 4 to highlight an option. 4 Enter its submenu by pressing 2 or OK . 5 Move the cursor by pressing 3 4 to highlight the selected item. ➜ In cases of value setting,...
Page 30 - Audio Setup Page; Digital Audio Setup
30 English System Menu Options DIVX(R) VOD registration code Philips provides you the DivX ® VOD (Video On Demand) registration code that allows you torent and purchase videos using the DivX ® VOD ser vice .For more information, visit us at www.divx.com/vod. 1 In ‘ General Setup Page ’, press 3 4 to...
Page 31 - Night Mode; Video Setup Page; Video Output
31 English 3D Processing The option included in 3D Processing is: “Reverb Mode”. Reverb Mode Reverb mode provides a vir tual surround sound experience using just two speakers. ➜ Off , Concert , Living Room , Hall , Bathroom , Cave , Arena and Church . HDCD The option included in HDCD (High Definitio...
Page 32 - TV Mode; Preference Page; Parental
32 English System Menu Options TV Mode Selects interlace or P-SCAN video output modewhen Pr/Cr Pb/Cb Y is selected. ➜ P-SCAN and Interlace . In the progressive scan mode, you can enjoy thehigh quality picture with less flickers. It onlyworks when you have connected the DVDplayer's Y Pb Pr jacks to y...
Page 33 - Rating explanations; Password Setup Page; Password Mode
33 English System Menu Options ➜ DVDs that are rated above the level you selected will not play unless you enter your four-digit password and choose a higher level rating. Note:– Some DVDs are not encoded with a ratingthough the movie rating may be printed on theDisc cover. The rating level feature ...
Page 34 - Radio Reception; Tuning to radio stations; Other Functions; Listening to preset radio stations; Setting the clock; Sleep timer setting
34 English Radio Reception Tuning to radio stations 1 Press ECO POWER/STANDBY-ON B ( B on the remote) to switch on the last selectedsource. 2 Press SOURCE ( TUNER on the remote) to select TUNER mode. 3 Press TUNER on the remote again to select the desired band: FM or AM. 4 Press and hold ¡ / ™ ( CH ...
Page 35 - To deactivate the sleep timer; To deactivate the timer
35 English Other Functions 2 When you reach the desired length of time, stoppressing SLEEP/TIMER . ➜ ” SLEEP ” appears. To deactivate the sleep timer ● Press SLEEP/TIMER repeatedly until “ 00 ” is displayed, or press ECO POWER/ STANDBY-ON B ( B on the remote). In standby mode , the timer setting ena...
Page 36 - Specifications
36 English SYSTEM Power supply ........................................... 120V / 60 HzRated wor king power consumption (1/8 ratedoutput power) ........................................................ ≤ 55W AUX input sensitivity ..................................... ≤ 350mV Channel Separation .........
Page 37 - Troubleshooting; Problem
37 English WARNINGUnder no circumstances should you try to repair the system yourself, as this willinvalidate the warranty. Do not open the system as there is a risk of electric shock. If a fault occurs, first check the points listed below before taking the system for repair. If youare unable to rem...
Page 40 - Glossary; Component Video Out Jacks:
40 English Glossary Analog: Sound that has not been turned into numbers. Analog sound varies, while digital soundhas specific numerical values. These jacks sendaudio through two channels, the left and right. Aspect ratio: The ratio of ver tical and horizontal sizes of a displayed image. Thehorizonta...