Page 2 - Contents
EN 1 English Contents 1 Important 2 Safety 2 Notice 3 2 Your DVD Micro Theater 5 Introduction 5 What’s in the box 5 Over view of the main unit 6 Over view of the remote control 7 3 Connect 10 Before you connect 10 Connect speakers 10 Connect TV 10 Connect audio cable 11 Connect FM antenna 11 Place t...
Page 3 - Important; Safety; Important Safety Instructions
2 EN 1 Important Safety Important Safety Instructions a Read these instructions. b Keep these instructions. c Heed all warnings. d Follow all instructions. e Do not use this apparatus near water. f Clean only with dry cloth. g Do not block any ventilation openings. Install in accordance with the man...
Page 4 - Hearing safety; Notice; Recycling
EN 3 English Hearing safety Listen at a moderate volume. Using headphones at a high volume can • impair your hearing. This product can produce sounds in decibel ranges that may cause hearing loss for a normal person, even for exposure less than a minute. The higher decibel ranges are offered for tho...
Page 5 - Norge
4 EN Please inform yourself about the local rules on separate collection of bat teries. The correct disposal of bat teries helps prevent potentially negative consequences on the environment and human health. Environmental information All unnecessar y packaging has been omit ted. We have tried to mak...
Page 6 - Your; Introduction; What’s in the box
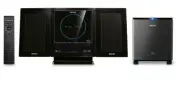
EN 5 English 2 Your DVD Micro Theater Congratulations on your purchase, and welcome to Philips. To fully benefi t from the suppor t that Philips offers, register your product at www.Philips.com/welcome. Introduction With this unit, you can: watch video from DVD/ VCD/SVCD discs • enjoy audio from DVD/...
Page 7 - Overview of the main unit
6 EN Overview of the main unit a STANDBY-ON/ECO POWER Turn on the apparatus, switch • to standby mode, or Eco Power standby mode. b Display screen Display current status of the system. • c PROGR AM For DVD/ VCD/CD/MP3-CD/USB: • enter the program menu. For picture CD: during playback , • select a sli...
Page 11 - Connect; Before you connect; Connect TV; Connect video cables
10 EN 3 Connect Before you connect 1 Place a sof t cloth on a hard, fl at, stable sur face. 2 With its front panel face-down, place the unit onto the cloth. 3 Remove the detachable cover on the back of the set. Connect speakers 1 Connect the two front speaker cables to the SPEAKERS terminals: right s...
Page 12 - Connect through S-Video; Connect audio cable; Place the unit
EN 11 English Connect through S-Video 1 Connect an S-video cable (not supplied) to: the • S -Video socket on this unit. the S -Video input socket (or labeled • as Y/C or S -VHS) on the T V. Connect through component video Connect a progressive scan T V through component video for higher quality vide...
Page 13 - Connect power
12 EN 2 Align the side marked PRESS of the stand to the slots at the bottom of the set. 3 Push the stand down into the slots until you hear a click . 4 Place the set upright on the desk top with the suppor t of the stand. 5 Ex tend the bracket on the back of each front speaker as shown so that the f...
Page 14 - Get; Prepare the remote control; Set the clock; Turn on
EN 13 English 4 Get started Caution Use of controls or adjus tments or per for mance of • procedures other than herein may result in ha zardous r adiation exposure or other unsafe oper ation. Always follow the instructions in this chapter in sequence. If you contact Philips, you will be asked for th...
Page 15 - Switch to standby mode; Select the correct TV system
14 EN 1 In active, standby or Eco Power Standby mode, press and hold on the unit for three seconds. » [PAIRING] fl ashes on the display screen. 2 Press and hold the PAIR but ton on the rear of the subwoofer for three seconds. If the connection succeeds, » [PAIR OK] is displayed and both the blue and ...
Page 16 - Turn on Progressive Scan
EN 15 English Change system menu language 1 Press SYSTEM MENU . 2 Select [General Setup Page] or [Preference Page] . 3 Select [OSD L ANGUAGE] and then press . 4 Select a set ting and then press OK . 5 To exit the menu, press SYSTEM MENU . Turn on Progressive Scan Progressive scan displays twice the ...
Page 17 - Play; Play discs; Use the disc menu; Select a subtitle language; Play from USB
16 EN 5 Play Note With some disc /fi le t ypes, play may dif fer. • Play discs Caution Never look at the laser beam inside the unit . • Risk of produc t damage! Never play discs with • accessor ies such as disc s tabilizer r ings or disc treatment sheets. Never put any objec ts other than discs into ...
Page 18 - Play DivX video; Play control; Select repeat/shuffl e play options; Search forward/backward
EN 17 English 1 Inser t the USB plug into the socket. 2 Press SOURCE (or USB on the remote control) to select the USB source. 3 Press / to select a folder, then press OK to confi rm. 4 Press / to select a fi le from the folder. 5 Press OK to star t play. To stop play, press • . To pause or resume play...
Page 19 - Play options; Display play information; Zoom in/out image
18 EN Search by time or chapter/track number 1 During video/audio play, press GOTO until a time fi eld or chapter/track fi eld is displayed. For the time fi eld, enter the play • position in hours, minutes and seconds. For the chapter/track fi eld, enter the • chapter/track . Play star ts automatically ...
Page 20 - Select a camera angle; Picture view options; Preview pictures; Select a slide show play mode; Rotate picture
EN 19 English 1 During play, press AUDIO repeatedly to select an audio channel available on the disc: Mono Lef t • Mono Right • Stereo • Select a camera angle Note This feature is only available for DVDs recorded with • multiple camer a angles. 1 During play, press ANGLE repeatedly to select a camer...
Page 21 - Audio setup; Adjust; General setup
• [On] – Enable the screen saver. • [Off ] – Disable the screen saver. [DIVX (R) VOD] Display the DivX® registration code. Tip Enter this DivX regis tr ation code when you rent or • purchase video from ht tp://vod.div x.com/. The DivX videos rented or purchased through the DivX® VOD ( Video On Deman...
Page 22 - Preference setup; Video setup
EN 21 English • [Interlace] – For ordinar y T V: turn on the interlace mode. [Picture Setting] Customize picture color set tings. Preference setup On [Preference Page] , you can set the following options: [T V Type] Change this set ting if the video does not appear correctly. By default, this set ti...
Page 24 - Tune to a preset radio station; Set RDS clock; Tune to FM
EN 23 English Program radio stations manually Note You can progr am a ma ximum of 20 preset r adio • s tations. 1 Tune to a radio station. 2 Press PROGR AM to activate programming. » PROG begins to blink. 3 Press PRESET / to allocate a number from 1 to 20 to this radio station. 4 Press PROGR AM to c...
Page 25 - Show RDS information
24 EN The unit reads the RDS time and sets » the clock automatically. Note The accur acy of the tr ansmit ted time depends on the • RDS s tation that tr ansmits the time signal. Show RDS information RDS (Radio Data System) is a ser vice that allows FM stations to show additional information. If you ...
Page 26 - Select automatic loudness control; Mute sound; Adjust; Adjust volume level; Select a preset sound effect
EN 25 English Select automatic loudness control Automatic loudness control increases the treble and bass effect at low volume levels (the higher the volume, the lower the treble and bass levels). 1 To turn on automatic loudness control, press LOUDNESS during play until the loudness icon is displayed...
Page 27 - Set the sleep timer; Connect other devices; Listen to an audio player; Other; Set the alarm timer
26 EN Set the sleep timer 1 When the unit is turned on, press SLEEP/ TIMER repeatedly to select a set period of time (in minutes). The unit turns off automatically after » the set period of time. Connect other devices Listen to an audio player You can listen to audio player through this unit. 1 Conn...
Page 28 - Speakers; 0 Product; Specifi cations; Amplifi er
EN 27 English Tuner (FM) Tuning Range 87. 5 - 108MHz Tuning grid 50KHz Sensitivity - Mono, 26dB S/N Ratio - Stereo, 46dB S/N Ratio <5 uV >10 0 uV Search Selectivity >28dB Image rejection >25dB Total Harmonic Distor tion <3% Signal to Noise Ratio >50dBA Speakers Speaker Impedance --...
Page 29 - USB playability information; General information; Supported disc formats
28 EN Picture (Kodak , JPEG) fi les on CDR( W ) • DivX(R) disc on CD-R( W ): • DivX 3.11, 4.x and 5.x • WMA • Supported MP3-CD formats: ISO 9660 • Max. title/album name: 12 characters • Max. title number plus album: 255. • Max. nested director y: 8 levels. • Max. album number : 32. • Max. MP3 track n...
Page 30 - RDS program types
EN 29 English RDS program types NO T YPE No RDS programme type NEWS News ser vices AFFAIRS Politics and current affairs INFO Special information programs SPORT Spor ts EDUCATE Education and advanced training DR AMA Radio plays and literature CULTURE Culture, religion and society SCIENCE Science VARI...
Page 31 - 1 Troubleshooting
30 EN The aspect ratio of the TV screen cannot be changed even though you have set the TV display format. The aspect ratio if fi xed on the loaded • DVD disc. The aspect ratio may not be changed for • some T V systems. No sound or poor sound. Adjust the volume. • Disconnect the headphone. • Ensure th...