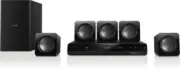
Page 3 - Contents; Product specifications
1 EN Contents 1 Important 2 Safety 2 Care for your product 3 Care of the environment 3 2 Your home theater 4 Main unit 4 Remote control 4 Connectors 5 3 Connect and set up 7 Connect speakers 7 Connect to TV 8 Connect audio from TV and other devices 9 Set up speakers 10 Set up EasyLink (HDMI-CEC cont...
Page 4 - Important; Safety
2 EN 1 Important Read and understand all instructions before you use your home theater. If damage is caused by failure to follow instructions, the warranty does not apply. Safety Risk of electric shock or fire! • Never expose the product and accessories to rain or water. Never place liquid container...
Page 5 - Care for your product; Care of the environment
3 EN of children at all times! If swallowed, the batter y can cause serious injur y or death. Severe internal burns can occur within two hours of ingestion. • If you suspect that a batter y has been swallowed or placed inside any par t of the body, seek immediate medical attention. • When you change...
Page 6 - Main unit
4 EN 2 Your home theater Congratulations on your purchase, and welcome to Philips! To fully benefit from the suppor t that Philips offers, register your home theater at www.philips.com/welcome. Main unit a Disc compartment b Display panel c (Open/Close) Open or close the disc compar tment, or eject ...
Page 7 - Connectors; Front; Front connectors
5 EN a (Standby-On) • Switch the home theater on or to standby. • When EasyLink is enabled, press and hold for at least three seconds to switch all connected HDMI CEC compliant devices to standby. b Source buttons • DISC : Switch to disc source.Access or exit the disc menu when you play a disc. • AU...
Page 8 - Back connectors
6 EN b MIC Audio input from a microphone. c AUDIO IN Audio input from an MP3 player (3.5mm jack). Back connectors a AC MAINS Connect the supplied AC power cable. b SPEAKERS Connect to the supplied speakers and subwoofer. c VIDEO OUT Connect to the composite video input on the TV. d AUDIO IN-AUX Conn...
Page 9 - Connect speakers
7 EN 3 Connect and set up This section helps you connect your home theater to a TV and other devices, and then set it up. For information about the basic connections of your home theater and accessories, see the quick star t guide. Note • For identification and supply ratings, see the type plate at ...
Page 10 - Connect to TV; Option 1: Connect to TV through; Option 2: Connect to TV through
8 EN Place the rear surround speakers to the left and right side of your seating position, either in line with it or slightly behind it. 5 SUBWOOFER (subwoofer): Place the subwoofer at least one meter to the left or right of the TV. Leave about 10-centimeter clearance from the wall. Connect to TV Co...
Page 11 - Option 3: Connect to the TV through; Connect audio from TV and; Option 1: Connect audio through a
9 EN TV and the home theater. (see 'Set up EasyLink (HDMI-CEC control)' on page 10) 4 If you cannot hear the TV audio through your home theater, set up the audio manually. (see 'Set up the audio' on page 11) Note • If your TV has a DVI connector, you can use an HDMI/ DVI adapter to connect to TV. Ho...
Page 12 - Set up speakers; Enable EasyLink
10 EN Option 2: Connect audio through analog audio cables Basic quality audio 1 Using an analog cable, connect the AUX connectors on your home theater to the AUDIO OUT connectors on the TV or other device. Set up speakers Set up the speakers manually to experience customized surround sound. Before y...
Page 13 - EasyLink controls; Set up the audio
11 EN EasyLink controls With EasyLink, you can control your home theater, TV, and other connected HDMI-CEC compliant devices with a single remote control. • [One Touch Play] (One-touch play): If one- touch play is enabled, press ( Standby- On ) on the remote control of your home theater to wake up t...
Page 14 - Access the home menu; Play buttons; Synchronize picture and sound
12 EN 4 Use your home theater This section helps you use the home theater to play media from a wide range of sources. Before you start • Make the necessar y connections described in the Quick star t guide and the user manual. • Switch the TV to the correct source for the home theater. Access the hom...
Page 15 - Display menu for VCD and SVCD; Subtitles; VOD code for DivX
13 EN Note • Picture and sound can be synchronized through the setup menu, press ( Home ), select [Setup] > [Audio] > [Audio Sync] . Display menu for VCD and SVCD Display the content menu on VCD and SVCD discs. 1 Press ( Home ). 2 Select [Setup] , and then press OK . 3 Select [Preferences] >...
Page 16 - USB storage devices; options; Audio options
14 EN USB storage devices Enjoy pictures, audio, and video stored on a USB storage device such as an MP4 player. What you need • A USB storage device that is formatted for FAT or NTFS file system, and complies with the Mass Storage Class. • A media file in one of the suppor ted file formats. (see 'F...
Page 17 - Musical slideshow; Radio; Tuning grid; MP3 player
15 EN Musical slideshow If the picture and audio files are from the same disc or USB storage device, you can create a musical slideshow. 1 Select an audio track and then press OK . 2 Press BACK and then go to the picture folder. 3 Select a picture and then press OK to star t the slideshow. 4 Press t...
Page 18 - Karaoke; Play karaoke music; Choose sound; Sound mode; Surround sound mode
16 EN 1 Using the 3.5mm stereo audio cable, connect the MP3 player to the AUDIO IN connector on your home theater. • If you use 6.5mm stereo audio cable, connect the MP3 player to your home theater using a 3.5mm - 6.5mm conver ter jack. 2 Press AUDIO SOURCE repeatedly until AUDIO IN appears on the d...
Page 20 - Change settings; Language settings; Onscreen display language
18 EN 5 Change settings The home theater settings are already configured for optimal performance. Unless you have a reason to change a setting, we recommend that you keep the default setting. Note • You cannot change a setting that is grayed out. • To return to the previous menu, press BACK . To exi...
Page 21 - Parental control settings; Password and Ratings
19 EN Audio settings1 Press ( Home ). 2 Select [Setup] and then press OK . 3 Select [Audio] and then press OK . • [HDMI Audio] : Set the HDMI audio output from your TV, or disable HDMI audio output from the TV. • [Audio Sync] : Set audio delay if audio and video cannot be matched. • [Speaker Setup] ...
Page 23 - Update software; Check software version; Update software through; Step 1: Download the latest software; Step 2: Update the software
21 EN 6 Update software Philips continually tries to improve its products. To get the best features and suppor t, update your home theater with the latest software. Compare the version of your current software with the latest version on www.philips.com/ suppor t. If the current version is lower than...
Page 24 - Amplifier
22 EN 7 Product specifications Note • Specifications and design are subject to change without notice. Region codes The type plate on the back or bottom of the home theater shows which regions it suppor ts. Media formats • DVD-Video, DVD+R/+RW, DVD-R/-RW, DVD+R/-R DL, CD-R/CD-RW, Audio CD, Video CD/S...
Page 26 - Troubleshooting; Sound; Play
24 EN 8 Troubleshooting Warning • Risk of electric shock. Never remove the casing of the product. To keep the warranty valid, never tr y to repair the product yourself. If you have problems using this product, check the following points before you request ser vice. If you still have a problem, get s...
Page 28 - Notice; Copyright
26 EN 9 Notice This section contains the legal and trademark notices. Copyright This item incorporates copy protection technology that is protected by U.S. patents and other intellectual proper ty rights of Rovi Corporation. Reverse engineering and disassembly are prohibited. Trademarks Manufactured...
Page 29 - 0 Language code
27 EN 10 Language code Abkhazian 6566 Afar 6565 Afrikaans 6570 Amharic 6577 Arabic 6582 Armenian 7289 Assamese 6583 Avestan 6569 Aymara 6589 Azerhaijani 6590 Bahasa Melayu 7783 Bashkir 6665 Belarusian 6669 Bengali 6678 Bihari 6672 Bislama 6673 Bokmål, Norwegian 7866 Bosanski 6683 Brezhoneg 6682 Bulg...