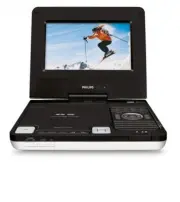
Page 4 - English; FUNCTIONAL OVERVIEW; ) search backward/forward in a disc at different; Front of player
English FUNCTIONAL OVERVIEW Main unit controls ( see figure 1 ) 1 OPEN .....................Open the disc door to insert or remove disc. 2 MENU .....................Display the MENU page. 3 MONITOR ..............Switch the aspect ratio between 16:9 or 4:3. 4 SOURCE ... ..............Select respectiv...
Page 6 - REMOTE CONTROL; CAUTION
REMOTE CONTROL 9 SETUP ....................Enter or exit the system menu. 0 3 , 4 , 1 , 2 ...........Navigate in a menu............( 1 / 2 ) search backward/forward in a disc at different speeds. ! OK ...........................Confirm a selection. @ J( / § ...................Skip to the previous/ne...
Page 8 - Precautions related to battery recharge; Playable disc formats; R and DVD; CD with JPEG files; You can also view JPEG still photos on this player.
INTRODUCTION About Built-in Rechargeable Battery Precautions related to battery recharge 1 Once the battery is fully discharged (the power indicator will flash as a priorwarning), immediately recharge it (regardless of whether you plan to use thebattery or not) in order to maximize the battery life....
Page 9 - Policy to guarantee optimal screen quality.; About SD Memory Card
INTRODUCTION Video CD Depending on the material on the disc (a movie, video clips, a dramaseries, etc.) these discs may have one or more Tracks, and tracksmay have one or more indexes, as indicated on the disc case.Tomake access easy and convenient, your player lets you move between tracks andbetwee...
Page 10 - heated. This is normal
GENERAL INFORMATION Power Sources This unit operates on a supplied AC adapter, car adapter, or the built-in lithium battery. • Make sure that the input voltage of the AC adaptor is in line with the local voltage. Otherwise, the AC adaptor and unit may be damaged. • Do not touch the AC adaptor with w...
Page 11 - Listen at a moderate volume:; • Using headphones at a high volume can impair your hearing. This; To establish a safe volume level:
GENERAL INFORMATION Hearing Safety Listen at a moderate volume: • Using headphones at a high volume can impair your hearing. This product can produce sounds in decibel ranges that may cause hearingloss for a normal person, even for exposure less than a minute. Thehigher decibel ranges are offered fo...
Page 13 - Using the AC / DC adaptor; Using the car adapter; EJECT; the same or equivalent type.
PREPARATIONS Power supply Using the AC / DC adaptor Connect the supplied adapter to the set and the main power supply (as shown). TIP To avoid damage to the player, switch off before plugging or unplugging the AC adaptor. Using the car adapter Connect the supplied car adapter to the set and the car ...
Page 14 - Connect the desired device to this terminal directly (no; AV IN; On the DVD player panel, press the source key; AV
PREPARATIONS Connections Connecting headphones Connect the headphones into the n 1 or the n 2 jack of your set. Connecting additional equipment • Turn off your set before connecting to any additional equipment. • You can connect the player to a TV or an amplifier to enjoy DVDs or karaoke. AV OUT Con...
Page 15 - PREPARATIONS; Dock for iPod
PREPARATIONS SD/MMC card slot You can play video/audio/picture files stored inan SD/MMC card by inserting it into the SD/MMC CARD slot. On the DVD player panel, press the SOURCE key repeatedly (or SD/MMC CARD on the remote) to select the SD/MMC source. TIP Make sure the metal contact of the card to ...
Page 16 - Press the; on; To remove the iPod player; Pull out the iPod connector.
PREPARATIONS 4 Switch on your iPod player to set "TV OUT" to "ON" and select the"NTSC" mode if you want to play video or photo files in your iPod player.(See your iPod user’s manual for detailedoperation.) 5 Press the SOURCE key repeatedly (or iPod on the remote) for dock inp...
Page 17 - ” appears on; Remote control operation; various settings and operations.
GENERAL EXPLANATION About this manual This manual gives the basic instructions for operating this DVD player. Some DVD discs however are produced in a way that requires specificoperation or allows only limited operation during playback. In these casesthe player may not respond to all operating comma...
Page 19 - Playing an audio or video CD disc; OK; Playing DivX® disc
BASIC FUNCTIONS Playing a DVD disc After switching on, inserting the disc and closing the door, playback startsautomatically. The screen shows the type of disc loaded. The disc may invite youto select an item from a menu. Use the 3 , 4 , 1 , 2 keys to highlight your selection,and press OK . Note: Si...
Page 20 - Playing a JPEG discs; DISC MENU
BASIC FUNCTIONS Playing a MP3 CD The following playback features are available for MP3 CDs. Please refer to the corresponding sections for more information.Volume control, skipping tracks, searching, repeat, shuffle, etc.Use the 3 , 4 keys to highlight your selected music folder. Press OK to play. P...
Page 21 - and; Playing files stored in your iPod player
BASIC FUNCTIONS Playing files stored in an SD/MMC card After connecting an SD/MMC card to this player, you can play audio/video filesstored in the card by selecting the desired file with 3 4 and OK . Playing files stored in your iPod player After connecting your iPod player as described in the "...
Page 23 - GENERAL FEATURES; AUDIO; ZOOM; REPEAT
GENERAL FEATURES Changing the audio output (for VCD/CD) Press AUDIO repeatedly for the following audio options. x 1 Mono left x 2 Mono right x 3 Stereo TIP This key is used to select audio languages during DVD playback. ZOOM The Zoom function allows you to enlarge the video image and to pan through ...
Page 24 - TIP; SHUFFLE; Volume Control
GENERAL FEATURES TIP The repeat function is also available for JPEG, SD/MMC etc. The actionsmay vary for different media being played. SHUFFLE Press SHUFFLE on the remote to play all tracks (for CD), chapters (for DVD) or all tracks in the selected folder/wholedisc (for MP3) randomly. Repeat A - B T...
Page 25 - MONITOR; DISPLAY; PROGRAM; PROG
GENERAL FEATURES MONITOR (on the main unit) Press MONITOR repeatedly to adjust the display mode (normal or full screen). DISPLAY Press DISPLAY on the remote repeatedly for the following display options: DVD CD/VCD DivX x 1 Title elapsed Single elapsed Single elapsed x 2 Title remained Single remaine...
Page 28 - Note: Before using the
SETUP OPERATIONS To maximize your playback experience, use SETUP to fine tune your settings. Use the 3 , 4 , 1 , 2 keys to highlight your selection, and press OK . 1 Press SETUP . A list of features is shown. 2 Use the 3 4 keys to highlight your selection. When the cursor highlights these settings, ...
Page 29 - Password Setup Page; Preference Page
SETUP OPERATIONS Video Setup Page When the cursor highlights these settings, press OK to: Quality select video quality options DivX R VOD get DivX ID for VOD Press 1 to abort current settings or go back to previous menu level Password Setup Page When the cursor highlights these settings, press OK to...
Page 30 - TROUBLESHOOTING
TROUBLESHOOTING If it appears that the DVD-Video player is faulty, first consult this checklist. It may be that something has been overlooked. WARNINGUnder no circumstances should you try to repair the set yourself as thiswill invalidate the guarantee.If a fault occurs, first check the points listed...
Page 32 - TECHNICAL DATA
TECHNICAL DATA Dimensions 210 x 178 x 39 mm8.3 x 7.0 x 1.5 inches Weight 1.9 kg / 4.2 pounds Power supply DC 9V 1.0A Power Consumption 9W Operating temperature range 0 - 45°C Laser wavelength 650nm Video system PAL Frequency response 20Hz ~ 20KHz ± 1dB Signal/noise ratio * 85dB Audio distortion + no...
Page 33 - Important notes for users in the UK; Mains plug; Remove fuse cover and fuse.; How to connect a plug; Connect the blue wire to the terminal marked N or coloured black.
Important notes for users in the UK Mains plug This apparatus is fitted with an approved 13 Amp plug. To change afuse in this type of plug proceed as follows: 1. Remove fuse cover and fuse. 2. Fix new fuse which should be a BS1362 5 Amp, A.S.T.A. or BSIapproved type. 3. Refit the fuse cover. If the ...