Page 2 - Canada
Canada English: This digital apparatus does not exceed the Class B limits for radio noise emissions from digital apparatus as set out in the Radio Interference Regulations of the Canadian Depar tment of Communications. This Class B digital apparatus complies with Canadian ICES-003. Français: Cet app...
Page 3 - Contents
3 English EN Contents 1 Important 6 Safety 6Notice 7 2 Your camcorder 8 Introduction 8What’s in the box 8 Functional over view 9 3 Get started 10 Load the Micro SD card 10 Turn on 10 Set the date and time (for first-time users only) 11 Select a menu display language 11 Charge the built-in batter y 11...
Page 4 - *Product Safety Notification; safety
4 EN Register online at www.philips.com/welcome today to get the very most from your purchase. Visit our World Wide Web Site at http://www.philips.com/welcome Registering your model with PHILIPS makes you eligible for all of the valuable benefits listed below,so don't miss out. Register online at www...
Page 6 - Hearing safety; Important; Safety
6 Hearing safety Listen at a moderate volume. Using headphones at a high volume can • impair your hearing. This product can produce sounds in decibel ranges that may cause hearing loss for a normal person, even for exposure less than a minute. The higher decibel ranges are offered for those that may...
Page 7 - Notice
7 Caution Removal of the built-in bat ter y invalidates the • war r anty and may destroy the produc t. Always bring your product to a professional to remove the built-in bat ter y. Perchlorate Material - special handling may apply. See w w w.dtsc.ca.gov/hazardouswaste/perchlorate. Philips Consumer L...
Page 8 - Introduction
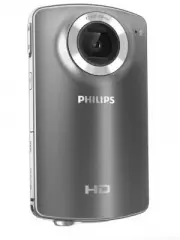
8 2 Your camcorder Introduction With this portable camcorder, you can: take HD (720P) or VGA movies • take pictures • play recorded movies or pictures either • directly or on the large screen of a connected T Vupload the recorded movies or pictures • to the Internet directly What’s in the box Make s...
Page 9 - Functional overview
9 During video play, change the • volume.Per form the specific function as • shown on the display panel. d Shutter button In view finder mode, take a picture or • star t /stop video recording. Functional overview a Built-in speaker b Display panel c +/- In view finder mode, zoom in/out. • Navigate up/d...
Page 10 - started; Load the Micro SD card
10 3 Get started Load the Micro SD card 1 Flap open the protective cover on the Micro SD card socket. 2 Inser t the Micro SD card into the socket. Ensure that the the Micro SD card is • not write-protected.Ensure that the metal contact of the • card faces down. 3 Close the protective cover securely....
Page 11 - Charge the built-in battery
11 Charge the built-in battery 1 Press at the bot tom of the camcorder to eject the USB connector. 2 Connect the USB connector to a USB socket on a PC . The status indicator on the shutter » button star ts flashing in orange. 3 Wait until the status indicator stops flashing and turns to green steadily...
Page 12 - Play; Delete a file; Options during video play; Adjust volume level; your; Record video
12 Play 1 In view finder mode, press to enter play mode. The last recorded video clip is played » automatically. 2 Press / to select a picture or video clip for play. 3 If the selected file is a video clip, press to star t play. Delete a file 1 In play mode, press / to select a file. 2 Press to enter de...
Page 13 - View video or pictures on TV; Adjust settings
13 5 Use more of your camcorder View video or pictures on TV 1 Connect the supplied AV cable to: the • / AV OUT socket on the camcorderthe component video and audio • input sockets on the T V 2 Select a file and star t play. To enjoy high-quality video/picture: 1 Connect an HDMI cable (not supplied) ...
Page 14 - Install the camcorder software
14 Install and use the camcorder software 1 On your PC , click Start\(All) Programs\ ArcSoft MediaImpression HD Edition . The main screen of the software » appears. 2 Click an option to select the corresponding operation. 3 Follow the on-screen instructions to complete the operation. Transfer video/...
Page 16 - Frequently
16 How do I charge the camcorder? You can charge the camcorder via the • USB pop-out connector. When you connect it to your PC/laptop it will automatically charge. You can also plug the camcorder via the pop-out USB into a USB charger. How long do I have to charge the camcorder? The camcorder is ful...
Page 19 - Philips Consumer Lifestyle
© 2010 Koninklijke Philips Electronics N.V. All rights reserved. CAM100_37_UM_V1.0 Philips Consumer Lifestyle A division of Philips Electronics North America Corporation P.O. Box 10313 Stamford, CT 06904 Phone: 1-888-PHILIPS (744-5477) Meet Philips at the Internet http://www.philips.com/welcome