Page 3 - English; Important; Safety and important notice; Disposal of your old product and batteries
English 1 Important Safety and important notice Warning Risk of over heating! Never ins tall the produc t in a confined space. Always leave a space of at leas t 4 • inches around the produc t for ventilation. Ensure cur tains or other objec ts never cover the ventilation slots on the produc t .Never ...
Page 4 - Copyright notice; Trademark notice
Your produc t contains bat ter ies covered by the European Direc tive 20 06/66/EC , which cannot be disposed with nor mal household was te.Please infor m your self about the local r ules on separ ate collec tion of bat ter ies because cor rec t disposal helps to prevent negative consequences for the...
Page 6 - Feature highlights; Playable media; Region codes
2 Your product Congratulations on your purchase, and welcome to Philips! To fully benefit from the suppor t that Philips offers, register your product at www.philips.com/welcome. Feature highlights Philips EasyLink Your produc t suppor ts Philips EasyLink , which uses the HDMI CEC (Consumer Elec tron...
Page 7 - Product overview; Main unit
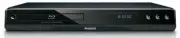
Region code Countr y DVD BD Europe, United Kingdom Product overview Main unit a Tur n on this produc t or switch to s tandby mode. • b Disc compar tment c IR sensor Point the remote control at the IR sensor. • d Display panel e Open or close the disc compar tment . • f Star t or resume play. • g Pau...
Page 9 - Remote control
Remote control a Tur n on this produc t or switch to s tandby mode. • When EasyLink is enabled, press and hold for at leas t three seconds to tur n all • connec ted HDMI CEC compliant devices to s tandby. b BONUSVIEW Tur n on or of f the secondar y video in a small screen window dur ing play (applic...
Page 11 - Connect; Connect video/audio cables
Selec t repeat play or r andom play. • 3 Connect Make the following connections to use this product. Basic connections: Video • Audio • Power • Optional connections: Route audio to other devices • Digital amplifier/receiver • Analog s tereo sys tem • USB device (As additional memor y for sof t ware u...
Page 12 - Option 1: Connect to the HDMI jack; Option 2: Connect to the composite video jack
Option 1: Connect to the HDMI jack 1 Connec t an HDMI cable (not supplied) to the • HDMI jack on this produc t . the HDMI input jack on the T V. • Tip If the T V has a DVI connec tor only, connec t via an HDMI/DVI adaptor. Connec t an audio cable for • sound output .You can optimize the video output...
Page 13 - Route audio to other devices; Connect to digital amplifier/receiver; Connect analogue stereo system; Connect USB device
the AUDIO input jack s on the T V. • Tip The video input jack on the T V might be labeled as A / V IN , VIDEO IN , COMPOSITE or BASEBAND. • This t ype of connec tion provides s tandard pic ture qualit y. • Route audio to other devices To enhance audio play, you can route the audio from this product ...
Page 14 - Connect power; started; Prepare the remote control
Note This produc t cannot play any audio/video/photo file s tored on a USB device. • Connec t a USB device only to the • USB jack on this produc t . Philips does not guar antee 10 0% compatibilit y with all USB devices. • 1 Connec t the USB device to the USB jack on the back of this produc t . Connec...
Page 15 - Find the correct viewing channel; Use the Home menu; Navigate the menu
1 Open the bat ter y compar tment . 2 Inser t 2 A A A bat ter ies with cor rec t polar ity (+/-) as indicated. 3 Close the bat ter y compar tment . Note If you are not going to use the remote control for a long time, remove the bat ter ies. • Do not use old and new or dif ferent t ypes of bat ter ie...
Page 16 - Select menu display language; Use Philips EasyLink
Button Action Move up or down. Move lef t or r ight . OK Confir m a selec tion. Enter number s. Select menu display language Note If this produc t is connec ted to a HDMI CEC compliant T V, sk ip this set ting. It switches automatically • to the same OSD menu language as per your T V set ting (if the...
Page 17 - Play a disc
Note To enable the EasyLink feature, you mus t tur n on the HDMI CEC oper ations on the T V and on other • devices connec ted to T V. Refer to the T Vs/devices manual for details. One-touch play 1 Press the STANDBY but ton to tur n on this produc t . The TV (if suppor ts one-touch play) automaticall...
Page 18 - Play video; Control video play; Change video play
Note Check disc /file for mats suppor ted (see “Your produc t” > “ Playable media”). • If the password entr y menu is displayed, enter the password before you can play the locked or • res tr ic ted disc (see “Adjus t set tings” > “ Preference Setup” > [Parental Control] ). If you pause or s ...
Page 19 - Display menu
Button Action AUDIO Selec t an audio language or channel on a disc. SUBTITLE Selec t the subtitle language on a disc. REPE AT Selec t or tur n of f repeat or shuf fle mode. Repeat options may var y from the disc type. • For VCDs, repeat play is only possible when the PBC mode • is tur ned of f. INFO ...
Page 20 - View video play from different camera angles
Select title/chapter 1 Dur ing play, press OPTIONS . The play options menu is displayed. » 2 Selec t [ Title] or [Chapter] in the menu, then press OK . 3 Selec t the title or chapter number, then press OK . Skip play to a specific time 1 Dur ing play, press OPTIONS . The play options menu is displaye...
Page 21 - Shift subtitle display
Note Applicable only to discs that contain multi-angle scenes. • Shift subtitle display This feature is only available if you have set the [ T V Display] to [Cinema 21:9] (see “Adjus t set tings” > “ Video Setup”). 1 Dur ing play, press OPTIONS . The play options menu is displayed. » 2 Selec t [S...
Page 22 - Play music; Control a track
B Secondar y video 1 Press BONUSVIEW to tur n on the secondar y video window. 2 Press OPTIONS . The play options menu is displayed. » 3 Selec t [2nd Audio Language] or [2nd Subtitle Language] in the menu, then press . 4 Selec t the language to play, then press OK . Play DivX ® video DivX video is a ...
Page 23 - Play photo; Play photo as slideshow
Button Action Pause play. Star t or resume play. Stop play. / Skip to a previous/nex t tr ack . Selec t an item to play. / Search fas t-back ward or fas t-for ward. Press repeatedly to change the search speed. REPE AT Selec t or tur n of f repeat or shuf fle mode. Play MP3/WMA music MP3/ WMA is a typ...
Page 24 - Control photo play; Set slideshow interval and animation
3 Selec t a photo folder, then press OK to enter. To selec t a photo, press the • Navigation buttons . To enlarge the selec ted photo and s tar t slideshow, press • OK . 4 Press OK to s tar t slideshow play. Note It may require longer time to display the disc content on the T V due to the lar ge num...
Page 25 - Adjust; Video setup
Note To create a musical slideshow, you mus t s tore the MP3/ WMA and JPEG files on the same disc. • 1 Play MP3/ WMA music. 2 Press BACK to retur n to the main menu. 3 Navigate to enter a photo folder, then press OK to s tar t slideshow play. Slideshow begins and continues till the end of the photo f...
Page 27 - Audio Setup
This feature is available only when the display device is connec ted by a HDMI cable, and when it suppor ts deep color feature.• [Auto] - Enjoy vivid images in over a billion color s on Deep Color enabled T V. • [Of f ] - Output s tandard 8 bit color. [Picture Settings] Selec t a predefined set of pi...
Page 28 - Preference Setup
• [Bitstream] – Selec t the bes t or iginal HD audio exper ience (only via an HD audio compatible receiver). • [Auto] – Detec t and selec t the bes t suppor ted audio for mat automatically. [Digital Audio] Selec t an audio for mat for the sound output from the DIGITAL OUT jack (coa xial/optical).• [...
Page 30 - EasyLink Setup
EasyLink Setup 1 Press . 2 Selec t [Settings] , then press OK . 3 Selec t [EasyLink Setup] , then press . 4 Selec t an option, then press OK . 5 Selec t a set ting, then press OK . To retur n to the previous menu, press • BACK . To exit the menu, press • . Video Setup Advanced Setup Audio Setup Pref...
Page 31 - Advanced Setup
[EasyLink] This produc t suppor ts Philips Easylink which uses the HDMI CEC (Consumer Elec tronics Control) protocol. You can use one single remote control to control all EasyLink-compliant devices that are connec ted through HDMI connec tor s.• [On] - Tur n on EasyLink features. • [Of f ] - Disable...
Page 32 - Additional; Update software
• [USB] - Download sof t ware from the USB device which is connec ted to this produc t . Note For detailed sof t ware updating, see “Additional infor mation” > “ Update sof t ware”. • [Clear Memor y] Remove some Blu-r ay disc data (such as BonusView) that are automatically copied on the connec te...
Page 33 - Update software via USB; Care; Specifications
Update software via USB 1 Go to w w w.philips.com/suppor t to check if the lates t sof t ware ver sion is available for this produc t . 2 Download the sof t ware onto a USB flash dr ive. 3 Inser t the USB flash dr ive to the USB jack of the rear panel. 4 In the Home menu, selec t [Settings] > [Adva...
Page 34 - Troubleshooting
Sampling frequency: • MP3: 32 kHz, 4 4.1 kHz, 48 kHz • WMA: 4 4.1 kHz, 48 kHz • Cons tant bit r ate: • MP3: 112 kbps - 320 k pbs • WMA: 48 k pbs - 192 k pbs • USB As additional memor y for sof t ware updates and BonusView contents. Not for media play. • Main unit Power supply r ating • Europe: 220 ~...
Page 39 - Open Source Software
Open Source Software This product contains the following open source software packages, which are subject to their respective licenses. 1. Zlib general purpose compression librar y See http://www.zlib.net/, and in par ticular http://www.zlib.net/zlib_license.html. /* zlib.h -- interface of the ‘zlib...
Page 43 - NOTICE; SOFTWARE END USER LICENSE AGREEMENT
The licence and distribution terms for any publically available version or derivative of this code cannot be changed. i.e. this code cannot simply be copied and put under another distribution licence [including the GNU Public Licence.] NOTICE SOFTWARE END USER LICENSE AGREEMENT THIS SOFTWARE END USE...