Philips AZB798T/12 - Manuals
Philips AZB798T/12 – User Manual, Quick Guide in PDF format online.
Manuals:
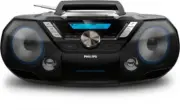
User Manual Philips AZB798T/12


Summary
1 EN Contents 1 Important 2 Hearing safety 2 2 Your CD Soundmachine 3 Introduction 3 What's in the box 3 Over view of the main unit 4 Over view of the remote control 5 3 Get started 7 Prepare the remote control 7 Connect power 7 Turn on 8 Turn off 8 4 Play 9 Play CD 9 Play from USB devices 9 Play fr...
2 EN 1 Important Warning • Never remove the casing of this apparatus. • Never lubricate any par t of this apparatus. • Never look into the laser beam inside this apparatus. • Never place this apparatus on other electrical equipment. • Keep this apparatus away from direct sunlight, naked ÁDPHVRUKHDW ...
3 EN 2 Your CD Soundmachine Introduction With this CD Soundmachine, you can: • listen to FM radio; • enjoy audio from tapes, USB device, Bluetooth devices, and other external audio devices; • program the play sequence of tracks. 7KHXQLWRIIHUV\RX'\QDPLF%DVV%RRVW'%% DQG'LJLWDO6RXQG&RQWURO'6&WR...
Quick Guide Philips AZB798T/12


Philips Manuals
-
 Philips 50PFL5907/F7
User Manual
Philips 50PFL5907/F7
User Manual
-
Philips 50PFL5907/F7
Quick Guide
-
 Philips 32PFL4508/F7
User Manual
Philips 32PFL4508/F7
User Manual
-
Philips 32PFL4508/F7
Quick Guide
-
 Philips 39PFL2908/F7
User Manual
Philips 39PFL2908/F7
User Manual
-
Philips 39PFL2908/F7
Quick Guide
-
Philips 55PFL5907/F7
User Manual
-
Philips 55PFL5907/F7
Quick Guide
-
Philips 46PFL5907/F7
User Manual
-
Philips 46PFL5907/F7
Quick Guide
-
Philips 40PFL4908/F7
User Manual
-
Philips 40PFL4908/F7
Quick Guide
-
Philips 40PFL4708/F7
User Manual
-
Philips 40PFL4708/F7
Quick Guide
-
Philips 40PFL1708/F7
User Manual
-
Philips 29PFL4908/F7
User Manual
-
Philips 29PFL4908/F7
Quick Guide
-
Philips 42PFL5907/F7
User Manual
-
Philips 42PFL5907/F7
Quick Guide
-
 Philips 32PFL5708/F7
User Manual
Philips 32PFL5708/F7
User Manual