Page 3 - CONTENTS
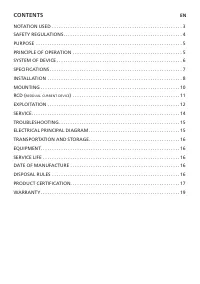
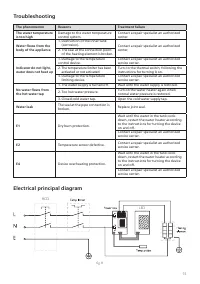
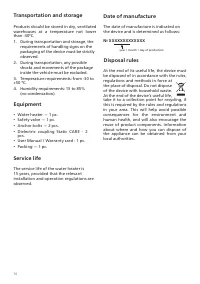
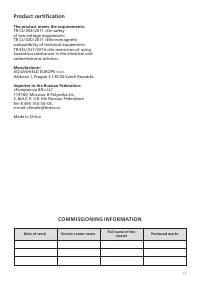
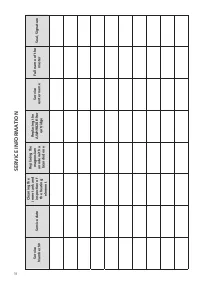
1 CONTENTS EN NOTATION USED 3SAFETY REGULATIONS 4PURPOSE 5PRINCIPLE OF OPERATION 5SYSTEM OF DEVICE 6SPECIFICATIONS 7INSTALLATION 8MOUNTING 10RCD ( residual current device ) 11 EXPLOITATION 12SERVICE 14TROUBLESHOOTING 15ELECTRICAL PRINCIPAL DIAGRAM 15TRANSPORTATION AND STORAGE 16EQUIPMENT 16SERVICE L...
Page 4 - СОДЕРЖАНИЕ
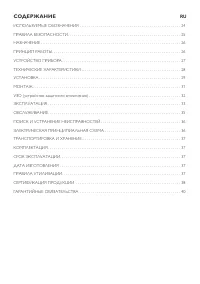
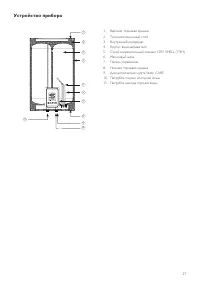
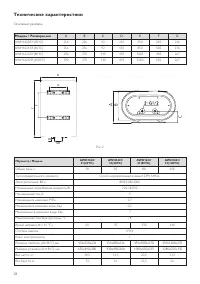
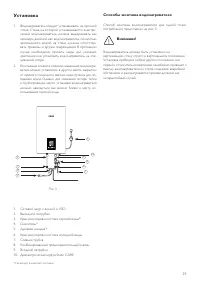
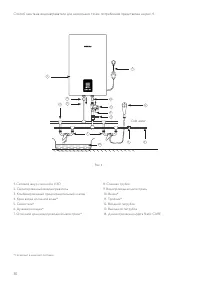
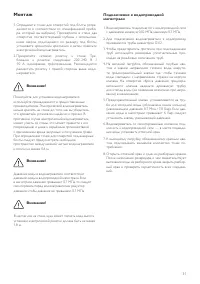
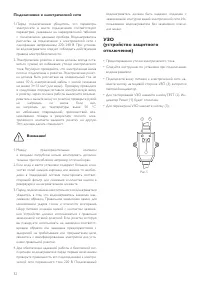
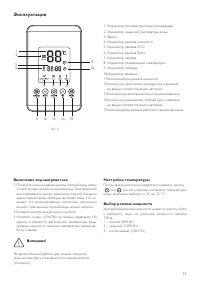
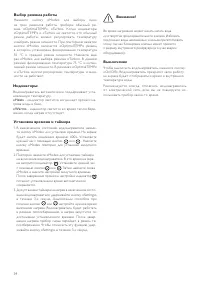
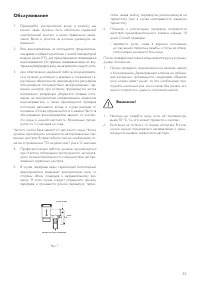
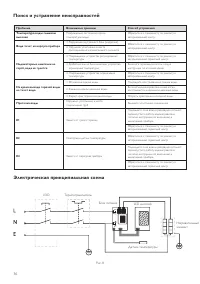
2 СОДЕРЖАНИЕ RU ИСПОЛЬЗУЕМЫЕ ОБОЗНАЧЕНИЯ 24 ПРАВИЛА БЕЗОПАСНОСТИ 25 НАЗНАЧЕНИЕ 26 ПРИНЦИП РАБОТЫ 26 УСТРОЙСТВО ПРИБОРА 27 ТЕХНИЧЕСКИЕ ХАРАКТЕРИСТИКИ 28 УСТАНОВКА 29 МОНТАЖ 31 УЗО (устройство защитного отключения ) 32 ЭКСПЛУАТАЦИЯ 33 ОБСЛУЖИВАНИЕ 35 ПОИСК И УСТРАНЕНИЕ НЕИСПРАВНОСТЕЙ 36 ЭЛЕКТРИЧЕСКАЯ ...
Page 5 - Notation used; of the product for different shipments,
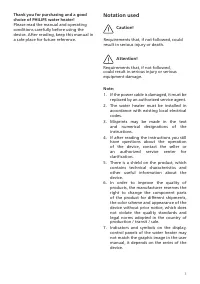
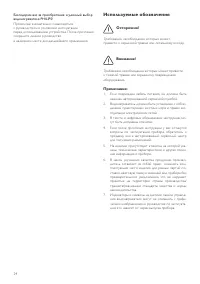
3 Thank you for purchasing and a good choice of PHILIPS water heater! Please read the manual and operating conditions carefully before using the device After reading, keep this manual in a safe place for future reference Requirements that, if not followed, could result in serious injury or death Not...
Page 6 - Safety regulations
4 • Read this instruction manual carefully before installation and operation If you have any questions, please contact the official dealer of the manufacturer. • Use the device only for the intended purpose specified in the user manual. • Do not store gasoline or other volatile or flammable liquids ...
Page 7 - flammable or combustible substances.
5 Electric water heater storage type is designed to heat cold water coming from the water supply The water heater is used for domestic purposes Tap water enters the water heater and is evenly distributed throughout the volume of the tank thanks to a specially installed jet divider This contributes t...
Page 8 - System of device
6 System of device 1 Upper end cap 2 Thermal insulation layer 3 Inner tank 4 Water heater housing 5 Dry heating element DRY SHELL (HE) 6 Magnesium anode 7 Control panel 8 Bottom end cap 9 Dielectric coupling Static CARE 10 Cold water inlet 11 Hot water outlet 2 4 5 6 3 1 8 9 11 10 7
Page 9 - Specifications; Main dimensions
7 Specifications Main dimensions Model / Dimensions, mm A B C D E F G AWH1620/51(30YC) 256 236 92 433 550 240 216 AWH1621/51(50YC) 256 236 92 433 850 500 216 AWH1622/51(80YC) 290 270 110 493 1005 450 267 AWH1623/51(100YC) 290 270 110 493 1200 550 267 Parameter / Model AWH1620/ 51(30YC) AWH1621/ 51(5...
Page 10 - Installation; when fully filled with water, and the; Water heater installation methods
8 * Not included in the scope of deliver y Installation 1 The water heater should be installed on a solid wall The wall on which the electric water heater is to be installed must be capable of supporting at least twice the weight of the water heater when fully filled with water, and the wall must be...
Page 12 - Water supply connection; Mounting
10 1 The water heater is connected to a water supply network with a pressure of at least 0 02 MPa, maximum 0 7 MPa 2 To connect the water heater to the water supply, pipes with a diameter of G1/2 are used 3 When connecting pipes, use rubber seals on the threaded pipe ends to prevent leakage 4 Screw ...
Page 13 - Electrical connection
11 Electrical connection 1 Do not mount additional devices, such as a shut-off valve, between the safety valve and the inlet pipe 2 If the water at the installation site contains a large amount of calcium, manganese or iron salts, then it is necessary to install an appropriate filter in the supply s...
Page 14 - Exploitation; Turning on the water heater
12 Exploitation Turning on the water heater 1 Open one of the hot water outlet valves, then open the cold water supply valve The electric water heater will begin to fill with water. When water flows freely from the hot water tap, this means that the water heater is completely filled with water and t...
Page 15 - Operating mode selection; «Heat»; Shutdown
13 Operating mode selection Press the «Mode» button to select one of the three operating modes of the device: normal mode, «OptimalTEMP», «Turbo». When the «OptimalTEMP» and «Turbo» indicators are off, this is the normal operation mode, you can adjust the temperature and select the power mode. Press...
Page 16 - If water does not flow, the valve is; Service; the thread, and then water should flow
14 лампочка - индика тор работы УЗО (1) кнопка TEST (2) кнопка перезапуска (3) отверстие сброса давления винт ручка слива fig 7 1 Never drain water if its temperature is above 50 °C, as this may cause burns 2 If water does not flow, the valve is damaged In this case, the water heater must not be use...
Page 17 - Troubleshooting; Electrical principal diagram
15 Troubleshooting The phenomenon Reasons Treatment failure The water temperature is too high Damage to the water temperature control system Contact a repair specialist an authorized center Water flows from the body of the appliance 1 Destruction of the inner tank (corrosion) Contact a repair specia...
Page 18 - Dielectric coupling Static CARE - 2; Disposal rules; No ХХХХХХХХХХХХХ
16 Transportation and storage Products should be stored in dry, ventilated warehouses at a temperature not lower than -30°C. 1 During transportation and storage, the requirements of handling signs on the packaging of the device must be strictly observed 2 During transportation, any possible shocks a...
Page 19 - Product certification; The product meets the requirements:; compatibility of technical equipment».; Importer in the Russian Federation:; «Kompaniya BIS» LLC; COMMISSIONING INFORMATION; Date of work
17 Product certification The product meets the requirements: TR CU 004/2011 «On safety of low-voltage equipment», TR CU 020/2011 «Electromagnetic compatibility of technical equipment». TR EEU 037/2016 «On restriction of using hazardous substances in the electrical and radioelectronic articles». Manu...
Page 20 - Number No
18 SER VIC E INF O RM AT IO N Service Number № Service date Cleaning the inner tank and inspection of the heating element Replacing the magnesium anode with a br anded one Replacing the AWH9820 filter cartridge Service center name Full name of the master Seal, Signatur e
Page 21 - WARRANTY
19 WARRANTY Model Serial number Date of manufacture Guarantee period Date of sale* Mounting date** Customer Salesman The organization that installs the equipment * date of signing the bill of lading ** date of signing of the Cer tificate of acceptance of equipment into operation
Page 26 - Используемые обозначения
24 Благодарим вас за приобретение и удачный выбор водонагревателя PHILIPS! Просим вас внимательно ознакомиться с руководством и условиями эксплуатации перед использованием устройства После прочтения сохраните данное руководство в надежном месте для дальнейшего применения Требования, несоблюдение кот...
Page 27 - Правила безопасности
25 • Внимательно прочитайте данное руководство по экс - плуатации перед установкой и эксплуатацией Если у вас возникнут вопросы, обращайтесь к официальному дилеру производителя • Используйте прибор только по назначению, указанно - му в руководстве по эксплуатации • Не храните бензин и другие летучие...
Page 29 - Устройство прибора
27 Устройство прибора 1 Верхняя торцевая крышка2 Теплоизоляционный слой3 Внутренний резервуар4 Корпус водонагревателя5 Сухой нагревательный элемент DRY SHELL (ТЭН)6 Магниевый анод7 Панель управления8 Нижняя торцевая крышка9 Диэлектрическая муфта Static CARE10 Патрубок подачи холодной воды11 Патрубок...
Page 30 - Технические характеристики
28 Технические характеристики Основные размеры Рис 2 Модель / Размеры, мм A B C D E F G AWH1620/51(30YC) 256 236 92 433 550 240 216 AWH1621/51(50YC) 256 236 92 433 850 500 216 AWH1622/51(80YC) 290 270 110 493 1005 450 267 AWH1623/51(100YC) 290 270 110 493 1200 550 267 , - * + ( ' ) , - * + ( ' ) Пар...
Page 31 - Установка; Способы монтажа водонагревателя
29 Установка 1 Водонагреватель следует устанавливать на прочной стене Стена, на которой устанавливается электри - ческий водонагреватель, должна выдерживать как минимум двойной вес водонагревателя, полностью заполненного водой, на стене должны отсутство - вать трещины и другие повреждения В противно...
Page 33 - Монтаж
31 1 Водонагреватель подключается к водопроводной сети с давлением минимум 0,02 МПа, максимум 0,7 МПа 2 Для подключения водонагревателя к водопроводу применяются трубы диаметром G1/2 3 Чтобы предотвратить протечки, при подсоединении труб используйте резиновые уплотнительные про - кладки на резьбовых...
Page 34 - Подключение к электрической сети; УЗО
32 Подключение к электрической сети Внимание! 1 Между предохранительным клапаном и входным патрубком нельзя монтировать дополни - тельные приспособления, например, отсечной кран 2 Если вода в месте установки содержит большое коли - чество солей кальция, марганца или железа, то необхо - димо в подвод...
Page 35 - Эксплуатация; Включение водонагревателя
33 Эксплуатация Включение водонагревателя 1 Откройте один из кранов выхода горячей воды, затем откройте кран подачи холодной воды Электрический водонагреватель начнёт заполняться водой Когда из крана горячей воды свободно вытекает вода, это оз - начает, что водонагреватель полностью заполнился водой...
Page 36 - Выключение
34 Во время нагревания может начать капать вода из отверстия предохранительного клапана Избежать подтекания воды невозможно и нельзя препятствовать этому, так как блокировка клапана может привести к разрыву внутреннего резервуара (в случае аварии оборудования) Внимание! Индикаторы: Водонагреватель а...
Page 37 - Обслуживание
35 лампочка - индика тор работы УЗО (1) кнопка TEST (2) кнопка перезапуска (3) отверстие сброса давления винт ручка слива Рис 7 1 Никогда не сливайте воду, если её температура выше 50 °С, т к это может привести к ожогам 2 Если вода не потечет, то клапан испорчен В этом случае нельзя пользоваться наг...
Page 40 - Сертификация продукции; Товар соответствует требованиям:; ИНФОРМАЦИЯ О ПРОВЕДЕНИИ
38 Сертификация продукции Товар соответствует требованиям: ТР ТС 004/2011 «О безопасности низковольтного оборудования» ТР ТС 020/2011 «Электромагнитная совместимость технических средств» ТР ЕАЭС 037/2016 «Об ограничении применения опасных веществ в изделиях электротехники и радиоэлектроники» Изготов...
Page 42 - ГАРАНТИЙНЫЕ ОБЯЗАТЕЛЬСТВА
40 ГАРАНТИЙНЫЕ ОБЯЗАТЕЛЬСТВА Модель Серийный номер Дата изготовления Срок гарантии Дата продажи* Дата монтажа** Покупатель Продавец Организация, осуществившая монтаж оборудования * дата подписания товарно-транспортной накладной ** дата подписания Акта приемки оборудования в эксплуатацию