Philips 49B2U6903CH/00 - Manuals
Philips 49B2U6903CH/00 – User Manual, Quick Guide in PDF format online.
Manuals:
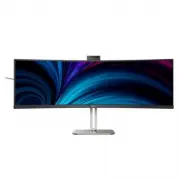
User Manual Philips 49B2U6903CH/00


Summary
Table of Contents 1. Important ����������������������������������������� 1 1.1 Safety precautions and maintenance ...................................1 1.2 Notational Descriptions ................3 1.3 Disposal of product and packing material .............................................4 2� Setting ...
1 1. Important This electronic user’s guide is intended for anyone who uses the Philips monitor. Take time to read this user manual before you use your monitor. It contains important information and notes regarding the operation of your monitor.The Philips guarantee applies provided that the product...
3 • Temperature: 0°C-40°C 32°F-104°F• Humidity: 20%-80% RH Important information for Burn-in/ Ghost image • Always activate a moving screen saver program when you leave your monitor unattended. Always activate a periodic screen refresh application if your monitor will display unchanging static conte...
Quick Guide Philips 49B2U6903CH/00

Philips Manuals
-
 Philips 50PFL5907/F7
User Manual
Philips 50PFL5907/F7
User Manual
-
Philips 50PFL5907/F7
Quick Guide
-
 Philips 39PFL2908/F7
User Manual
Philips 39PFL2908/F7
User Manual
-
Philips 39PFL2908/F7
Quick Guide
-
 Philips 55PFL5907/F7
Quick Guide
Philips 55PFL5907/F7
Quick Guide
-
Philips 40PFL4908/F7
User Manual
-
Philips 40PFL4908/F7
Quick Guide
-
 Philips 29PFL4908/F7
User Manual
Philips 29PFL4908/F7
User Manual
-
Philips 29PFL4908/F7
Quick Guide
-
Philips 42PFL5907/F7
Quick Guide
-
 Philips 32PFL5708/F7
Manual
Philips 32PFL5708/F7
Manual
-
Philips 39PFL5708/F7
Manual
-
 Philips 50PFL5708/F7
User Manual
Philips 50PFL5708/F7
User Manual
-
Philips 50PFL5708/F7
Manual
-
 Philips 20PT643R
User Manual
Philips 20PT643R
User Manual
-
 Philips 30PW862H
Manual
Philips 30PW862H
Manual
-
 Philips 30PW850H
Manual
Philips 30PW850H
Manual
-
 Philips HTS6500
User Manual
Philips HTS6500
User Manual
-
Philips HTS6500
Manual
-
 Philips 37PF9631D/37
User Manual
Philips 37PF9631D/37
User Manual