Page 2 - Contents
Contents 1 Home Screen 4 1.1 Home Screen and Channels 4 1.2 Open the Home Screen 4 1.3 Home Screen Update 4 2 Setting Up 6 2.1 Read Safety 6 2.2 TV Stand and Wall Mounting 6 2.3 Tips on Placement 6 2.4 Power Cable 6 2.5 Antenna Cable 6 2.6 Satellite Dish 7 3 Remote Control 8 3.1 Key Overview 8 3.2 I...
Page 4 - Home Screen; Home Screen and Channels
1 Home Screen 1.1 Home Screen and Channels The Home launcher To enjoy the benefits of your Android TV, connect theTV to the Internet. Press Home on your remote control to get your new Android Home screen. Like onyour Android smartphone or tablet, the Home screenis the centre of your TV. From here yo...
Page 5 - Home Screen Update
1.3 Home Screen Update You may receive the update notification from Googleand have new version of Home launcher installed.With the new Home launcher, you will have a newlook and features on TV’s Home screen. New highlights on your home screen With multiple tabs like Home , Discover , Apps and Search...
Page 6 - Setting Up; Read Safety; TV Stand and Wall Mounting; TV Stand; Wall Mounting; Tips on Placement; Power Cable
2 Setting Up 2.1 Read Safety Read the safety instructions first before you use theTV. To read the safety instructions, go to Safety and Care section on this Help manual for the information. 2.2 TV Stand and Wall Mounting TV Stand You can find the instructions for mounting the TVstand in the Quick St...
Page 7 - Antenna Cable; Satellite Dish
2.5 Antenna Cable Insert the antenna plug firmly intothe Antenna socket at the back of the TV. You can connect your own antenna or an antennasignal from an antenna distribution system. Use anIEC Coax 75 Ohm RF antenna connector. Use this antenna connection for antenna digital oranalogue input signal...
Page 8 - Remote Control; Key Overview; Top
3 Remote Control 3.1 Key Overview Top 1 - Power (Standby / On) To switch the TV on or back to Standby. 2 - MENU To open the TV Menu with typical TV functions. 3 - Amazon Prime Video To launch the Amazon Prime Video App. 4 - NETFLIX To launch the Netflix App with the TV switched on orfrom standby. • ...
Page 12 - Channel Installation; First Time to Install Channels; Satellite Installation
5 Channel Installation 5.1 First Time to Install Channels Install channels during the first TV installation On the first TV installation, you can follow on-screeninstructions to set the menu language, networkconnection, sign in Google account, select yourcountry and complete other basic settings for...
Page 13 - Antenna Installation
6 - Select the Satellite name to view and change the satellite settings. Once the satellite settings areconfirmed, press Back and select Next to start the scan. The satellite setting items include all information ofsatellites. • Satellite Status - The item is not allowed to modify when you select Pr...
Page 14 - Favourite Network Select; Cable Installation; Single RF Scan and Reception Quality
3 - Select Channels > Channel Scan and press OK . Alternatively, while watching a TV channel, you canperform the channel scan by... MENU > Navigation Keys up > Channels > Channel Favourite Network Select To select the favourite network... 1 - While watching TV, press MENU > TV options...
Page 15 - Update Channels
menu. * Note: You cannot skip the current watching channel. Channel Sort You can swap the position on the channel list foreach channel. To swap the channel number... 1 - While watching TV, press MENU > TV options > Settings > Channel > Channels and press OK . 2 - Select Channel Sort * an...
Page 17 - Channels; Channel Lists; About Channel Lists
6 Channels 6.1 About Channels and SwitchChannels To watch TV channels • Press SOURCES and select DTV to watch digital channels or ATV to watch analogue channels. • Alternatively, you can Press Home > Live TV and press OK to watch current TV source channels. If Live TV is not on your Apps row, you...
Page 18 - Watching channels; Tune to a Channel
Search for a Channel You can search for a channel to find it in a long list ofchannels. To search for a channel… 1 - Press OK to open the current channel list. 2 - Press Yellow key for Select More . 3 - Select Operation > Find and press OK to open a text field. You can use the remote control keyb...
Page 19 - Favourite Channels; About Favourite Channels
Programme Restrictions To prevent children from watching a programme thatmay not suitable for them, you can set a rating. Digital channels can have their programmes rated.When the rating of a programme is equal to or higherthan the rating you have set, the programme will belocked. To watch a locked ...
Page 20 - Edit a Favourites List - Analogue TV; Interactive TV; About iTV
* Note: Only one favourite channel list is availablewhen the installation country is UK. Edit a Favourites List - Analogue TV To add a channel to the favourite list… 1 - While watching Analogue TV, press OK to open the current channel list. 2 - Press Navigation keys up or down to select a channel. 3...
Page 21 - Connect Devices; About Connections; Connectivity Guide
7 Connect Devices 7.1 About Connections Connectivity Guide Always connect a device to the TV with the highestquality connection available. Also, use good qualitycables to ensure a good transfer of picture andsound. When you connect a device, the TV recognizes itstype and gives each device a correct ...
Page 23 - Home Theatre System - HTS; Connect with HDMI ARC; Connect with HDMI; Video Device; HDMI; Audio Device; Digital Audio Out - Optical
7.3 Home Theatre System - HTS Connect with HDMI ARC Use an HDMI cable to connect a Home TheatreSystem (HTS) to the TV. You can connect a PhilipsSoundbar or an HTS with a built-in disc player. HDMI ARC If your Home Theatre System has an HDMI ARCconnection, you can use HDMI ARC connection onthe TV to ...
Page 24 - Headphones; USB Flash Drive
Headphones You can connect a set of headphones to theheadphone connector on the back of the TV. Theconnection is a mini-jack 3.5mm. * Note: TV Speakers will be muted when theHeadphones are plugged in. 7.6 USB Flash Drive You can view photos or play your music and videosfrom a connected USB flash dri...
Page 25 - Bluetooth; What You Need
8 Bluetooth 8.1 What You Need You can connect a wireless device with Bluetooth® tothis TV – a wireless speaker or headphones*. To play the TV sound on a wireless speaker, you mustpair the wireless speaker with the TV. The TV can onlyplay the sound on one speaker at a time. Attention - Audio to Video...
Page 27 - Network and Internet; Home Network
9 Connect yourAndroid TV 9.1 Network and Internet Home Network To enjoy the full capabilities of your Philips AndroidTV, your TV must be connected to the Internet. Connect the TV to a home network with a high-speedInternet connection. You can connect your TVwirelessly or wired to your network router...
Page 28 - Network Settings; Google Account; Sign In
If the connection fails, you can check the DHCPsetting of the router. DHCP should be switched on. **To fulfill EMC regulations, use a shielded FTP Cat.5E Ethernet cable. Network Settings Proxy settings MENU > TV options > Settings > Network & internet > Proxy settings . Enter a valid...
Page 29 - Apps; About Apps; Movies and TV
10 Apps 10.1 About Apps You can find your favourite Apps on Apps row in the Home menu. Like apps on your smartphone or tablet, the apps onyour TV offer specific functions for an enriched TVexperience. Apps like YouTube, games, video storesor weather forecasts (a.o.). Apps can come from the Google Pl...
Page 30 - Start or Stop an App
exit/stop button. If the App is not on you Home screen, you can addvia the Apps page or by the Add app to favourites item on the Apps row. Some Google Play products and features aren't available in all countries. Find more informationon www.support.google.com/androidtv Google Play Store From the Goo...
Page 31 - Sources; Switch to a device
11 Sources 11.1 Switch to a device From the list of Sources, you can switch to any of theconnected devices. You can switch to a tuner towatch TV or switch to your connected devices towatch their programme, a digital receiver or a Blu-rayDisc player. To switch to a connected device… 1 - Press SOURCES...
Page 32 - Settings; Picture Settings; Picture Mode
12 Settings 12.1 Picture Settings Picture Mode Select a style MENU > TV options > Picture > Picture mode . For easy picture adjustment, you can select a presetpicture style. • User - The picture preferences you set during thefirst start up.• Standard - Most energy conscious setting - Factor...
Page 33 - Sound Settings; Sound Mode; Power Settings
Dynamic video contrast enhancement to adjust theLuma level of the picture signal automatically. If thePC Mode setting is On, this feature will be off.• Local Contrast ControlEnhance the contrast level in local area for the image.• Game ModeSwitch TV to Game mode to have fast response time.• PC ModeS...
Page 34 - Advanced Options; Audio
Power > Picture off . Select Picture off, the TV screen is switched off, toswitch the TV screen back on, press any key on theremote control. Set TV switch off timer Power > Switch off timer . Select Switch off timer, the TV switches offautomatically at a preset time to save energy. Thetimer wi...
Page 35 - Other settings; Device Preferences
You can reset your TV unique device identifier. A newidentifier will be created. This will replace your DeviceID with a new identifier. Freeview Play Settings MENU > TV options > Advanced Options > Freeview Play Settings . Switch the Freeview Play* on or off. Toenjoy Freeview Play , you nee...
Page 36 - Remote and Accessories; Reboot
Set TV switch on or off timer. Language Set or change the menu language. Keyboard Set the on-screen keyboard type. Inputs Rename the Inputs name and adjust the settings forConsumer Electronic Control (CEC). Power Set the timers for saving energy. Picture Adjust the picture settings. Sound Adjust the...
Page 37 - Menu Language
such as the video and audio are not synchronised orthe App is running slow, reboot your TV for betterperformance. 12.7 Factory Reset Reset all settings value to original TV settings Home > Settings > Device Preferences > About > Factory reset . This will erase all data from your device's...
Page 38 - Timer; Accessibility Settings
Timer Set TV switch on or off timer Home > Settings > Device Preferences > Timer . Set Power on time type or Power off type to On or Once . 12.9 Accessibility Settings The TV is prepared for use of the deaf, hard ofhearing, blind or partially sighted people. Accessibility for blind or parti...
Page 39 - View Photos
13 Videos, Photos,Music & Text 13.1 From a USB Connection You can view your photos or play your music andvideos from a connected USB flash drive. With the TV switched on, plug in a USB flash drive toone of the USB connections. 1 - Press Home , select MMP from the Apps list and press OK . 2 - Use...
Page 41 - TV Guide; TV Guide Data
14 TV Guide 14.1 TV Guide Data With the TV Guide you can view a list of the currentand scheduled TV programmes of your channels. Notall channels offer TV Guide information. The TV Guide receives information (data) frombroadcasters. The TV can collect TV Guideinformation for the channels that are ins...
Page 42 - Google Cast; Cast to Your TV
15 Smartphones andTablets 15.1 Google Cast What You Need If an app on your mobile device has Google Cast, youcan cast your app on this TV. On the mobile app, lookfor the Google Cast icon. You can use your mobiledevice to control what's on TV. Google Cast works onAndroid and iOS. Your mobile device m...
Page 43 - Freeview Play
16 Freeview Play To enjoy Freeview Play* , you need to connect your TV to Internet first. Freeview Play offers: • Watch TV programmes you missed from the lastseven days.• Watch live TV and on demand, all in one placewithout entering an app, you can search FreeviewPlay programmes in TV Guide.• Watch ...
Page 44 - Netflix
17 Netflix If you have a Netflix membership subscription, youcan enjoy Netflix on this TV. Your TV must beconnected to the Internet. In your region, Netflixmight only come available with future softwareupdates. To open Netflix, press NETFLIX on the remote control to open the Netflix App. You can ope...
Page 45 - Software; Update Software
18 Software 18.1 Update Software Local Updates You need a computer with an high-speed Internetconnection and a USB flash drive to upload thesoftware on the TV. Use a USB flash drive with at least2GB free space. Make sure that write protection isswitched off. 1 - Press Home > Settings > Device ...
Page 46 - Specifications; Environmental; European Energy Label; EPREL Registration Number; End of Use; UK Declaration of Conformity; Operating System
19 Specifications 19.1 Environmental European Energy Label The European Energy Label informs you on the energy efficiency class of this product. The greenerthe energy efficiency class of this product is, thelower the energy it consumes.On the label, you can find the energy efficiency class,the avera...
Page 48 - Help and Support; Register your TV; Troubleshooting; Switch On and Remote Control; PIN Code
20 Help and Support 20.1 Register your TV Register your TV and enjoy a range of benefitsincluding full support (including downloads),privileged access to information about new products,exclusive offers and discounts, the chance to winprizes and even participate in special surveys aboutnew releases. ...
Page 50 - Online Help
information on indoor range, transfer rate and otherfactors of signal quality.• Use a high-speed (broadband) Internet connectionfor your router. DHCP • If the connection fails, you can check the DHCP(Dynamic Host Configuration Protocol) setting of therouter. DHCP should be switched on. Bluetooth Una...
Page 51 - Safety and Care; Safety; Important; Stability Hazards
21 Safety and Care 21.1 Safety Important Read and understand all safety instructions beforeyou use the TV. If damage is caused by failure tofollow instructions, the warranty does not apply. Risk of Electric Shock or Fire • Never expose the TV to rain or water. Never placeliquid containers, such as v...
Page 52 - Screen Care
some lithium battery types).• Disposal of a battery into fire or a hot oven, ormechanically crushing or cutting of a battery, that canresult in an explosion.• Leaving a battery in an extremely high temperaturesurrounding environment that can result in anexplosion or the leakage of flammable liquid o...
Page 53 - Terms of Use
22 Terms of Use 2022 © TP Vision Europe B.V. All rights reserved. This product was brought to the market by TP VisionEurope B.V. or one of its affiliates, hereinafter referredto as TP Vision, which is the manufacturer of theproduct. TP Vision is the warrantor in relation to theTV with which this boo...
Page 54 - Copyrights; Kensington
23 Copyrights 23.1 HDMI HDMI The terms HDMI, HDMI High-Definition MultimediaInterface, and the HDMI Logo are trademarks orregistered trademarks of HDMI LicensingAdministrator, Inc. 23.2 Dolby ATMOS Dolby ATMOS Dolby, Dolby ATMOS, and the double-D symbol areregistered trademarks of Dolby Laboratories...
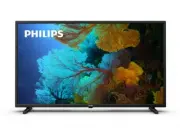


 Philips 50PFL5907/F7
User Manual
Philips 50PFL5907/F7
User Manual
 Philips 39PFL2908/F7
User Manual
Philips 39PFL2908/F7
User Manual
 Philips 55PFL5907/F7
Quick Guide
Philips 55PFL5907/F7
Quick Guide
 Philips 29PFL4908/F7
User Manual
Philips 29PFL4908/F7
User Manual
 Philips 32PFL5708/F7
Manual
Philips 32PFL5708/F7
Manual
 Philips 50PFL5708/F7
User Manual
Philips 50PFL5708/F7
User Manual
 Philips 20PT643R
User Manual
Philips 20PT643R
User Manual
 Philips 30PW862H
Manual
Philips 30PW862H
Manual
 Philips 30PW850H
Manual
Philips 30PW850H
Manual
 Philips HTS6500
User Manual
Philips HTS6500
User Manual
 Philips 37PF9631D/37
User Manual
Philips 37PF9631D/37
User Manual