Page 2 - Contents
Contents 1 What's new 4 1.1 New Browser Engine 4 2 Setting Up 5 2.1 Read Safety 5 2.2 TV Stand and Wall Mounting 5 2.3 Tips on Placement 5 2.4 Power Cable 5 2.5 Antenna Cable 6 2.6 Satellite Dish 6 3 Remote Control 7 3.1 Key Overview 7 3.2 Voice Search 8 3.3 IR Sensor 9 3.4 Batteries 9 3.5 Cleaning ...
Page 4 - New Browser Engine
1 What's new 1.1 New Browser Engine Your Smart TV apps will use a new engine with a newlook and better performance from now!You may be required to re-enter your user name andpassword when accessing some apps that use thenew engine. Internet browser application will also have a new lookand feel. You ...
Page 5 - Setting Up; Read Safety; TV Stand and Wall Mounting; TV Stand; Tips on Placement; Power Cable
2 Setting Up 2.1 Read Safety Read the safety instructions first before you use theTV. For more information, in Help , select Keywords and look up Safety Instructions . 2.2 TV Stand and Wall Mounting TV Stand You can find the instructions for mounting the TVstand in the Quick Start Guide that came wi...
Page 6 - Antenna Cable; Satellite Dish
Although this TV has a very low standby powerconsumption, unplug the power cable to save energyif you do not use the TV for a long period of time. 2.5 Antenna Cable Insert the antenna plug firmly intothe Antenna socket at the back of the TV. You can connect your own antenna or an antennasignal from ...
Page 7 - Remote Control; Key Overview; Top
3 Remote Control 3.1 Key Overview Top 1 - Standby / On To switch the TV on or back to Standby. 2 - Playback and Record • Play , to playback. • Pause , to pause playback • Stop , to stop playback • Rewind , to rewind • Fast forward , to go fast forward • Record , to start recording 3 - ...
Page 8 - Voice Search; Download App from Google play
1 - To open the Netflix App directly. With the TV switchedon or from standby. 2 - Volume To adjust the volume level. 3 - Number keys To select a channel directly. 4 - SUBTITLE To switch subtitles on, off or to show automatically. 5 - Channel To switch to the next or previous channel in thechan...
Page 10 - On or Standby; Keys on TV
4 Switching On andOff 4.1 On or Standby Make sure the TV is connected to the mains ACpower. Connect the supplied power cord to the AC in connector at the back of the TV. The indicator light at the bottom of the TV lights up. Switch on Press on the remote control to switch the TV on. Alternatively,...
Page 11 - Channels; Satellite Installation; About Installing Satellites
5 Channels 5.1 Satellite Installation About Installing Satellites Up to 4 Satellites You can install up to 4 satellites (4 LNBs) on this TV.Select the exact number of satellites you wish toinstall at the start of the installation. This will speed upthe installation. Unicable You can use a Unicable s...
Page 13 - Antenna/Cable Installation
Manual Installation Manual Installation is intended for expert users. You can use Manual Installation to quickly add newchannels from a satellite transponder. You need toknow the frequency and polarization of thetransponder. The TV will install all channels of thattransponder. If the transponder was...
Page 14 - Update or reinstall
Update or reinstall Update digital channels You can always start an channel update yourself. To start a channel update manually… 1 - Press , select All Settings and press OK . 2 - Select Channels > Antenna/Cable Installation . 3 - Enter your PIN code if necessary. 4 - Select Search for Channels...
Page 15 - Channel List Copy; Copy a Channel List
Frequency Scan Select the method of searching for channels. You canselect the faster Quick Scan method and use the predefined settings used by most cable operator inyour country. If this results in having no channels installed or ifsome channels are missing, you can select theextended Full Scan meth...
Page 16 - About Channels; Channel Lists
the Child Lock PIN code to copy the channel list. 6 - When copying is done, unplug the USB flash drive. 7 - Press (left) repeatedly if necessary, to close the menu. Now you can upload the copied channel list ontoanother Philips TV. Channel List version Check the current version of the channel list...
Page 17 - Watching channels
Open a Channel List Next to the list with all channels for each tuner,Antenna/Cable or Satellite tuner, you can select afiltered list or you can select one of the favourite listsyou created. To open the current channel list… 1 - Press , to switch to TV. 2 - Press LIST * or OK to open the current...
Page 19 - Favourite Channels
press OK. 3 - Select Programme Info and press OK , you can see progrmme information. 4 - Press BACK to close. Mono / Stereo You can switch the sound of an analogue channel toMono or Stereo. To switch to Mono or Stereo… 1 - Tune to an analoge channel. 2 - Press OPTIONS , and select Preferences ...
Page 22 - Filter a Channel List
5.5 Filter a Channel List You can filter a list with all channels. You can set thechannel list to show only TV channels or only Radiostations. For Antenna/Cable channels you can set thelist to show the Free-to-Air or the Scrambledchannels. When you have several satellites installed,you can filter th...
Page 23 - Connect Devices; About Connections; Connectivity Guide; HDMI Ports; HDMI Quality; HDMI ARC
6 Connect Devices 6.1 About Connections Connectivity Guide Always connect a device to the TV with the highestquality connection available. Also, use good qualitycables to ensure a good transfer of picture andsound. When you connect a device, the TV recognizes itstype and gives each device a correct ...
Page 24 - DVI to HDMI; Copy Protection
suited for your mobile device. In particular, with theHDMI connector for the TV on one side, the type ofconnector you need to connect to your smartphoneor tablet. MHL, Mobile High-Definition Link and the MHL Logoare trademarks or registered trademarks of the MHL,LLC. HDMI CEC - EasyLink An HDMI conn...
Page 25 - Scart; Smart Card
6.4 Scart SCART is a good quality connection. The SCART connection can be used for CVBS andRGB video signals but cannot be used for HighDefinition (HD) TV signals. The SCART connectioncombines video and audio signals. The SCARTconnection also supports NTSC playback. 6.5 Audio Out - Optical Audio Out...
Page 26 - Home Theatre System - HTS; Connect with HDMI ARC
Passwords and PIN codes For some CAMs, you must enter a PIN code to watchits channels. When you set the PIN code for the CAM,we recommend you to use the same code you areusing to unlock the TV. To set the PIN code for the CAM… 1 - Press SOURCES . 2 - Select the channel type you are using the CAM f...
Page 27 - Smartphones and Tablets
If the sound does not match the video on screen, youcan set a delay on most Home Theatre Systems witha disc player to match the sound with the video. Connect with HDMI Use an HDMI cable to connect a Home TheatreSystem (HTS) to the TV. You can connect a PhilipsSoundbar or an HTS with a built-in disc ...
Page 29 - Gamepad; Connect a Gamepad
6.13 Headphones You can connect a set of headphones tothe connection on the back of the TV. The connection is a mini-jack 3.5mm. You can adjust thevolume of the headphones separately. To adjust the volume… 1 - Press , select Headphone Volume . 2 - Press the arrows (up) or (down) to adjust th...
Page 30 - Problems; USB Hard Drive; What You Need; Installation; Formatting
Problems To solve possible interference with other wirelessdevices on TV… • Use a USB extension cord and move the nanoreceiver about 1 meter away from the TV.• Alternatively, you can use a powered USB hubconnected to the TV and plug in the nano receivers inthe USB hub. 6.16 USB Hard Drive What You N...
Page 31 - USB Keyboard; Connect; USB Flash Drive
6.17 USB Keyboard Connect Connect a USB keyboard (USB-HID type) to enter texton your TV. Use one of the USB connections to connect. Configure Install the keyboard To install the USB keyboard, switch on the TV andconnect the USB keyboard to one ofthe USB connections on the TV. When the TV detects the...
Page 32 - Computer
HDMI For best quality, use an HDMI cable to connect thecamcorder to the TV. Audio Video LR / Scart You can use an HDMI, YPbPr or SCART connection toconnect your camcorder. If your camcorder only hasVideo (CVBS) and Audio L/R output, use a VideoAudio L/R to SCART adapter (sold separately) toconnect t...
Page 33 - Network and Internet; Home Network
7 Connect yourAndroid TV 7.1 Network and Internet Home Network To enjoy the full capabilities of your Philips AndroidTV, your TV must be connected to the Internet. Connect the TV to a home network with a high-speedInternet connection. You can connect your TVwirelessly or wired to your network router...
Page 34 - Network Settings
Problems Wireless network not found or distorted • Microwave ovens, DECT phones or other Wi-Fi802.11b/g/n devices in your proximity might disturbthe wireless network.• Make sure that the firewalls in your network allowaccess to the TV's wireless connection.• If the wireless network does not work pro...
Page 35 - File Sharing; Google Account; Sign In
5 - Press (left) repeatedly if necessary, to close the menu. Switch on Wi-Fi connection You can switch on or off Wi-Fi connection on yourTV. To switch on Wi-Fi… 1 - Press , select All Settings and press OK . 2 - Select Wireless and Networks and press (right) to enter the menu. 3 - Select Wired...
Page 36 - Philips App Gallery; Philips Apps; Android Settings
did not sign in during the first TV installation, you canalways sign in later. To sign in after you did the TV installation… 1 - Press , select All Settings and press OK . 2 - Select Android Settings and press OK . 3 - Press (down) and select Personal > Add account and press OK . 4 - Press OK...
Page 37 - Home Menu; About the Home Menu
To open these settings… 1 - Press , select All Settings and press OK . 2 - Select Android Settings . 3 - Explore the different Android settings. 4 - Press BACK if necessary, to close the menu. 7.5 Home Menu About the Home Menu To enjoy the benefits of your Android TV, connect theTV to the Intern...
Page 38 - Apps; About Apps; Movies and TV
8 Apps 8.1 About Apps You can find all installed apps inthe Apps section of the Home menu. Like apps on your smartphone or tablet, the apps onyour TV offer specific functions for an enriched TVexperience. Apps like YouTube, games, video storesor weather forecasts (a.o.). You can use the Internetap...
Page 39 - Start or Stop an App; About App Locks
Games and press OK . 3 - Select a game to play or select a new game to install and press OK . 4 - When done, press BACK repeatedly or press EXIT or stop the app with its dedicated exit/stop button. The games you install will also appear in the row of Games in the Home menu Some Google Play pro...
Page 40 - Restricted Profile; Manage Apps
For more information, in Help , select Keywords and look up Google Play Store for more information. Lock 18+ rated apps You can lock 18+ rated apps from the Philips AppGallery. This setting controls the 18+ setting in thePhilips App Gallery Privacy Settings. To lock 18+ rated apps… 1 - Press , sel...
Page 41 - Storage
running, you can force it to stop or you can clear thecache data. You can uninstall apps you downloaded. 5 - Press BACK to go back one step or press EXIT to close the menu. If you are using a USB Hard Drive to store apps, youcan move the app from the USB Hard Drive to the TVmemory or vice versa....
Page 42 - Internet; Start Internet
9 Internet 9.1 Start Internet You can browse the Internet on your TV. You canview any Internet website but most of them are notprepared for a TV screen. • Some plug-ins (e.g. to view pages or videos) are notavailable on your TV.• You cannot send or download files.• Internet pages are shown one page ...
Page 43 - About TV Menu; Open TV Menu
10 TV Menu 10.1 About TV Menu If the TV cannot be connected with the Internet, youcan use the TV Menu as your Home menu. In the TV Menu, you will find every TV function. 10.2 Open TV Menu To open TV Menu and open an item… 1 - Press to open TV Menu. 2 - Select an item and press OK to open or start ...
Page 44 - Sources; Switch to a device
11 Sources 11.1 Switch to a device From the list of Sources, you can switch to any of theconnected devices. You can switch to a tuner towatch TV, open the content of a connected USB FlashDrive or see the recordings you made on a connectedUSB Hard Drive. You can switch to your connecteddevices to wat...
Page 46 - Settings; Frequent Settings; Picture Style
12 Settings 12.1 Frequent Settings The most frequently used settings are bundled inthe Frequent Settings menu. To open the menu… 1 - Press . 2 - Select the setting you want to adjust and press OK . 3 - Press BACK , if you do not want to change anything. 12.2 Picture Picture Style Select a Style ...
Page 47 - Advanced Picture Settings
2 - Select Picture and press (right) to enter the menu. 3 - Select Contrast and press (right). 4 - Press the arrows (up) or (down) to adjust the value. 5 - Press (left) repeatedly if necessary, to close the menu. Sharpness With Sharpness , you can adjust the level of sharpness in fine deta...
Page 49 - Sound; Sound Style
Picture Format Basic If the picture is not filling the whole screen, if blackbars are showing on the top or bottom or at bothsides, you can adjust the picture to fill the screencompletely. To select one of the basic settings to fill the screen… 1 - While watching a TV channel, press (if available ...
Page 52 - Ambilight Settings; Ambilight Style
1 - Press , select All Settings and press OK . 2 - Select Sound and press (right) to enter the menu. 3 - Select Advanced and press (right) to enter the menu. 4 - Select Speakers and press (right) to enter the menu. 5 - Select On , Off , or EasyLink Autostart . 6 - Press (left) repeatedly i...
Page 54 - Eco Settings; Energy Saving; General Settings
bulbs off. To switch the hue bulbs off… 1 - Press , select All Settings and press OK . 2 - Select Ambilight and press (right) to enter the menu. 3 - Select Ambilight+hue > Lounge Light+hue . 4 - Select Off . 5 - Press (left) repeatedly if necessary, to close the menu. View Configuration Wit...
Page 56 - Clock, Region and Language; Menu Language
Advanced Settings TV Guide The TV Guide receives information (data) frombroadcasters or from the Internet. In some regionsand for some channels, TV Guide information mightnot be available. The TV can collect TV Guideinformation for the channels that are installed on theTV. The TV cannot collect the ...
Page 57 - Language preferences
Language preferences Audio Language Settings Digital TV channels can broadcast audio with severalspoken languages for a programme. You can set apreferred primary and secondary audio language. Ifaudio in one of these languages is available, the TVwill switch to this audio. If none of the preferred au...
Page 58 - Clock
4 - Press OK again to jump to the subsequent occurence. 5 - To stop searching, press (up) until nothing is selected. Text from a connected device Some devices that receive TV channels can also offerText.To open Text from a connected device . . . 1 - Press , select the device and press OK . 2 - Wh...
Page 59 - Universal Access; Switch On
5 - Press (up) or (down) to adjust the value. 6 - Press (left) to go back one step. Time Zone For some countries, you can select specific timezones to set the TV clock correctly. To set the time zone (if available)… 1 - Press , select All Settings and press OK . 2 - Select Region and Languag...
Page 60 - Child Lock; Parental Rating
1 - Press , select All Settings and press OK . 2 - Select Universal Access and press (right) to enter the menu. 3 - Select Audio Description > Mixed Volume . 4 - Press the arrows (up) or (down) to adjust the value. 5 - Press (left) repeatedly if necessary, to close the menu. Audio Effec...
Page 64 - TV Guide; Open the TV Guide
14 TV Guide 14.1 What You Need With the TV Guide you can view a list of the currentand scheduled TV programmes of your channels.Depending on where the TV guide information (data)is coming from, analogue and digital channels or onlydigital channels are shown. Not all channels offer TVGuide informatio...
Page 66 - Recording
15 Recording andPause TV 15.1 Recording What You Need You can record a digital TV broadcast and watch itlater. To record a TV programme you need… • a connected USB Hard Drive formatted on this TV• digital TV channels installed on this TV• to receive channel information for the on screen TVGuide• a r...
Page 67 - Pause TV
set the time margin added to a recordingautomatically. You can add up to 45 minutes to arecording. 5 - Press BACK to close the menu. Manual Recording You can schedule a recording that is not linked to aTV programme. You set the tuner type, channel andthe start and end time yourself. To schedule a ...
Page 69 - Google Cast; Cast to Your TV; AirPlay
16 Smartphones andTablets 16.1 Philips TV Remote App The new Philips TV Remote App on your smartphone or tablet is your new TV buddy. With the TV Remote App, you master your mediaaround you. Send photos, music or videos to your bigTV screen or watch any of your TV channels live onyour tablet or phon...
Page 70 - Games; From the Home menu
17 Games 17.1 What You Need On this TV, you can play games… • from the App Gallery in the Home menu• from the Google Play Store in the Home menu• from a connected Game Console Games from the App Gallery or the Google Play Storemust be downloaded and installed on TV before youcan play them. Some game...
Page 71 - Ambilight; Follow Video; Ambilight Off
18 Ambilight 18.1 Ambilight Style Follow Video You can set Ambilight to follow the video or the audiodynamics of a TV programme. Alternatively, you canset Ambilight to show a preset colour style or you canswitch Ambilight off. If you select Follow Video , you can select one of the styles that follow...
Page 73 - Top Picks; About Top Picks; About Now on TV; TV on Demand; About TV on Demand; Video on Demand
19 Top Picks 19.1 About Top Picks With Top Picks your TV recommends… • current TV programmes in Now on TV • the latest rental videos in Video on Demand • online TV services (Catch Up TV) in TV on Demand To enjoy Top Picks, connect your TV to theInternet. Make sure you agree to the Terms of U...
Page 75 - Netflix
20 Netflix If you have a Netflix membership subscription, youcan enjoy Netflix on this TV. Your TV must beconnected to the Internet. In your region, Netflixmight only come available with future softwareupdates. To open Netflix, press to open the Netflix App. You can open Netflix immediately from a...
Page 76 - Multi View; Text and TV
21 Multi View 21.1 Text and TV You can watch a TV channel in the small screen ofMulti View when you're watching Text. To watch a TV channel while watching Text… 1 - Press Multi View * or press to open TV Menu . 2 - Select Multi View , and press OK . 3 - Select Multi View: On on screen. The chann...
Page 77 - Software; Update Software; Update from Internet; Software Version
22 Software 22.1 Update Software Update from Internet If the TV is connected to the Internet, you may receivea message to update the TV software. You need ahigh-speed (broadband) Internet connection. If youreceive this message, we recommend you to carry outthe update. With the message on screen, sel...
Page 78 - About Open Source License; Announcements
22.4 Open Source Software This television contains open source software. TPVision Europe B.V. hereby offers to deliver, uponrequest, a copy of the complete correspondingsource code for the copyrighted open sourcesoftware packages used in this product for which suchoffer is requested by the respectiv...
Page 79 - Specifications; Environmental; European Energy Label; Product Fiche; End of Use
23 Specifications 23.1 Environmental European Energy Label The European Energy Label informs you on the energy efficiency class of this product. The greenerthe energy efficiency class of this product is, thelower the energy it consumes.On the label, you can find the energy efficiency class,the avera...
Page 82 - Help and Support; Register your TV; Switch On and Remote Control
24 Help and Support 24.1 Register your TV Register your TV and enjoy a range of benefitsincluding full support (including downloads),privileged access to information about new products,exclusive offers and discounts, the chance to winprizes and even participate in special surveys aboutnew releases. ...
Page 84 - Online Help
Wi-Fi Wi-Fi network not found or distorted • Microwave ovens, DECT phones or other Wi-Fi802.11b/g/n devices in your proximity might disturbthe wireless network.• We recommend using the 5 GHz frequency(802.11ac) on your router when your TV is placed inthe neighborhood of many other wireless routers(a...
Page 85 - Safety and Care; Safety
25 Safety and Care 25.1 Safety Important Read and understand all safety instructions beforeyou use the TV. If damage is caused by failure tofollow instructions, the warranty does not apply. Risk of Electric Shock or Fire • Never expose the TV to rain or water. Never placeliquid containers, such as v...
Page 86 - Humidity; Screen Care
Humidity In rare occasions, depending on temperature andhumidity, minor condensation can occur on the insideof the TV glass front (on some models). To preventthis, do not expose the TV to direct sunlight, heat orextreme humidity. If condensation occurs, it willdisappear spontaneously while the TV is...
Page 87 - Terms of Use
26 Terms of Use 26.1 Terms of Use - TV 2016 © TP Vision Europe B.V. All rights reserved. This product was brought to the market by TP VisionEurope B.V. or one of its affiliates, hereinafter referredto as TP Vision, which is the manufacturer of theproduct. TP Vision is the warrantor in relation to th...
Page 88 - Copyrights; MHL
27 Copyrights 27.1 MHL MHL, Mobile High-Definition Link and the MHL Logoare trademarks or registered trademarks of the MHL,LLC. 27.2 HDMI The terms HDMI and HDMI High-DefinitionMultimedia Interface, and the HDMI Logo aretrademarks or registered trademarks of HDMILicensing LLC in the United States an...
Page 91 - Index
Index A Age Rating 18 Ambilight, Settings 52 Android Settings 36 Announcements 78 Antenna Connection 6 APP lock 39 APP, Voice Search 8 Apps 38 Audio Description 59 Auto Volume Levelling 50 B Bass 50 Batteries, Remote Control 9 Bluetooth 28 Bluetooth, Pairing 28 Bluetooth, Remove device 28 Bluetooth,...
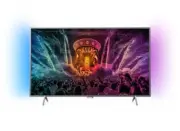


 Philips 50PFL5907/F7
User Manual
Philips 50PFL5907/F7
User Manual
 Philips 39PFL2908/F7
User Manual
Philips 39PFL2908/F7
User Manual
 Philips 55PFL5907/F7
Quick Guide
Philips 55PFL5907/F7
Quick Guide
 Philips 29PFL4908/F7
User Manual
Philips 29PFL4908/F7
User Manual
 Philips 32PFL5708/F7
Manual
Philips 32PFL5708/F7
Manual
 Philips 50PFL5708/F7
User Manual
Philips 50PFL5708/F7
User Manual
 Philips 20PT643R
User Manual
Philips 20PT643R
User Manual
 Philips 30PW862H
Manual
Philips 30PW862H
Manual
 Philips 30PW850H
Manual
Philips 30PW850H
Manual
 Philips HTS6500
User Manual
Philips HTS6500
User Manual
 Philips 37PF9631D/37
User Manual
Philips 37PF9631D/37
User Manual