Page 3 - Contents; Changing the order of stored channels .. 11; Setting up lists of favourite channels 17; Information about software downloads .. 18; Tuning analogue channels manually 24; Creating a pin code for parental control 29
1 Contents Introduction .......................................... 3 Safety ..................................................... 4 Television keys and connectors .......... 5 Getting started ..................................... 6 Mounting the TV on a wall ........................... 6 Connecting t...
Page 4 - Adjusting picture and sound settings 33
2 Locking the side controls (Child Lock) .................................................... 31 Enjoying Ambilight ............................. 32 Switching Ambilight on and off .................. 32 Confi guring Ambilight settings................... 32 Adjusting picture and sound settings 33 Pict...
Page 5 - Product features; Note: Available in selected models; Caring for the screen; Introduction; If you still have problems after reading; Product information
3 Product features Note: Available in selected models Caring for the screen Do not remove the protective sheet until you have completed the stand or wall mounting and connections. Use the soft cloth that is provided to clean the front of the TV. Do not use a cloth that is dripping with water. Do not...
Page 6 - Safety
4 Two people are required to lift and carry a TV that weighs more than 25 kilogrammes. Improper handling of the TV can cause serious injury. If you place the TV set on a surface, ensure the surface is level and that it can withstand the weight of the TV. Mounting the TV on the wall requires special ...
Page 7 - Television keys and connectors
5 . POWER To switch the TV on and off. To disconnect from the mains, remove the mains cord from the mains socket at the back of the TV or remove the mains plug from the wall socket. - PROGRAM + To select a channel. MENU To display or close menus. - VOLUME + To increase or decrease volume. Audio Vide...
Page 8 - To switch the TV on, press the; POWER; key on the side controls or; Getting started
6 Mounting the TV on a wall This TV is compatible with the VESA wall mounting standard. Please contact your local electronics retailer for a VESA compliant bracket to wall mount this TV. Insert the cables into the TV before you mount it on the wall. Ensure that there is a distance of at least 30 mm ...
Page 9 - Remote control functions
7 1 3 4 6 7 9 2 8 5 10 11 12 13 Standby To put the TV in standby mode or to switch the TV on. Alternatively, press to , P +/- , or . Teletext For information about using teletext, see Using teletext on page 37. Sound mode To change programmes to Mono from Stereo and Nicam Stereo . - For bilingual pr...
Page 11 - Language; Country; Switching the TV on for the first time
9 When you turn the TV on for the first time, the TV is in digital mode and the following menu appears on screen. English EspañolFrançaisItalianoMagyar Language Country Time Zone Service Scan Setup 11:28 Select your preferred language Selecting your language, country and time zone Press the Æ key to...
Page 12 - Analogue teletext is available in; Understanding the information banner
10 When you select a digital programme, an information banner is displayed at the top of the screen. The banner disappears after a few seconds. symbols programmestart and end time presetnumber TXT 2 11:00-11:45 10:38 BBC 2 Snooker Minutes left : 22 clock channel name programme title remaining timeof...
Page 13 - Adding new; Viewing or listening to digital TV and radio
11 Changing the order of stored channels You can change the order of the digital channels and radio stations that you have stored. If you are in analogue mode, switch to digital mode by pressing the key on the remote control. Press the key to display the setup menu. Press the ï key to select Install...
Page 14 - Reinstalling all channels; Installation; Setting up TV and radio channels
12 Adding new channels or stations to your list You can search for new TV channels or radio stations that have been launched by the broadcaster after the initial installation. If you are in analogue mode, switch to digital mode by pressing the key on the remote control. Press the key to display the ...
Page 15 - Installing digital channels manually; Testing your TV reception; Test
13 Installing digital channels manually You can manually scan services by keying in the frequency of your target channel. If you are in analogue mode, switch to digital mode by pressing the key on the remote control. Press the key to display the setup menu. Select Service setup , and press the Æ key...
Page 16 - Setting your language and location; Preferences; Submenu options for language; Subtitles for hearing impaired:; Selecting your language and location
14 You can select your preferred language, country and time zone. Setting your language and location If you are in analogue mode, switch to digital mode by pressing the key on the remote control. Press the key to display the setup menu. Press the ï key to select Preferences and press the Æ key. Audi...
Page 17 - Submenu options for location; To select the country where
15 Submenu options for location This list describes the submenu options for choosing your location. Country: To select the country where you are located. Time zone: To select the time zone where you are located. T he language can be selected independently from the country. Caution: If you select a w...
Page 18 - Opting to use a pin code; Changing your pin code; Using conditional access; Restricting access to digital channels
16 You can restrict access to digital channels. Opting to use a pin code If you are in analogue mode, switch to digital mode by pressing the key on the remote control. Press the key to display the setup menu. Press the ï key to select Access restrictions , and press the Æ key. Press the Æ key to ent...
Page 19 - Setting up lists of favourite channels
17 You can create up to four lists of your favourite TV channels and radio stations. If you are in analogue mode, switch to digital mode by pressing the key on the remote control. Press the key to display the setup menu. List 1 List 2 List 3List 4 Favourites Preferences Information Access restrictio...
Page 20 - Obtaining the software version; The; Downloading new software; Updating software automatically
18 You can install new software and obtain information about the current software version. Obtaining the software version If you are in analogue mode, switch to digital mode by pressing the key on the remote control. Press the key to display the setup menu. List 1 List 2 List 3List 4 Favourites Pref...
Page 21 - Using the Options menu
19 You can directly access your list of favourite channels and configure your language and subtitle options. If you are in analogue mode, switch to digital mode by pressing the key on the remote control. Display the options menu by pressing the white key. NonePhilips 1 Philips 2Philips 3Philips 4 Fa...
Page 22 - Today; Getting programme listings
20 You can access an Electronic Programme Guide to provide you with a quick and easy way to view a list of digital programmes. You can navigate through the guide and obtain detailed information about the programmes. If you are in analogue mode, switch to digital mode by pressing the key on the remot...
Page 23 - Í Æ Î ï; Analogue teletext in digital mode; Using teletext; Using digital teletext
21 Note: Digital teletext is available in the U.K. only The digital teletext services differs greatly from the analogue teletext service. The digital teletext service contains graphics and text that are laid out and controlled by the broadcaster. Some digital channels, offer a dedicated teletext ser...
Page 25 - Selecting your language and; Tuning analogue channels automatically
23 You can automatically search for and store analogue channels. If you are in digital mode, switch to analogue mode by pressing the key on the remote control. Press the key to display the Main menu. BrightnessColourContrastSharpnessColour TempMore Option... MainPictureSoundAmbilight*FeaturesInstall...
Page 26 - Tuning analogue channels manually
24 You can tune analogue channels manually, one at a time. If you are in digital mode, switch to analogue mode by pressing the key on the remote control. Press the key to display the Main menu. Auto Store Manual Store SortName Favourite Program MainPictureSoundAmbilight*FeaturesInstall * Available i...
Page 27 - Sort; the new; Renumbering channels
25 You can change the number that is allocated to a channel Press the key to display the Main menu. Press the Î or ï key to select Install , and press the Æ or u key to enter the menu. Auto StoreManual StoreSortNameFavourite Program MainPictureSoundAmbilight*FeaturesInstall * Available in selected m...
Page 28 - Name; Naming channels
26 You can assign a name to a channel number. Press the key to display the Main menu. Press the Î or ï key to select Install , and press the Æ or u key to enter the menu. Auto StoreManual StoreSort Name Favourite Program MainPictureSoundAmbilight*FeaturesInstall * Available in selected models Press ...
Page 29 - Favourite Program; Selecting your favourite channels
27 You can specify a list of favourite channels. When you use the P – / + keys of the remote control to access channels, only the favourite channels are accessed. To access channels that are not in your list of favourites, use the to numerical keys. Adding or removing channels from your list of favo...
Page 30 - During the last minute of a sleep; Setting the timer
28 You can programme the TV to switch to another channel at a specified time or to switch on at a specified time from standby mode. To operate the timer, you must leave the TV in standby mode. Press the key to display the Main menu. Press the Î or ï key to select Features , and press the Æ or u key ...
Page 31 - Accessing the Parental Control
29 You can block TV channels to prevent your children from watching them. Accessing the Parental Control menu Press the key to display the Main menu. Press the Î or ï key to select Features , and press the Æ or u key to enter the menu. TimerChild Lock Parental Control Auto HDMI MainPictureSoundAmbil...
Page 32 - Blocking or unblocking all channels
30 Press the Í or Æ key to block or unblock the selected channel. When a channel is blocked, a padlock symbol + appears besides the locked channel number. 001002 003 004005006007008 Parental ControlLock ProgramChange CodeClear AllLock All 109 Press the Í key to return to the previous menu. Press the...
Page 33 - On
31 You can lock the side controls of the TV to prevent children from changing channels. However, it does not prevent you or your children from changing channel by using the remote control. Press the key to display the Main menu. Press the Î or ï key to select Features , and press the Æ or u key to e...
Page 34 - Switching Ambilight on and off; Configuring Ambilight settings; Colour; Enjoying Ambilight
32 This section applies only to TVs equipped with the Ambilight feature. Switching Ambilight on and off Press the key to display the Main menu. Press the Î or ï key to select Ambilight , and press the Æ or u key to enter the menu. MainPictureSoundAmbilightFeaturesInstall AmbilightBrightnessModeColou...
Page 35 - Adjusting picture and sound settings
33 You can adjust the picture and sound settings. Press the key to display the Main menu. Press the Î or ï key to select Picture or Sound, and press the Æ or u key to enter the menu. PictureBrightnessColourContrastSharpnessColour TempMore options... 100 0 53 120HZ200HZ500HZ1200HZ3000HZ7500HZ12000HZ ...
Page 37 - Using Smart Picture and Smart Sound
35 Using Smart Picture You can toggle through a selection of predefined picture settings. Press the button to cycle through the settings. News Sports Game Personal or Movie The Personal setting is the setting that you create by using the Picture menu in the Main menu. This is the only Smart Picture ...
Page 38 - key to cycle; Widescreen; Note; Subtitle Zoom; Picture Formats
36 Pictures can be transmitted in various format. Toggle the key to cycle through the picture formats and select your preferred viewing format. Widescreen The picture is displayed in the original proportions of images transmitted in 16:9 format. Note : If you display a 4:3 picture in widescreen mode...
Page 41 - the; confirm the; Picture settings in HD mode; Using the TV in High Definition mode
39 Connecting HD equipment to your TV Connect the HDMI or DVI output of your HD equipment to any of the HDMI connectors of the TV. Use a HDMI to DVI cable or a HDMI to HDMI cable. Alternatively, you can connect the YPbPr output of your HD equipment to the Component Video Input of your TV. If you are...
Page 42 - Displaying in native 1080 mode; Î ï; Supported formats
40 PC HD FeaturesTimerChild LockParental ControlAuto HDMIMode Selection Press the Î or ï key to select HD. Press the Í key to return to the previous menu. Press the key to exit the menu. Displaying in native 1080 mode Note: Only TVs with the full HD 1080p can display in native 1080p mode. When you c...
Page 43 - Using Auto HDMI
41 Using Auto HDMI The first time you connect a device on an HDMI connection, the TV switches automatically to that HDMI channel. The TV does not switch automatically for subsequent HDMI connections. Switching Auto HDMI off Press the key to display the Main menu. Press the Î or ï key to select Featu...
Page 44 - Connecting a PC to your TV; Source List; Picture settings in PC mode; Picture settings in; Sound settings in PC mode; Configuring the TV in HD mode; Supported PC resolutions; Using the TV as a PC Monitor
42 You can use your TV as a PC monitor, by connecting the HDMI or DVI output of your PC to any of the HDMI connectors of the TV. Use an HDMI to DVI cable or an HDMI to HDMI cable. Connection through VGA is not supported. When you use an HDMI connector to connect your PC to the TV, you might have to ...
Page 45 - Troubleshooting
43 Below is a list of symptoms you may encounter with your TV. Before you call for service, make these simple checks. Troubleshooting Symptom Possible solutions No display on screen Check whether power cord is properly connected to the mains socket and to your TV. If there is still no power, disconn...
Page 47 - which can; Disposal of batteries; batteries according to; Power consumption; Environmental Information; Specifi cations and information are
45 Recycling The packaging of this product is intended to be recycled. Contact your local authorities for information about how to recycle the packaging. Disposal of your old product Your product is manufactured with high-quality materials and components which can be recycled and reused. When you se...
Page 48 - Information for users in the UK; Remove fuse cover and fuse.
46 Information for users in the UK (not applicable outside the UK) Positioning the TV For the best results, choose a position where light does not fall directly on the screen, and at some distance away from radiators or other sources of heat. Leave a space of at least 5 cm all around the TV for vent...
Page 52 - All rights reserved
© 2007 Koninklijke Philips N.V. All rights reserved Document order number: 3139 125 38891
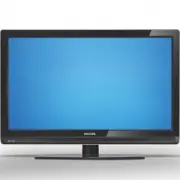


 Philips 50PFL5907/F7
User Manual
Philips 50PFL5907/F7
User Manual
 Philips 39PFL2908/F7
User Manual
Philips 39PFL2908/F7
User Manual
 Philips 55PFL5907/F7
Quick Guide
Philips 55PFL5907/F7
Quick Guide
 Philips 29PFL4908/F7
User Manual
Philips 29PFL4908/F7
User Manual
 Philips 32PFL5708/F7
Manual
Philips 32PFL5708/F7
Manual
 Philips 50PFL5708/F7
User Manual
Philips 50PFL5708/F7
User Manual
 Philips 20PT643R
User Manual
Philips 20PT643R
User Manual
 Philips 30PW862H
Manual
Philips 30PW862H
Manual
 Philips 30PW850H
Manual
Philips 30PW850H
Manual
 Philips HTS6500
User Manual
Philips HTS6500
User Manual
 Philips 37PF9631D/37
User Manual
Philips 37PF9631D/37
User Manual