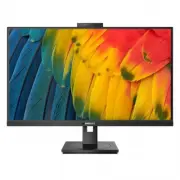
Page 2 - Table of Contents; Safety precautions and; Technical Specifications; Philips’ Flat Panel Displays Pixel
Table of Contents 1. Important ����������������������������������������� 1 1.1 Safety precautions and maintenance .....................................1 1.2 Notational Descriptions .................3 1.3 Disposal of product and packing material ..............................................4 2� Sett...
Page 5 - Notational Descriptions
3 • Temperature: 0-40°C 32-104°F• Humidity: 20-80% RH Important information for Burn-in/ Ghost image • Always activate a moving screen saver program when you leave your monitor unattended. Always activate a periodic screen refresh application if your monitor will display unchanging static content. U...
Page 6 - Waste Electrical and Electronic
4 1.3 Disposal of product and packing material Waste Electrical and Electronic Equipment-WEEE This marking on the product or on its packaging illustrates that, under European Directive 2012/19/EU governing used electrical and electronic appliances, this product may not be disposed of with normal hou...
Page 7 - Setting up the monitor; Package contents; Install the base
5 2. Setting up the monitor 2.1 Installation 1 Package contents Quick start Register your product and get support at www.philips.com/welcome 27B1U5601H Business Monitor 5000 Series Power * HDMI * DP *USB C-C *USB C-A *USB C-C/A *Different according to region. 2 Install the base 1. Place the monitor ...
Page 8 - Connecting to your PC; Connect to PC
6 3 Connecting to your PC 12 13 10 11 RJ45 Fast Charger USBC (PD15W) AUDIO OUT 3 4 5 6 7 9 8 1 2 USB hub (USB A-C) USB Type-A USB docking (USB C-C) a-1 a-2 c 1 2 a b USBC1 USB USB Type-C OR c 1 2 a b USBC1 USBC2 USB OR OR a-1 a-2 or 1 Power Switch 2 AC power input 3 HDMI input 4 DisplayPort input 5 ...
Page 10 - Operating the monitor
8 2.2 Operating the monitor 1 Description of the control buttons 5 4 3 2 1 7 6 1 Switch monitor’s power ON or OFF . 2 Access the OSD menu. Confirm the OSD adjustment. 3 Adjust the OSD menu. 4 User preference key. Customize your own preference function from OSD to become the “user key”. 5 Change the ...
Page 12 - Note; Resolution notification
10 Note If this display has "DPS" for ECO design, the default setting is "ON" mode: it makes the screen looks slightly dim; for optimum brightness, enter to the OSD to set "DPS" to "OFF" mode. Main menu Sub menu Picture OSD Setting USB Setting Setup Language Color Aud...
Page 13 - Physical Function; Tilt; Warning
11 6 Physical Function Tilt 30° -5° Swivel -180° +180° Height adjustment 150mm Pivot 90° -90° 0° 0° Warning • To avoid potential screen damage, such as panel peeling, ensure that the monitor does not tilt downward by more than -5 degrees. • Do not press the screen while adjusting the angle of the mo...
Page 16 - MultiClient Integrated KVM; How to enable MultiClient Integrated; HDMI or DP
14 2.4 MultiClient Integrated KVM 1 What is it? With MultiClient Integrated KVM switch, you can control two separate PCs with one monitor-keyboard-mouse set up. 2 How to enable MultiClient Integrated KVM With the built-in MultiClient Integrated KVM, Philips monitor allows to quickly switch your peri...
Page 17 - Noise Cancelling
15 2. Connect peripherals to the USB downstream port of this monitor. PC1 PC2 PC1/PC2 USB USBC2 USBC1 1 1 2 3. Enter to OSD menu. Go to KVM layer and select “Auto”, “USB C1” or “USB C2” to switch the control of peripherals from one device to another. Simply repeat this step for switching the control...
Page 18 - MultiView in OSD menu
16 2.6 MultiView 1 What is it? Multiview enables active dual connect and view so that you can work with multiple devices like PC and Notebook side-by-side simultaneously, making complex multi-tasking work a breeze. 2 Why do I need it? With the ultra high resolution Philips MultiView display, you can...
Page 19 - Inputs; MAIN; • PIP Position: When PIP is activated,
17 [PBP]: Picture by Picture Open up a sub-window side-by-side of another signal source. A (main) B When the sub source is not detected: A (main) B Note The black strip shows on the top and the bottom of the screen for the correct aspect ratio when in the PBP mode. If you expect to see full screen s...
Page 20 - Place the monitor face down on a
18 2.7 Remove the Base Assembly for VESA Mounting Before you start disassembling the monitor base, please follow the instructions below to avoid any possible damage or injury. 1. Place the monitor face down on a smooth surface. Pay attention not to scratch or damage the screen. 2. Place the monitor ...
Page 21 - Image Optimization; How to enable SmartImage?; Enhances text and dampens
19 3. Image Optimization 3.1 SmartImage What is it? SmartImage provides presets that optimize display for different types of content, dynamically adjusting brightness, contrast, color and sharpness in real time. Whether you're working with text applications, displaying images or watching a video, Ph...
Page 23 - How to enable LightSensor?
21 3.3 LightSensor What is it? Light Sensor is a unique and intelligent way of optimizing picture quality by measuring and analyzing the incoming signal to automatically adjust picture quality settings. Light Sensor uses a sensor to adjust the picture brightness depending on the room light condition...
Page 25 - DisplayPort multi-streaming over
23 5. Daisy-chain function DisplayPort Multi-Stream feature enables multiple monitor connections.This Philips display is equipped with DisplayPort interface and DisplayPort over USBC1 which enables daisy- chaining to multiple displays. Now you can daisy chain and use multiple monitors via a single c...
Page 28 - Landscape/Portrait mode
26 7. PowerSensor™ How does it work? • PowerSensor works on principle of transmission and reception of harmless “infrared” signals in order to detect user-presence. • When the user is in front of the monitor, the monitor operates normally, at the predetermined settings that the user has set- i.e. br...
Page 29 - How to adjust settings
27 from the monitor use the maximum detection signal for distances up to 120 cm or 47 inches. (Setting 4) • Since some dark colored clothing tends to absorb infrared signals even when the user is within 100 cm or 40 inches of the display, step up signal strength when wearing black or other dark clot...
Page 30 - Connectivity; x DisplayPor; BC: Power supply up to 1; Convenience
28 8. Technical Specifications Picture/Display Display Panel Type IPS Technology Backlight W-LED Panel Size 27" W ( 68.5 cm ) Aspect Ratio 16:9 Pixel Pitch 0.2331(W) x 0.2331(H) Contrast ratio(typical) 1000:1 Native Resolution 2560 x 1440 @ 60 Hz Maximum Resolution 2560 x 1440 @ 75 Hz Viewing An...
Page 31 - megapixel webcam with microphone and LED indictor; Stand
29 Built-in speaker 5 W x 2 Built-in Webcam 5.0 megapixel webcam with microphone and LED indictor (for Windows Hello) MultiView PIP/PBP mode, 2×devices OSD Languages English, German, Spanish, Greek, French, Italian, Hungarian, Dutch, Portuguese, Brasil Portuguese, Polish, Russian, Swedish, Finnish, ...
Page 35 - Philips’ Flat Panel Displays; subpixel; Pixels and Sub pixels
33 10. Customer care and warranty 10.1 Philips’ Flat Panel Displays Pixel Defect Policy Philips strives to deliver the highest quality products. We use some of the industry's most advanced manufacturing processes and practice stringent quality control. However, pixel or sub pixel defects on the TFT ...
Page 39 - FAQs; Troubleshooting; Common Problems
37 • Check to see if the display cable has bent pins. • Make sure the computer is turned on. Visible signs of smoke or sparks • Do not perform any troubleshooting steps • Disconnect the display from mains power source immediately for safety • Contact with Philips customer service representative imme...
Page 40 - * Functionality different according to; : Recommended resolution for this
38 “after-image” or “ghost image” symptoms that will not disappear and cannot be repaired. The damage mentioned above is not covered under your warranty. Image appears distorted. Text is fuzzy or blurred. • Set the PC’s display resolution to the same mode as display’s recommended screen native resol...
Page 42 - the Microsoft Windows Task
40 to connect the display to your Mac system. Please contact your Philips sales representative for more information. Q10: Are Philips LCD displays Plug-and- Play? Ans.: Yes, the displays are Plug-and- Play compatible with Windows 11/10/8.1/8/7 Q11: What is Image Sticking, or Image Burn-in, or After ...