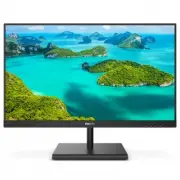
Page 2 - Table of Contents; Safety precautions and; Philips’ Flat Panel Monitors
Table of Contents 1. Important ....................................... 1 1.1 Safety precautions and maintenance .................................. 1 1.2 Notational Descriptions ............. 31.3 Disposal of product and packing material ........................................... 4 2. Setting up the...
Page 3 - Warnings
1 1. Important 1. Important This electronic user’s guide is intended for anyone who uses the Philips monitor. Take time to read this user's manual before you use your monitor. It contains important information and notes regarding the operation of your monitor. The Philips guarantee applies provided ...
Page 4 - Maintenance
2 1. Important monitor damage will not be covered under warranty. • Do not knock or drop the monitor during operation or transportation. • Excessive usage of monitor can cause eye discomfort, it’s better to take shorter breaks more often at your workstation than longer breaks and less often; for exa...
Page 5 - Notational Descriptions; Notes, Cautions and Warnings
3 1. Important period may cause “burn-in”, also known as “after-imaging” or “ghost imaging”, on your screen. • "Burn-in", "after-imaging", or "ghost imaging" is a well-known phenom-enon in LCD panel technology. In most cases, the “burn-in” or “after-imaging” or “ghost imaging...
Page 7 - Setting up the monitor; Package contents; Start; Start; Start; Note
5 2. Setting up the monitor 2. Setting up the monitor 2.1 Installation Package contents 245E1S * VGA * HDMI * DP AC/DC Adapter Register your product and get support at www.philips.com/welcome Quick Start E line 245E1S 245E1 AC/DC Adapter * VGA * HDMI * DP Register your product and get support at Qui...
Page 8 - Connecting to your PC
6 2. Setting up the monitor 2 1 3 245E1 1. Place the monitor face down on soft and smooth surface taking care to avoid scratching or damaging the screen. 2. (1) Hold the base stand with both hands and firmly insert the base stand into the base column. (2) Use a screwdriver to tighten the screw locat...
Page 9 - Connect to PC; Operating the monitor; Front view product description
7 2. Setting up the monitor Connect to PC 1. Connect the power cord to the back of the monitor firmly. 2. Turn off your computer and unplug its power cable. 3. Connect the monitor signal cable to the video connector on the back of your computer. 4. Plug the power cord of your computer and your monit...
Page 10 - Description of the On Screen Display; Resolution notification
8 2. Setting up the monitor Description of the On Screen Display What is On-Screen Display (OSD)? On-Screen Display (OSD) is a feature in all Philips LCD monitors. It allows an end user to adjust screen performance or select functions of the monitors directly through an on-screen instruction window....
Page 11 - Physical Function; Remove the Base Assembly; Place the display face down on a
9 2. Setting up the monitor Display of the native resolution alert can be switched off from setup in the OSD (On Screen Display) menu. Physical Function Tilt 245E1S/241E1S 20° -5° 245E1 20° -5° Warning • To avoid potential screen damage, such as panel peeling, ensure that the monitor does not tilt d...
Page 13 - Warning
11 2. Setting up the monitor contact manufacturer for wall-mount installation. 100mm 100mm -5° 0° 90° * Display design may differ from those illustrated. Warning • To avoid potential screen damage, such as panel peeling, ensure that the monitor does not tilt downward by more than -5 degrees. • Do no...
Page 14 - How to ena; Image Optimization
12 3. Image Optimization How to ena ble SmartImage? 245E1S 245E1 241E1S 1. Toggle to the left to launch the SmartImage on screen display. 2. Toggle to the up or down to select between FPS, Racing, RTS, Gamer 1, Gamer 2, LowBlue Mode and Off. 3. Image Optimization 3.1 SmartImage What is it? SmartImag...
Page 16 - Operating system
14 4. AMD FreeSync™ 4. AMD FreeSync TM PC gaming has long been an imperfect experience because GPUs and monitors update at different rates. Sometimes a GPU can render many new pictures during a single update of the monitor, and the monitor will show pieces of each picture as a single image. This is ...
Page 17 - Technical Specifications; Connectivity
15 5. Technical Specifications 5. Technical Specifications Picture/Display Monitor Panel Type IPS technology Backlight W-LED system Panel Size 23.8” W (60.5 cm) Aspect Ratio 16:9 Pixel Pitch 245E1S/245E1: 0.206 x 0.206 mm241E1S: 0.275 x 0.275 mm Contrast Ratio (typ.) 1,000:1 Optimum Resolution 245E1...
Page 18 - Stand
16 5. Technical Specifications Plug & Play Compatibility DDC/CI, Mac OSX, sRGB, Windows 10/8.1/8/7 Stand Tilt -5° / +20° Power (245E1S/245E1) Consumption AC Input Voltage at 100VAC , 50Hz AC Input Voltage at 115VAC , 60Hz AC Input Voltage at 230VAC , 50Hz Normal Operation 24.6 W (typ.) 24.7 W (t...
Page 19 - Weight
17 5. Technical Specifications Product with packaging (WxHxD) 245E1S: 586 x 462 x 127 mm245E1: 586 x 476 x 148 mm241E1S: 586 x 466 x 127 mm Weight Product with stand 245E1S: 3.24 kg245E1: 3.14 kg241E1S: 3.08 kg Product without stand 245E1S/245E1 : 2.56 kg 241E1S: 2.40 kg Product with packaging 245E1...
Page 20 - Maximum Resolution
18 5. Technical Specifications 5.1 Resolution & Preset Modes 245E1S/245E1 Maximum Resolution 1920x1080@60Hz(Analog) 2560x1440@75Hz(Digital) Recommended Resolution 1920x1080@60Hz(Analog) 2560x1440@60Hz(Digital) H. freq (kHz) Resolution V. freq (Hz) 31.47 720x400 70.09 31.47 640x480 59.94 35.00 64...
Page 22 - Customer care and warranty; Customer care and; subpixel; Pixels and Sub pixels
20 7. Customer care and warranty 7. Customer care and warranty 7.1 Philips’ Flat Panel Monitors Pixel Defect Policy Philips strives to deliver the highest quality products. We use some of the industry's most advanced manufacturing processes and practice stringent quality control. However, pixel or s...
Page 25 - Philips Customer Care Center number listed below.
23 7. Customer care and warranty 7.2 Customer Care & Warranty For warranty coverage information and additional support requirements valid for your region, please visit www.philips.com/support website for details or contact your local Philips Customer Care Center. For Warranty Period please refer...
Page 26 - FAQs; Common Problems
24 8. Troubleshooting & FAQs 8. Troubleshooting & FAQs 8.1 Troubleshooting This page deals with problems that can be corrected by a user. If the problem still persists after you have tried these solutions, contact Philips customer service representative. Common Problems No Picture (Power LED...