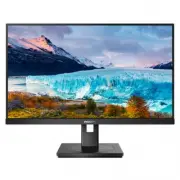
Page 2 - Table of Contents; Safety precautions and; Designs to prevent computer; Philips’ Flat Panel Monitors
Table of Contents 1. Important ...................................... 1 1.1 Safety precautions and maintenance ................................. 1 1.2 Notational Descriptions ............ 31.3 Disposal of product and packing material .......................................... 4 2. Setting up the mon...
Page 3 - Warnings
1 1. Important 1. Important This electronic user’s guide is intended for anyone who uses the Philips monitor. Take time to read this user manual before you use your monitor. It contains important information and notes regarding operating your monitor. The Philips guarantee applies provided the produ...
Page 4 - Maintenance
2 1. Important with fire enclosure in compliance with IEC 62368-1 or IEC 60950-1. • Excessive usage of monitor can cause eye discomfort, it’s better to take shorter breaks more often at your workstation than longer breaks and less often; for example a 5-10 minute break after 50-60-minute continuous ...
Page 5 - Notational Descriptions; Note
3 1. Important known as “after-imaging” or “ghost imaging”, on your screen. • “Burn-in”, “after-imaging”, or “ghost imaging” is a well-known phenomenon in LCD panel technology. In most cases, the “burn-in” or “after-imaging” or “ghost imaging” will disappear gradually over a period of time after the...
Page 7 - Setting up the monitor; Package contents; Start; *Different according to region
5 2. Setting up the monitor 2. Setting up the monitor 2.1 Installation Package contents *DP Power *HDMI *USB C-C/A *USB C-C *USB C-A Register your product and get support at www.philips.com/welcome Quick Start S Line 243S1 *Different according to region Install the base 1. Place the monitor face dow...
Page 10 - Operating the monitor; OK
8 2. Setting up the monitor 2.2 Operating the monitor Description of the control buttons 7 6 2 5 4 3 1 Switch monitor’s power ON and OFF. Access the OSD menu. Confirm the OSD adjustment.Adjust the OSD menu. Adjust the brightness level. Change the signal input source. Return to previous OSD level. Sm...
Page 11 - Resolution notification
9 2. Setting up the monitor The OSD MenuBelow is an overall view of the structure of the On-Screen Display. You can use this as a reference when you want to work your way around the different adjustments later on. Note If this display has "DPS" for ECO design, the default setting is "ON&...
Page 12 - Physical Function; Warning
10 2. Setting up the monitor Physical Function Tilt 25 ° -5 ° Swivel -180 ° +180 ° Height adjustment 130mm Pivot 90 ° -90 ° 0 ° 0 ° Warning • To avoid potential screen damage, such as panel peeling, ensure that the monitor does not tilt downward by more than -5 degrees. • Do not press the screen whi...
Page 13 - Remove the Base Assembly
11 2. Setting up the monitor 2.3 Remove the Base Assembly for VESA Mounting Before you start disassembling the monitor base, please follow the instructions below to avoid any possible damage or injury. 1. Extend the monitor base to its maximum height. 2. Place the monitor face down on a smooth surfa...
Page 14 - Image Optimization; How to enable SmartImage?
12 3. Image Optimization 3. Image Optimization 3.1 SmartImage What is it? SmartImage provides presets that optimize display for different types of content, dynamically adjusting brightness, contrast, color and sharpness in real time. Whether you're working with text applications, displaying images o...
Page 16 - DisplayPort multi-streaming over; DisplayPort multi-streaming over USB
14 4. Daisy-chain function 4. Daisy-chain function DisplayPort Multi-Stream feature enables multiple monitor connections. This Philips display is equipped with DisplayPort interface and DisplayPort over USB-C which enables daisy-chaining to multiple displays. Now you can daisy chain and use multiple...
Page 17 - Designs to prevent computer vision syndrome; Designs to prevent; Ideal working posture
15 5. Designs to prevent computer vision syndrome 5. Designs to prevent computer vision syndrome (CVS) Philips monitor is designed to prevent eye strain caused by prolonged computer use. Follow below instructions and use Philips monitor to efficiently reduce fatigue and maximum working productivity....
Page 18 - Technical Specifications; Connectivity
16 6.Technical Specifications 6. Technical Specifications Picture/Display Monitor Panel Type IPS Technology Backlight LED Panel Size 23.8" W (60.5 cm) Aspect Ratio 16:9 Pixel Pitch 0.275 (H) mm x 0.275 (V) mm Contrast Ratio(typ.) 1000:1 Optimum Resolution 1920 x 1080 @ 60 Hz Viewing Angle 178° (...
Page 19 - Stand
17 6.Technical Specifications Other Convenience VESA mount (100 x 100 mm), Kensington Lock Plug & Play Compatibility DDC/CI, sRGB, Windows 10/8.1/8/7, Mac OS X Stand Tilt -5 / +25 degree Swivel -180 / +180 degree Height adjustment 130 mm Pivot -90 / +90 degree Power Consumption AC Input Voltage ...
Page 20 - Environmental and energy
18 6.Technical Specifications Atmospheric pressure (operation) 700 to 1060hPa Temperature range (Non-operation) -20°C to 60°C Relative humidity(Non-operation) 10% to 90% Atmospheric pressure(Non-operation) 500 to 1060hPa Environmental and energy ROHS YES Packaging 100% recyclable Specific Substances...
Page 21 - Maximum Resolution
19 6.Technical Specifications 6.1 Resolution & Preset Modes Maximum Resolution 1920 x 1080 @ 75 Hz Recommended Resolution 1920 x 1080 @ 60 Hz H. freq (kHz) Resolution V. freq (Hz) 31.47 720 x 400 70.09 31.47 640 x 480 59.94 35.00 640 x 480 66.67 37.86 640 x 480 72.81 37.50 640 x 480 75.00 35.16 ...
Page 23 - Customer care and warranty; Customer care and; subpixel; Pixels and Sub pixels
21 8.Customer care and warranty 8. Customer care and warranty 8.1 Philips’ Flat Panel Monitors Pixel Defect Policy Philips strives to deliver the highest quality products. We use some of the industry's most advanced manufacturing processes and practice stringent quality control. However, pixel or su...
Page 24 - Proximity of Pixel Defects
22 8.Customer care and warranty Proximity of Pixel Defects Because pixel and sub pixels defects of the same type that are near to one another may be more noticeable, Philips also specifies tolerances for the proximity of pixel defects. Pixel Defect Tolerances In order to qualify for repair or replac...
Page 27 - FAQs; Common Problems
25 9.Troubleshooting & FAQs 9. Troubleshooting & FAQs 9.1 Troubleshooting This page deals with problems that can be corrected by a user. If the problem still persists after you have tried these solutions, contact Philips customer service representative. Common Problems No Picture (Power LED ...