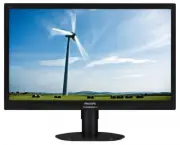
Page 2 - Table of Contents; Safety precautions and maintenance .1; Technical Specifications; Philips’ Flat Panel Monitors Pixel
Table of Contents 1. Important ............................................... 1 1.1 Safety precautions and maintenance .1 1.2 Notational Descriptions ............................3 1.3 Disposal of product and packing material ...............................................................4 2. Settin...
Page 3 - Warnings
1 1. Important 1. Important This electronic user’s guide is intended for anyone who uses the Philips monitor. Take time to read this user's manual before you use your monitor. It contains impor tant information and notes regarding the operation of your monitor.The Philips guarantee applies provided ...
Page 5 - Notational Descriptions; The following subsections describe notational
3 1. Important 1.2 Notational Descriptions The following subsections describe notational conventions used in this document. Notes, Cautions and Warnings Throughout this guide, blocks of text may be accompanied by an icon and printed in bold or italic type. These blocks contain notes, cautions or war...
Page 6 - Waste Electrical and Electronic Equipment-
4 1. Important 1.3 Disposal of product and packing material Waste Electrical and Electronic Equipment- WEEE This marking on the product or on its packaging illustrates that, under European Directive 2012/19/EU governing used electrical and electronic appliances, this product may not be disposed of w...
Page 7 - Setting up the monitor; Package contents; Install the base
5 2. Setting up the monitor 2. Setting up the monitor 2.1 Installation Package contents 241S4L * VGA * CD * DVI 241S4 © 20 16 K on ink lijk e P hilip s N .V. A ll rig hts rese rved . Un autho rized d uplicatio n is a violation of applicable laws. Mad e and prin ted in Ch ina . Ve rsi on Philips and ...
Page 8 - Place the monitor face down on a smooth
6 2. Setting up the monitor 241S4LC 1. Place the monitor face down on a smooth surface. Pay attention not to scratch or damage the screen. 2. Snap in the base in the VESA mount area. 3. Hold the base with both hands. (1) Gently attach the base to the column until the three guiding pins rest into the...
Page 9 - Connecting to your PC; Operating the monitor; Description of the control buttons
7 2. Setting up the monitor Connecting to your PC 241S4L 1 2 3 4 1 2 3 241S4LC 1 3 2 4 1 2 3 1 AC power input 2 DVI input 3 VGA input 4 Kensington anti-theft lock Connect to PC 1. Connect the power cord to the back of the monitor firmly. 2. Turn off your computer and unplug its power cable. 3. Conne...
Page 10 - Description of the On Screen Display
8 2. Setting up the monitor Description of the On Screen Display What is On-Screen Display (OSD)? On-Screen Display (OSD) is a feature in all Philips LCD monitors. It allows an end user to adjust screen performance or select functions of the monitors directly through an on-screen instruction window....
Page 11 - Resolution notification
9 2. Setting up the monitor Resolution notification This monitor is designed for optimal performance at its native resolution, 1920 × 1080 @ 60 Hz. When the monitor is powered on at a different resolution, an aler t is displayed on screen: Use 1920 × 1080 @ 60 Hz for best results.Display of the nati...
Page 12 - Remove the Base Assembly for; Before you star t disassembling the monitor
10 2. Setting up the monitor 2.3 Remove the Base Assembly for VESA Mounting Before you star t disassembling the monitor base, please follow the instructions below to avoid any possible damage or injur y. 241S4L 1. Place the monitor face down on a smooth surface. Pay attention not to scratch or damag...
Page 13 - While keeping the release button pressed,
11 2. Setting up the monitor 2. Remove the screws from hinge cover. 1 2 3. While keeping the release button pressed, tilt the base and slide it out. 1 2 4. Remove the base assembly. Note This monitor accepts a 100mm x 100mm VESA-Compliant mounting interface. 100mm 100mm
Page 14 - Image Optimization; How to enable SmartImage?
12 3. Image Optimization 3. Image Optimization 3.1 SmartImage What is it? Smar tImage provides presets that optimize display for different types of content, dynamically adjusting brightness, contrast, color and sharpness in real time. Whether you're working with text applications, displaying images ...
Page 15 - readable text for office work. By reducing your
13 3. Image Optimization profile delivers the best gaming experience for gamers. • Economy: Under this profile, brightness, contrast are adjusted and backlighting finetuned for just right display of ever yday office applications and lower power consumption. • Off: No optimization by Smar tImage. 3.2...
Page 16 - Technical Specifications; Connectivity
14 4. Technical Specifications 4. Technical Specifications Picture/Display Monitor Panel Type LCD Backlight LED Panel Size 24" W (61 cm) Aspect Ratio 16:9 Pixel Pitch 0.276 x 0.276 mm Smar tContrast 20,000,000:1 Optimum Resolution 1920 × 1080 @ 60Hz Viewing Angle 170° (H) / 160° (V) @ C/R > 1...
Page 17 - Dimensions
15 4. Technical Specifications Off <1.02 BTU/hr (typ.) <1.02 BTU/hr (typ.) <1.02 BTU/hr (typ.) On Mode (ECO mode) 10.7 W (typ.) Power LED indicator On mode: White, Standby/Sleep mode: White (blinking) Power Supply Built-in, 100-240VAC, 50-60Hz Dimensions Product with stand (WxHxD) 565 x 442...
Page 18 - Maximum Resolution
16 4. Technical Specifications 4.1 Resolution & Preset Modes Maximum Resolution 1920 × 1080 @ 60 Hz (analog input) 1920 × 1080 @ 60 Hz (digital input) Recommended Resolution 1920 × 1080 @ 60 Hz (digital input) H. freq (kHz) Resolution V. freq (Hz) 31.47 720x400 70.09 31.47 640x480 59.94 35.00 64...
Page 20 - Customer care and warranty; Customer care and; used in flat panel monitors are sometimes; subpixel; Pixels and Sub pixels
18 6. Customer care and warranty 6. Customer care and warranty 6.1 Philips’ Flat Panel Monitors Pixel Defect Policy Philips strives to deliver the highest quality products. We use some of the industr y's most advanced manufacturing processes and practice stringent quality control. However, pixel or ...
Page 21 - Note
19 6. Customer care and warranty Note A red or blue bright dot must be more than 50 percent brighter than neighboring dots while a green bright dot is 30 percent brighter than neighboring dots. Black Dot Defects Black dot defects appear as pixels or sub pixels that are always dark or 'off'. That is,...
Page 23 - Contact Information for China:; Country; Contact Information for CENTRAL AND EASTERN EUROPE region:
21 6. Customer care and warranty Greece Alman +30 00800 3122 1223 Free of charge Mon to Fri : 9am - 6pm Ireland Celestica +353 01 601 1161 Local call tariff Mon to Fri : 8am - 5pm Italy Anovo Italy +39 840 320 041 € 0.08 Mon to Fri : 9am - 6pm Luxembourg Ecare +352 26 84 30 00 Local call tariff Mon ...
Page 24 - Contact Information for LATIN AMERICA region:
22 6. Customer care and warranty Lithuania NA UAB Ser vicenet +370 37 400160(general) +370 7400088 (for Philips) Macedonia NA AMC +389 2 3125097 Moldova NA Comel +37322224035 Romania NA Skin +40 21 2101969 Russia NA CPS +7 (495) 645 6746 Serbia&Montenegro NA Kim Tec d.o.o. +381 11 20 70 684 Slov...
Page 25 - フィリップスモニター
23 6. Customer care and warranty Singapore Philips Singapore Pte Ltd (Philips Consumer Care Center) (65) 6882 3966 Mon.~Fri. 9:00am-6:00pm Sat. 9:00am-1:00pm Taiwan FETEC.CO 0800-231-099 Mon.~Fri. 09:00 - 18:00 Thailand Axis Computer System Co., Ltd. (662) 934-5498 Mon.~Fri. 8:30am~05:30pm South Afr...
Page 26 - AUTO button doesn't function
24 7. Troubleshooting & FAQs 7. Troubleshooting & FAQs 7.1 Troubleshooting This page deals with problems that can be corrected by a user. If the problem still persists after you have tried these solutions, contact Philips customer ser vice representative. Common Problems No Picture (Power LE...