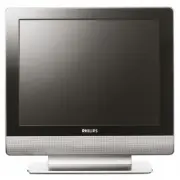
Page 2 - *Additional Benefits of; Congratulations on your purchase,
Know these safety symbols This “bolt of lightning” indicates uninsulated material within your unit may cause an electrical shock. For the safety of everyone in your household, please do not remove product covering. The “exclamation point” calls attention to features for which you should read the enc...
Page 3 - IMPORTANT SAFETY INSTRUCTIONS; Example of Antenna Grounding as
IMPORTANT SAFETY INSTRUCTIONS R EAD BEFORE OPERATING EQUIPMENT Read these instructions. Keep these instructions. Heed all warnings.Follow all instructions. Do not use this apparatus near water. Clean only with a dry cloth. Do not block any of the ventilation openings. Install in accordance with the ...
Page 4 - ADDITIONAL SAFET Y PREC AUTIONS
4 ADDITIONAL SAFET Y PREC AUTIONS • ENSURE that LCD T V stand is tightened properly to the set (See Quick Guide on the right way of tightening of the screw of the stand to the set . Improper tightening of screw may render the set unsafe. • If LCD T V is installed on the wall, installation should be ...
Page 5 - NOTE: This manual covers different versions
C ONTENTS NOTE: This manual covers different versions and models. Not all features described in this manual will match those of your LCD TV. This is normal and does not require you contacting your dealer or requesting service. Your new LCD TV and its packaging contain materials that can be recycled ...
Page 7 - then press the CURSOR RIGHT to confi rm.
6 H ELPFUL H INT F or English, French, Spanish or Por tuguese -speaking T V owners, an onscreen L ANGUAGE option is present . The L ANGUAGE control enables you to set the T V ’s onscreen menu to be shown in either English, French, Spanish or Por tuguese. Press the MENU button on the remote control t...
Page 8 - Press the Menu button to see the onscreen menu.; AUTO; function to set up the TV for the broadcast or cable channels; ELPFUL
7 T UNER M ODE C ONTROL T h e T u n e r M o d e a l l o w s y o u t o c h a n g e t h e L C D T V ’ s s i g n a l i n p u t t o C a b l e o r A i r ( a n t e n n a ) . I t ’ s i m p o r t a n t f o r t h e L C D T V t o k n o w i f y o u w a n t t o r e c e i v e c h a n n e l s f r o m a c a b l e ...
Page 9 - Press the MENU button on the remote
8 A UTO P ROGRAM (S ETTING U P C HANNELS ) Y our LCD T V can automatically set itself for local area (or cable T V ) channels. This makes it easy for you to selec t only the T V stations in your area by pressing the CH (+) or CH (- ) button. Press the MENU button on the remote control to show the on...
Page 11 - Press the CURSOR DOWN button to
10 F ACTORY R ESET Y our T V can be reset to the original fac tor y settings by per forming the following steps. Press the MENU button on the remote control to see the onscreen menu. Press the CURSOR DOWN button to highlight the INSTALL menu, then press CURSOR RIGHT to enter. Press the CURSOR DOWN b...
Page 12 - with the correc t and safe way of unfolding the base.
11 U NFOLD THE B ASE B efore proceed to install your new LCD T V, please follow the steps and diagrams as shown to familiarize yourself with the correc t and safe way of unfolding the base. Place the set facing down on a fl at surface and a protective sheet. Unfold the base following the direction as...
Page 13 - TV; Vesa Complied Mounting; Smart tips; with these instructions.
12 15” : 75X75 mm 20” : 100x100 mm I NSTALLING L CD TV ON T HE W ALL Vesa Complied Mounting The stand of your LCD TV complies with VESA standard, if you intend to install the LCD TV on the wall, please consult a professional technician for proper installing. The manufacture accepts no liability for ...
Page 14 - BATTERY INSTALLATION; TELEVISION AND REMOTE CONTROL
2 � - � � � � � � + - � � � � � � � � � � � � � � � � + � � � � � � � � � � Plug the DC adapter into the DC IN 16V jack on the LCD TV. Plug the power cable into an outlet. Press POWER to turn on the LCD TV. Press VOLUME + to increase the sound level, or press VOLUME – to decrease the sound level. Pr...
Page 15 - Press these buttons to highlight,
14 R EMOTE C ONTROL Status / Exit Button - Press to see the current channel number on the TV screen. Also press to clear the TV menu after control adjustments. SAP button Press to select a sound mode if available with the TV programming:Mono, Stereo, or SAP. Incredible Surround button- Adds greater ...
Page 16 - requiring sleep timing.; S L E E P 2 4 0 M I N .
Press the SLEEP button on the remote control to show the onscreen menu.. Press the SLEEP button repeatedly to select your requiring sleep timing. 12 S L E E P 2 4 0 M I N . S L E E P 1 5 M I N . � � S L E E P O F F IMPORTANT For the Timer to function, the set must not be turned off. Once the set is ...
Page 17 - TV P
16 Press the MENU button to see the onscreen menu. When PICTURE menu is highlighted, press the CURSOR RIGHT button to enter the PICTURE menu. Press the CURSOR DOWN to choose the item you want to adjust: Auto Picture, Brightness, Color, Contrast, Sharpness or Tint. Press the CURSOR RIGHT or CURSOR LE...
Page 18 - TV S; Press the MENU button to see the menu.; Auto Sound; : Please refer to page 18 for; Settings; and Balance of the sound.; Stereo; : Adds greater depth; AVL
17 TV S OUND M ENU C ONTROLS T o adjust your LCD T V Sound, selec t a channel and follow these steps. Press the MENU button to see the menu. Press the CURSOR DOWN button to highlight the AUDIO menu. Press the CURSOR RIGHT button to enter the AUDIO menu. Press the CURSOR DOWN button to choose the ite...
Page 20 - MOVIE RATINGS; - An Access Code must be
M O V I E R A T I N G G P G P G 1 3 R N C 1 7 X T V R A T I N G Y Y 7 G P G 1 4 M A O F F O N O F F O N 19 A UTO L OCK T he AUTO Lock feature is an integratedcircuit that receives and processes data sent by broadcasters, or other program providers, that contain program content advisories.When progra...
Page 22 - Press the MENU button to see the
21 A UTO L OCK P ROGRAM A f ter your personal access code has been set (see the previous page), you are ready to selec t the channels or inputs you want to block out or censor. Press the MENU button to see the onscreen menu. Press the CURSOR DOWN button to highlight the FEATURES menu, then press CUR...
Page 23 - Please use the Number buttons to enter your 4
22 A UTO L OCK - M OVIE R ATINGS T he AUTO Lock feature can block programming based on the Movie Industr y ratings. Once you’ve entered your access code and the AUTO Lock features are displayed on the screen: Press the MENU button to see the onscreen menu. Press the CURSOR DOWN button to highlight t...
Page 24 - Press the CURSOR DOWN button to
23 A UTO L OCK - TV R ATINGS T he AUTO Lock feature can block programming based on the T V Industr y ratings.Once you’ve entered your access code and the AUTO Lock features are displayed on the screen: Press the MENU button to see the onscreen menu. Press the CURSOR DOWN button to highlight the FEAT...
Page 25 - to toggle among the three screen format
24 Y ou can change the pic ture format size to match the t ype of program you are watching. Selec t the normal 4:3, E XPAND 4:3, or COMPRESS 16:9, or aspec t ratios. U SING T HE P ICTURE F ORMAT Press the MENU button to see the onscreen menu. Press the CURSOR DOWN button to highlight the FEATURES me...
Page 26 - While the SURF list message or the SURF channel; to the SURF list. This means that the external
25 S URF C ONTROL Press the CH+ or CH- button ( or the numbered buttons) to select a channel to add to the SURF list. Press the SURF button on the remote control. The onscreen display may read, SURF LIST EMPTY. The number of the current channel will be shown with ADD ? to the right. While the SURF l...
Page 27 - Press the CURSOR DOWN button to select
26 C LOSED C APTIONS C losed Captioning (CC) allows you to read the voice content of television programs on the T V screen. Designed to help the hearing impaired, this feature uses onscreen “tex t boxes” to show dialogue and conversations while the T V program is in progress. Press the MENU button t...
Page 28 - PC P; Color Temp
27 PC P ICTURE C ONTROLS T his T V can also be used as a PC Monitor. A PC video signal must be present or the T V will go into standby mode. The PC Picture controls allow you to adjust the picture. Press the MENU button on the remote control to see the onscreen menu. When the PICTURE menu is highlig...
Page 29 - PC A
28 PC A UDIO C ONTROLS T his T V can also be used as a PC Monitor. A PC video signal must be present or the T V will go into standby mode. The AUDIO controls allow you to adjust the sound. Press the MENU button on the remote control to show the onscreen menu. Press the CURSOR DOWN button to highligh...
Page 30 - Press the CURSOR RIGHT button to enter; SIZE; : Turn off and set the size of PIP. You; Video; : Select which corner of the
29 U SING PC PIP (P ICTURE I N P ICTURE ) F EATURE P IP ( Pic ture - in - Pic ture) feature allows you to call up a subscreen when you are using your T V as a monitor. Press the MENU button to see the onscreen menu. Press CURSOR DOWN button to highlight the FEATURES menu. Press the CURSOR RIGHT butt...
Page 31 - PC M; Resolution
30 15PF5120 (15” LCD T V ) S ETTING U P T HE PC M ODE (P ERSONAL C OMPUTER M ONITOR ) No Resolution Mode V. Frequency (Hz) H. Frequency (kHz) 1 640 x 480 VGA VESA 60 59.940 31.469 2 8 0 0 x 60 0 SVGA VESA 56 56.250 35.156 3 SVGA VESA 60 60. 317 37.897 4 1024 x 768 XGA VESA 60 60.0 04 48. 363 20PF512...
Page 33 - WARNING; concerning stationary images on the TV; TV Location; • Allow a free flow of air around the TV.; Cleaning
32 C ARE A ND C LEANING WARNING concerning stationary images on the TV Screen: Do not leave fixed images on the screen for extended periods of time. This can cause uneven aging of the LCD panel. Normal use of the TV should involve viewing of programs that have constantly moving or changing images. Do...
Page 35 - Reorient or relocate the receiving antenna.
34 F EDERAL C OMMUNICATIONS C OMMISSION (FCC) N OTICE (U.S. O NLY ) This equipment has been tested and found to comply with the limits for a Class B digital device, pursuant to Part 15 of the FCC Rules. These limits are designed to provide reasonable protection against harmful interference in a resi...
Page 36 - PHILIPS; warrants this product against defect in; EXCLUDED FROM WARR ANTY COVER AGE; Your warranty does not cover:; TO OBTAIN WARR ANTY SERVICE IN CANADA...
35 This warrant y gives you specif ic legal right s. You may have other right s which var y from state /province to state /province. Philips, P.O. Box 671539, Marietta, Ga. 30006-0026 P HILIPS L IMITED W ARRANTY One (1) Year Labor & One(1) Year Parts & One (1) Year Display Repair PHILIPS war...