Philips 19PFL5402D/27 - Manuals
Philips 19PFL5402D/27 – User Manual, Quick Guide in PDF format online.
Manuals:
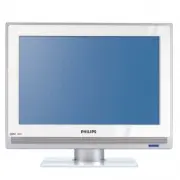
User Manual Philips 19PFL5402D/27


Summary
Cover & Connection 1 BestHDMI High-Definition Multimedia Interface provides an uncom-pressed, all-digital audio/video connection. HDMI provides the ultimate connection (Please use a certified HDMI cable.) BetterComponent Video input Provides superior picture quality by separating the green, blue...
Cover & Connection 5 5 6 DVD Player/Recorder/VCR to TV Lecteur DVD/Enregistreur DVD/Magnétoscope vers téléviseurDel reproductor/grabador de DVD/VCR al TV Composite Audio-video/Audio-Vidéo composite/Audio-Video compuesto Video Camera /Games Console to TV Caméra vidéo/Console de jeux vers télévise...
Cover & Connection 6 7 8 A AV 2 VIDEO IN S-VIDEO R L AUDIO IN VGA PC IN AUDIO HDMI Audio to Hi-fi System (Digital) Audio vers chaîne haute fidélité (Numérique) Audio al sistema Hi-fi (Digital) SPDIF PC connects to TV (as PC monitor) AV 1 Y Pb Pr R L AUDIO IN SPDIF OUT AV 2 VIDEO IN S-VIDEO R L A...
Quick Guide Philips 19PFL5402D/27


Philips Manuals
-
 Philips 50PFL5907/F7
User Manual
Philips 50PFL5907/F7
User Manual
-
Philips 50PFL5907/F7
Quick Guide
-
 Philips 32PFL4508/F7
User Manual
Philips 32PFL4508/F7
User Manual
-
Philips 32PFL4508/F7
Quick Guide
-
 Philips 39PFL2908/F7
User Manual
Philips 39PFL2908/F7
User Manual
-
Philips 39PFL2908/F7
Quick Guide
-
Philips 55PFL5907/F7
User Manual
-
Philips 55PFL5907/F7
Quick Guide
-
Philips 46PFL5907/F7
User Manual
-
Philips 46PFL5907/F7
Quick Guide
-
Philips 40PFL4908/F7
User Manual
-
Philips 40PFL4908/F7
Quick Guide
-
Philips 40PFL4708/F7
User Manual
-
Philips 40PFL4708/F7
Quick Guide
-
Philips 40PFL1708/F7
User Manual
-
Philips 29PFL4908/F7
User Manual
-
Philips 29PFL4908/F7
Quick Guide
-
Philips 42PFL5907/F7
User Manual
-
Philips 42PFL5907/F7
Quick Guide
-
 Philips 32PFL5708/F7
User Manual
Philips 32PFL5708/F7
User Manual