Page 2 - Safety; Safety Precautions
2 3 To reduce the risk of personal injury, electric shock or fire, please observe the following: n The following signals indicate the degree of harm and damage when the appliance is misused. WARNING : Indicates potential hazard that could result in serious injury or death. CAUTION: Indicates pot...
Page 3 - WARNING; Temperature sensor; CAUTION
4 5 CAUTION To avoid risk of electric shock, fire, burn, injury or property damage. l Do not use the appliance on following places. ● On uneven surfaces, on electrical appliances such as a refrigerator, on materials such as tablecloths or on carpets, etc. ● Places where it may be splashed with water...
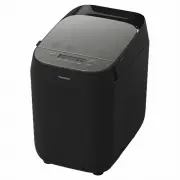
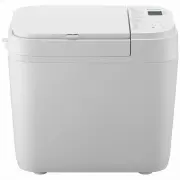
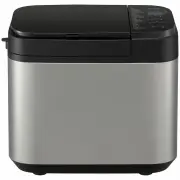
Page 4 - Main Unit; Main Unit & Accessories; Parts Names and Instructions
6 7 Parts Names and Instructions Bread pan and kneading blade are coated with ceramic to avoid stains and to make bread easier to remove. n To avoid damaging their ceramic coating, please follow the instructions below: ● Do not use hard or sharp utensils such as a knife or a fork when removing the b...
Page 5 - Bread Ingredients; Liquid ingredients; Time until the beep sounds from start (approximately); Dry / insoluble ingredients; Bread - making Ingredients
8 9 Bread Ingredients Flour Main ingredient of bread. The protein in flour forms gluten during kneading. Gluten provides structure and texture and helps the bread to rise.Use strong bread flour. Strong bread flour is milled from hard wheat and has a high content of protein which is necessary for the...
Page 6 - Function Availability and Time Required; Menu; Hard Crust Bake; Menu Charts and Baking Options; Before Use; Make sure to complete the preparation steps before setting menu.; Handling Instructions and Recipes
10 11 n Function Availability and Time Required ● The machine stop or move during process based on the operating program. ● Time required for each process will differ according to room temperature. Menu Number Menu Options Total Remark * 1 ( ) Processes Refer. Page Rest Size Crust Timer Knead Rise *...
Page 7 - Baking Bread; Bread Recipes
12 13 6 Press Menu ( ) button to select a menu. ● Choose the options for selected menu. (See P. 10) Bread size Crust colour Delay timer: set it to delay bread making process up to 13 hours. * Options of each menu also indicate by above icon in the recipe. 7 Press Start ( ) button to start the machin...
Page 8 - Baking Brioche
14 15 1 — 5 See P. GB11 of Preparations 6 Select menu 12, choose crust colour 7 Press button to start. ● Display shows the remaining time until the beep sounds. 8 After about 55 minutes. Open the lid when you hear the beep sound. Add the additional butter while is flashing (it will last about 5 minu...
Page 9 - Making Bread Dough; Before cleaning, unplug the machine and allow it to cool down.; Bread pan & Kneading blade
16 17 Wash with warm soapy water and dry well. ● Not dishwasher safe 1 — 5 See P. GB11 of Preparations 6 Select menu 16 7 Press button to start. ● Display shows the remaining time until the program is complete. 8 Press button and remove dough when machine beeps 8 times and End flashes. 9 Shape the f...
Page 10 - Troubleshooting; Problem; During or after cooking
18 19 Problem Cause and Action My bread does not rise well. The top of my bread is uneven. Your flour gluten quality is poor, or you have not used strong bread flour. (Gluten quality can vary depending on temperature, humidity, how the flour is stored, and the season of harvest.) ➝ Try another typ...
Page 11 - Specifications; Disposal of Old Equipment; Only for European Union and countries with recycling systems.
20 21 Problem Cause and Action When cooking jam, it has scorched or the kneading blade fixes and it doesn’t come off. The amount of the fruit is too little, or the amount of sugar is too much. ➝ Place the bread pan in the sink and half fill the bread pan with warm water. Leave the bread pan to soa...