Page 2 - Instructions; How to read the user manual; For this appliance
Instructions 4 1 Instructions 1.1 How to read the user manual This user manual uses the following reading conventions: 1. Use instruction sequence.• Single use instruction. 1.2 This user manual This user manual is an integral part of the appliance and must therefore be kept in its entirety and in an...
Page 3 - Manufacturer liability; Power voltage
Instructions 5 EN appliance. • Do not rest any weight or sit on the open door of the appliance. • Take care that no objects are stuck in the doors. • Do not use the appliance to heat rooms for any reason. • If cooking appliances are installed in motor vehicles (for example, camper vans, caravans etc...
Page 4 - Description; General description
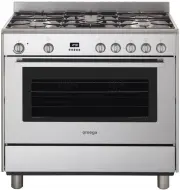
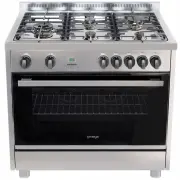
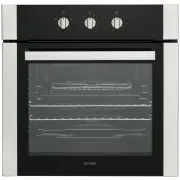
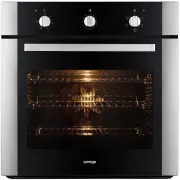
Description 6 2 Description 2.1 General description 1 Cooking hob 2 Control panel 3 Oven light 4 Seal 5 Door 6 Fan 7 Storage compartment Shelf for racks/trays support frames 2.2 Cooking hob AUX = AuxiliarySR = Semi-rapidR = RapidUR = Ultra rapid
Page 5 - to light the
Description 7 EN 2.3 Control panel Temperature knob (1) This knob allows you to select the cooking temperature. Turn the knob clockwise to the required value, between the minimum and maximum settings. Indicator light (2) The indicator light comes on to indicate that the oven is heating up. It turns ...
Page 6 - Available accessories; Rack
Description 8 2.5 Available accessories Rack Useful for holding cooking containers. Tray Useful for collecting fat from foods placed on the rack above and for cooking pies, pizzas and baked desserts. Handle Useful for removing hot racks and trays. Reduction pan stand Useful when using small cookware...
Page 7 - Use; Danger of burns
Use 9 EN 3 Use 3.1 Instructions High temperature inside the oven during use Danger of burns • Keep the oven door closed during cooking. • Protect your hands using heat resistant gloves when moving food inside the oven. • Do not touch the heating elements inside the oven. • Do not pour water directly...
Page 8 - Using the accessories; Racks and trays
Use 10 3.2 First use 1. Remove any protective film from the outside or inside of the appliance, including accessories. 2. Remove any labels (apart from the technical data plate) from the accessories and from the cooking compartments. 3. Remove all the accessories from the appliance and clean them (s...
Page 9 - Tray rack
Use 11 EN Tray rack The tray has to be inserted into the rack. In this way fat can be collected separately from the food which is being cooked. Reduction pan stands The reduction pan stands have to be placed on the hob grids. Make sure they are properly placed. 3.4 Using the hob All the appliance's ...
Page 10 - Practical tips for using the hob
Use 12 Correct position for flame-spreader crowns and burner caps Before lighting the hob burners, make sure that the flame-spreader crowns are correctly positioned in their housings with their respective burner caps. Make sure that the holes in the flame-spreader crowns are aligned with the igniter...
Page 11 - General advice
Use 13 EN 3.6 Cooking advice General advice • Use a fan-assisted function to achieve uniform cooking at several levels. • It is not possible to shorten cooking times by increasing the temperature (the food could be overcooked on the outside and undercooked on the inside). • Using more ovens at the s...
Page 12 - Advice for cooking desserts and biscuits
Use 14 Advice for cooking with the Grill and the Fan-assisted grill • Meat can be grilled even when it is put into the cold oven or into the preheated oven if you wish to change the effect of the cooking. • With the Fan-assisted grill function, we recommend that you preheat the oven before grilling....
Page 13 - Programming clock; Setting the time
Use 15 EN 3.7 Programming clock 1 Timer key 2 Cooking time key 3 End of cooking key 4 Value decrease key 5 Value increase key Setting the time On the first use, or after a power failure, the digits will be flashing on the appliance's display. 1. Press the and keys at the same time. The dot between t...
Page 14 - Programmed cooking
Use 16 Programmed cooking 1. Set the cooking time as described in the previous point “Timed cooking”. 2. Press key. The sum of the current time plus the pre-set cooking duration will appear on the display. 3. Use the or key to set the required minutes. 4. Wait approx. 5 seconds without pressing any ...
Page 15 - Cooking information table
Use 17 EN Cooking information table Food Weight (Kg) Function Runner position from the bottom Temperature (°C) Time (minutes) Lasagne 3 Static 1 or 2 220 - 230 40 - 50 Oven-baked pasta 2.5 Static 1 or 2 220 - 230 40 Roast veal 1 Circular 2 180 - 190 70 - 80 Pork loin 1 Circular 2 180 - 190 70 - 80 P...
Page 16 - Cleaning and maintenance; Cleaning the appliance; Ordinary daily cleaning
Cleaning and maintenance 18 4 Cleaning and maintenance 4.1 Instructions 4.2 Cleaning the appliance To keep the oven surfaces in good condition, they should be cleaned regularly after use. Let them cool first. Ordinary daily cleaning Always use only specific products that do not contain abrasives or ...
Page 17 - Igniters and thermocouples; Removing the door; Grasp the door on both sides with both
Cleaning and maintenance 19 EN Igniters and thermocouples For correct operation the igniters and thermocouples must always be perfectly clean. Check them frequently and clean them with a damp cloth if necessary. Remove any dry residues with a wooden toothpick or a needle. 4.3 Removing the door For e...
Page 18 - Cleaning the door glazing; Replacing the internal light bulb
Cleaning and maintenance 20 4.4 Cleaning the door glazing The glass in the door should always be kept thoroughly clean. Use absorbent kitchen roll. In case of stubborn dirt, wash with a damp sponge and an ordinary detergent. 4.5 Cleaning the inside of the oven For the best oven upkeep, clean it regu...
Page 19 - Installation; Clearances above and around domestic appliances; Requirements
Installation 21 EN 5 Installation 5.1 Clearances above and around domestic appliances This appliance must be installed by an authorised person in accordance with this instruction manual, AS/NZS 5601.1 – Gas installations (installation and pipe sizing), local gas fitting regulations, local electrical...
Page 20 - Additional requirements for
Installation 22 3. Additional requirements for Freestanding and Elevated Cooking Appliaces – (Measurements D & E) Where D, the distance from the periphery of the nearest burner to a horizontal combustible surface is less than 200 mm, then E shall be 10 mm or more, or the horizontal surface shall...
Page 21 - The regulator supplied must be fitted
Installation 23 EN connector at the inlet is recommended and the gas supply line to the appliance must be of adequate length to allow sufficient withdrawal of appliance for service or disconnection and be:1. annealed copper pipe or;2. flexible hose according to AS/NZ1869 & be at least Class “B”,...
Page 22 - Connection to liquid gas
Installation 24 Connection to liquid gas Use a pressure regulator and make the connection on the gas cylinder following the guidelines set out in the regulations in force.Make sure that the supply pressure complies with the values indicated in the paragraph “ Burner and nozzle characteristics table”...
Page 23 - Adaptation to different types of; Replacing nozzles
Installation 25 EN 5.3 Adaptation to different types of gas In case of operation with other types of gas, the burner nozzles must be changed and the minimum flame adjusted on the gas taps. Replacing nozzles 1. Remove the pan stands, burner caps and flame-spreader crowns to access the burner casings....
Page 24 - Burner and nozzle characteristics table; Electrical connection; General information
Installation 26 Burner and nozzle characteristics table 5.4 Electrical connection General information Check the grid characteristics against the data indicated on the plate.The identification plate bearing the technical data, serial number and brand name is visibly positioned on the appliance.A copy...
Page 25 - Heavy appliance
Installation 27 EN Connection with plug and socket Make sure that the plug and socket are of the same type. Avoid use of adapters and shunts as these could cause overheating and a risk of burns. Overall dimensions Location of gas and electrical connection points. 5.5 Positioning General information ...
Page 26 - B - Class 2 subclass 1; Assembling the skirt
Installation 28 Depending on the type of installation, this appliance belongs to classes: A - Class 1 (Free-standing appliance) B - Class 2 subclass 1 (Built-in appliance) C - Class 2 subclass 1 (Built-in appliance) Assembling the skirt The skirt must always be positioned and secured correctly on th...
Page 27 - Positioning and levelling the appliance
Installation 29 EN 2. Position the skirt above the worktop, taking care to align the pins ( C ) with the holes ( D ). 3. Secure the skirt to the worktop by tightening screws ( A ). Positioning and levelling the appliance After making the electrical and/or gas connections, level the appliance on the ...
Page 28 - Wall fixing
Installation 30 3. Use the same height on the wall to drill the holes for fastening the brackets. The distance between the centres of the holes is given in the diagram above. 4. Before tightening the brackets fully to the wall, check that the index on the brackets is at the same height as the index ...