Wa r r a n t y Duro is not responsible for incidental or consequential damages.Under no circumstances will Duro’s liability exceed the cost that you paid for the product.Some provinces/states do not allow the exclusion or limitation of incidental or consequential damages,so the above limitation or e...
Page 3 - Manufacture’s Limited Warranty; TO O B TA I N S E RV I C E U N D E R WA R R A N T Y:
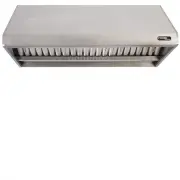
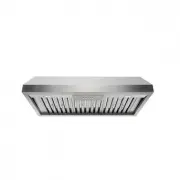
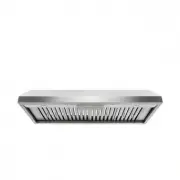
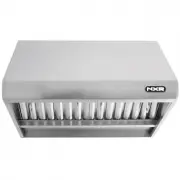
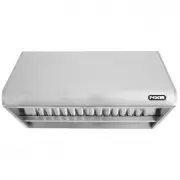
Thank you for purchasing your NXR range hood.We appreciate your business and we recommend that you read this entire user ’s manual before operating your new appliance for the first time. This manual contains instructions on how to properly install and set up your new range hood,as well as insights i...
Page 4 - M a i n t e n a n c e; CAUTION:DO NOT leave on too long as this may
WARNING If not installed,operated and maintained in accordance with the manufacturer ’s instructions,this product could expose you to fuel or fuel combustion substances,which can cause death or serious illness and which are known to the State of California to cause cancer,birth defects or other repr...
Page 5 - To reduce the risk of fire,electric shock,or injury to persons:
I m p o r t a n t S a f e t y N o t i c e R e a d a l l I n s t r u c t i o n s b e f o r e I n s t a l l i n g a n d o p e r a t i n g t h i s a p p l i a n c e The installation in this manual is intended for qualified installers, service technicians or persons with similar qualified background.Ins...
Page 6 - WA R N I N G; To reduce the risk of injury to persons in the event of a gas leaks:
I m p o r t a n t S a f e t y N o t i c e R e a d a l l I n s t r u c t i o n s b e f o r e I n s t a l l i n g a n d o p e r a t i n g t h i s a p p l i a n c e WA R N I N G Clean ventilation fan frequently.Always use appropriate cookware and utensils size.Always use cookware appropriate for the si...
Page 7 - P a r t s s u p p l i e d :; PROCESSOR BOARD
P a r t s s u p p l i e d : Ty p e AL e n g t h : 1 - 3 / 5 " Ty p e D ( F o r D u c t i n g Tr a n s i t i o n ) L e n g t h : 1 / 2 " ( Q t y : 2 P C S ) ( Q t y : 2 P C S ) ( Q t y : 3 P C S ) ( Q t y : 1 P C S ) Ty p e C ( F o r H o o d - m o u n t i n g B r a c k e t ) L e n g t h : 3 /...
Page 8 - H e i g h t & C l e a r a n c e
Ve n t i n g R e q u i re m e n t s &R e c o m m e n d a t i o n H e i g h t & C l e a r a n c e 6 34 - 4 / 5 " ( 88 4 ) for 48 " 1 9
Page 9 - C a l c u l a t i n g Ve n t S y s t e m L e n g t h
C a l c u l a t i n g Ve n t S y s t e m L e n g t h 7 47 -3 /4 "( 12 12 ) 47 -3 /4 "( 12 12 ) 1 8
Page 13 - I n s t a l l a t i o n; Installations; CAUTION:Make certain the range hood is secure before releasing!; R a n g e H o o d O p e r a t i o n s; Control Panel Layout and Buttons Configurations:
I n s t a l l a t i o n Installations (refer to Page 4 for parts): 1.Measure the distance between stove top and the bottom of range hood.A distance of “27 to 30" is recommended* Due to difference ceiling height configurations,recommended height may not be applicable. 1.You have two ways(Aor B)to...