Page 2 - TABLE OF CONTENTS; Table of Contents
2 TABLE OF CONTENTS Important Safeguards ............................ 3-4Save These Instructions ............................ 4Parts Description ....................................... 5Operating Instructions ........................... 6-9Care & Maintenance .................................. 9C...
Page 3 - Important Safeguards; IMPORTANT SAFEGUARDS; READ ALL INSTRUCTIONS; WARNING
3 Important Safeguards IMPORTANT SAFEGUARDS When using electrical units, basic safety precautions should always be followed including the following: 1. Do not touch hot surfaces. 2. To protect against electrical shock, do not immerse cord, plugs, or the unit in water or other liquid.3. Close supervi...
Page 4 - SAVE THESE INSTRUCTIONS; CAUTION
4 SAVE THESE INSTRUCTIONS 1. Do not place the unit close to flammable materials heating units or wet environments. 2. Height of ingredients placed in the Base Tray should comply with the directions listed under “Operation Instructions”. 3. Do not replace with other parts that are not designed specif...
Page 5 - PARTS DESCRIPTION; Parts Description
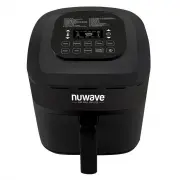
5 PARTS DESCRIPTION 1 2 3 Parts Description 1. Air FryerPart #: 36001 5. Baking Pot*Part #: 36207 9. Grill Pan*Part #: 36205 2. Base Tray Part #: 36201 6. Silicone Mat*Part #: 36208 Carrying Case*Part #: 36203 3. Fry Pan BasketPart #: 36202 7. Silicone Cup Cake Liners*Part #: 36209 (10 Pack) 4. Fry ...
Page 6 - Operating Instructions; OPERATING INSTRUCTIONS; Operation Preparation:
6 Operating Instructions Operation Functions On/Off Function: Press “On/Off ” button once to turn the unit on. The control panel should display “0” indicating that no cooking time or temperature has been selected and the unit is powered on. Press “On/Off ” button again to turn the unit off. Start/Pa...
Page 7 - Adjusting Temperature:
7 Once the NuWave Brio Digital Air Fryer reaches the set temperature, the control panel will display “Ready” and the NuWave Brio Digital Air Fryer will beep once. The NuWave Brio Digital Air Fryer will start a countdown of 5 minutes and the number “5” will start flashing. It will remain at this temp...
Page 8 - For Best Results
8 OPERATING INSTRUCTIONS (Continued) Operating Instructions For Best Results After you have selected your cooking time and temperature and you are ready to add your ingredients to the NuWave Brio Digital Air Fryer: Pull out the Base Tray and Fry Pan Basket from the NuWave Brio Digital Air Fryer. (Fi...
Page 10 - CARE & USE FOR ACCESSORIES
10 Care & Maintenance Care & Use: Before use, wash with mild soap and water or in a dishwasher, top rack only. This should never be cleaned with harsh abrasives nor cut with any sharp objects. • Do not use steel wool or any sharp objects that may scratch or damage the silicone.• Do not place...
Page 11 - GUIDE; Guide
11 GUIDE The following guide indicates the amount of weight, time and temperature for the various food types that are listed below. Guide Food Type Shake Time Temp Minutes Max Additional (minutes) (˚F) Food Amount (oz) Breakfast Frozen French Toast 12-16 390 25 Spray w/ Cooking Oil Hard Boiled Eggs ...
Page 12 - TROUBLESHOOTING GUIDE; Troubleshooting Guide
12 TROUBLESHOOTING GUIDE PROBLEM POSSIBLE CAUSE(S) RESOLUTION(S) The NuWave Brio Digital Air Fryer does not work. The appliance is not plugged in. Did not press On/OFF button. Fry Pan Basket is not in the NuWave Brio Digital Air Fryer. Insert the plug into an appropriate grounded power socket. Press...
Page 13 - Warranty; WARRANTY; The NuWave Brio Digital Air Fryer
13 Warranty WARRANTY The NuWave Brio Digital Air Fryer THE MANUFACTURER WARRANTS The NuWave Brio Digital Air Fryer including the Base Tray, Fry Pan Basket, Fry Pan Basket Net, Baking Pot, Silicone Mat, Silicone Cup Cake Liner, Reversible Rack and Grill Pan (optional) are to be free from manufacturer...