Page 2 - This instruction manual has been prepared for a variety of models.; “PLEASE READ THE INSTRUCTIONS BEFORE YOU INSTALL OR USE THIS; modern plants without harming the nature.; “Conforms with the AEEE Regulations.”
2 Dear Customer, Thank you very much for your preference for products. Our objective is to ensure that you enjoy this product, manufactured environmentally-friendly with a total sense of quality in a precise working environment at our modern facilities, most efficiently. We recommend you to read the...
Page 4 - An electric cooker hood should not be connected; to a flue or air duct used to drain smoke from devices; Packaging materials may be dangerous for children.
4 SAFETY INSTRUCTIONS1. The installation of the product should be carried out by authorized persons. Installation performed by unauthorized persons may result in poor performance, damage to the product or accidents. The product will not be covered by the warranty. 2. When an electric cooker hood is ...
Page 5 - or with lack of experience or technical knowledge. Do; Before the installation, maintenance and cleaning; deform and cause fire.; Do not leave boiling oil on the stove. Pots that; contain boiling oil may catch fire by itself.; Clean the oil trap aluminium filters regularly. Filters; pose risk of fire due to accumulated grease deposits on
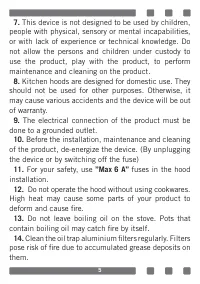
5 7. This device is not designed to be used by children, people with physical, sensory or mental incapabilities, or with lack of experience or technical knowledge. Do not allow the persons and children under custody to use the product, play with the product, to perform maintenance and cleaning on th...
Page 6 - Do not operate your product without filter, and do; Flammable foods must not be cooked under the; Risk of fire may occur if cleaning is not carried out; periodically and according to instructions.; CAUTION: Accessible sections may be hot when; used with cooking appliances.; WARNING: Failure to install screws or fixing
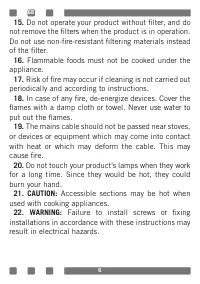
6 15. Do not operate your product without filter, and do not remove the filters when the product is in operation. Do not use non-fire-resistant filtering materials instead of the filter. 16. Flammable foods must not be cooked under the appliance. 17. Risk of fire may occur if cleaning is not carried...
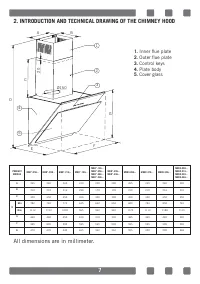
Page 7 - INTRODUCTION AND TECHNICAL DRAWING OF THE CHIMNEY HOOD; All dimensions are in millimeter.
7 2. INTRODUCTION AND TECHNICAL DRAWING OF THE CHIMNEY HOOD PRODUCT MODELS MDD*-056... MDD*-059... MDD*-216... MDD*-156... MDD*-146...MDD*-256...MDD*-266...MDD*-346... MDD*-236...MDD*-246... MDDX-286... MDDX-276... MDDX-306... MDDX-296...MDDX-316...MDDX-326...MDDX-366... A 265 265 265 310 200 200 26...
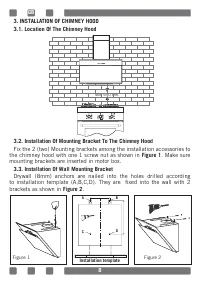
Page 8 - Installation Of Wall Mounting Bracket; Drywall (8mm) anchors are nailed into the holes drilled according; Figure 2; Installation template
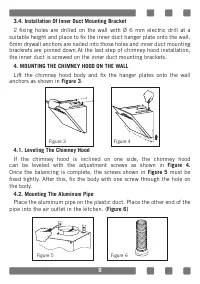
8 3. INSTALLATION OF CHIMNEY HOOD 3.1. Location Of The Chimney Hood 3.2. Installation Of Mounting Bracket To The Chimney HoodFix the 2 (two) Mounting brackets among the installation accessories to the chimney hood with one 1 screw nut as shown in Figure 1. Make sure mounting brackets are inserted in...
Page 11 - • Filter Warning: At the end of 100 hours of operation, the ‘C’ warning; speed - button for 5 seconds, the ‘E’ is viewed on the screen, the; • Automatic Shutdown:
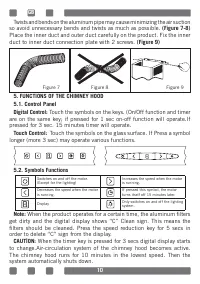
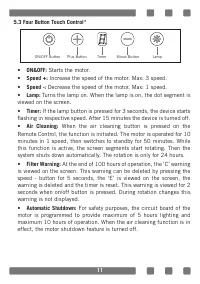
11 5.3 Four Button Touch Control* • ON&OFF: Starts the motor. • Speed +: Increase the speed of the motor. Max: 3 speed.• Speed -: Decrease the speed of the motor. Max: 1 speed.• Lamp: Turns the lamp on. When the lamp is on, the dot segment is viewed on the screen. • Timer: If the lamp button is ...
Page 12 - • Timer: To activate, press and hold the ON / OFF for 3 seconds.; activated engine LED flashes.; • Cycle Adjustment Button:; It increases the cycle speed while the engine
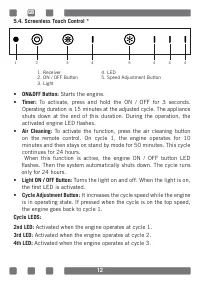
12 5.4. Screenless Touch Control * • ON&OFF Button: Starts the engine. • Timer: To activate, press and hold the ON / OFF for 3 seconds. Operating duration is 15 minutes at the adjusted cycle. The appliance shuts down at the end of this duration. During the operation, the activated engine LED fla...
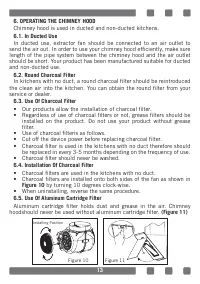
Page 13 - OPERATING THE CHIMNEY HOOD; Chimney hood is used in ducted and non-ducted kitchens.
13 6. OPERATING THE CHIMNEY HOOD Chimney hood is used in ducted and non-ducted kitchens. 6.1. In Ducted UseIn ducted use, extractor fan should be connected to an air outlet to send the air out. In order to use your chimney hood efficiently, make sure length of the pipe system between the chimney hoo...
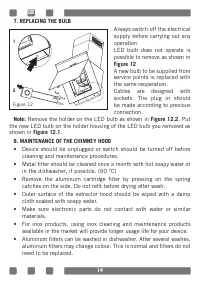
Page 14 - REPLACING THE BULB; Always switch off the electrical; MAINTENANCE OF THE CHIMNEY HOOD; • Device should be unplugged or switch should be turned off before
14 7. REPLACING THE BULB Always switch off the electrical supply before carrying out any operationLED bulb does not operate is possible to remove as shown in Figure 12A new bulb to be supplied from service points is replaced with the same reoperation.Cables are designed with sockets. The plug in sho...
Page 17 - УВАЖАЕМЫЙ ПОКУПАТЕЛЬ!; Благодарим Вас за то, что отдали предпочтение бытовой технике; ПРИМЕЧАНИЕ
технике Novex . 17 RU УВАЖАЕМЫЙ ПОКУПАТЕЛЬ! Благодарим Вас за то, что отдали предпочтение бытовой технике Novex . Novex – это качество, надёжность, и внимательное отношение к потребностям покупателей. Надеемся, что Вам понравится продукция нашей компании, и в будущем Вы отдадите предпочтение Данное ...
Page 19 - РЕКОМЕНДАЦИИ ПО ТЕХНИКЕ БЕЗОПАСНОСТИ
приборами, сжигающими газ или ва, помещение должно хорошо или воздуховоду, исполь от приборов, сжигающих топлива (кухонная плита, термосифон и т. д.) (Не относится пускающим воздух обратно в поме 19 РЕКОМЕНДАЦИИ ПО ТЕХНИКЕ БЕЗОПАСНОСТИ 1. Монтаж изделия должен выполняться авторизо- ванным сервисным ...
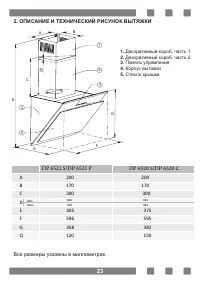
Page 23 - ОПИСАНИЕ И ТЕХНИЧЕСКИЙ РИСУНОК ВЫТЯЖКИ; Все размеры указаны в миллиметрах.
23 2. ОПИСАНИЕ И ТЕХНИЧЕСКИЙ РИСУНОК ВЫТЯЖКИ Все размеры указаны в миллиметрах. 1. Декоративный короб, часть 1 2. Декоративный короб, часть 2 3. Панель управления 4. Корпус вытяжки 5. Стекло крышки 1 2 3 4 5 F G E D C A B 20 A 200 200 B 170 170 C 300 300 D E 305 375 F 596 595 G 358 382 Q 120 150 Min...
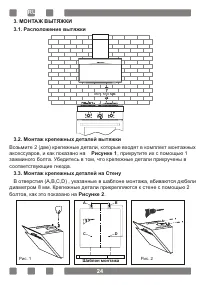
Page 24 - Рисунке 1; , прикрутите их с помощью 1; Рисунке 2
24 3. МОНТАЖ ВЫТЯЖКИ 3.1. Расположение вытяжки 3.2. Монтаж крепежных деталей вытяжки Возьмите 2 (две) крепежные детали, которые входят в комплект монтажных аксессуаров, и как показано на Рисунке 1 , прикрутите их с помощью 1 зажминого болта. Убедитесь в том, что крепежные детали прикручены в соответ...
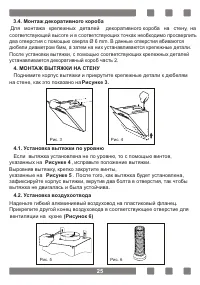
Page 25 - МОНТАЖ ВЫТЯЖКИ НА СТЕНУ; Если вытяжка установлена не по уровню, то с помощью винтов,; Рисунке 4
вентиляции на кухне 25 3.4. Монтаж декоративного короба Для монтажа крепежных деталей декоративного короба на стену, на соответствующей высоте и в соответствующих точках необходимо просверлить два отверстия с помощью сверла Ø 6 mm. В данные отверстия вбиваются дюбели диаметром 6мм, а затем на них ус...
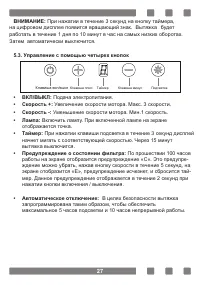
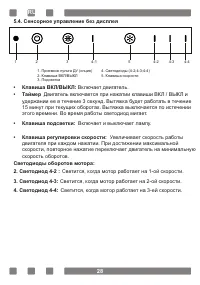
Page 28 - Таймер; Двигатель включается при нажатии клавиши ВКЛ / ВЫКЛ и; Клавиша регулировки скорости:; Увеличивает скорость работы; Светодиоды оборотов мотора:
28 5.4. Сенсорное управление без дисплея • Клавиша ВКЛ/ВЫКЛ: Включает двигатель. • Таймер Двигатель включается при нажатии клавиши ВКЛ / ВЫКЛ и удержании ее в течение 3 секунд. Вытяжка будет работать в течение 15 минут при текущих оборотах. Вытяжка выключается по истечении этого времени. Во время ра...
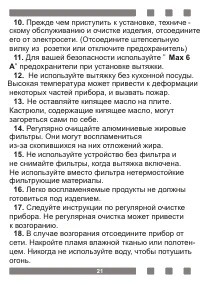
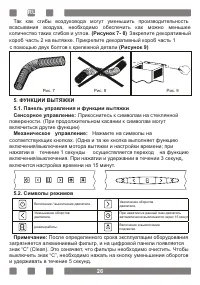
Page 30 - Применение алюминиевого жирового фильтра; Алюминиевый жировой фильтр задерживает пыль и жир. Вытяжка ни
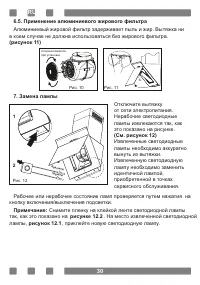
30 6.5. Применение алюминиевого жирового фильтра Алюминиевый жировой фильтр задерживает пыль и жир. Вытяжка ни в коем случае не должна использоваться без жирового фильтра. (рисунок 11) 7. Замена лампы Отключите вытяжку от сети электропитания.Нерабочие светодиодные лампы извлекаются так, как это пока...
Page 31 - Будьте осторожны при работе вытяжки с воздухово-; Для эффективной работы вытяжки:; количество изгибов воздуховода.
31 8. Техническое обслуживание и очистка. • Перед техническим обслуживанием и чисткой вытяжки необходимо вынуть кабель питания из электросети или нажать на выключатель. • Жировой фильтр необходимо мыть один раз в месяц мыльной водой. • Извлеките алюминиевый жировой фильтр, нажав на пружинные защелки...
Page 32 - Прежде чем связаться с сервисным центром проверьте, подключен; Сервисное обслуживание и расходные материалы
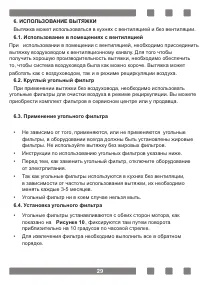
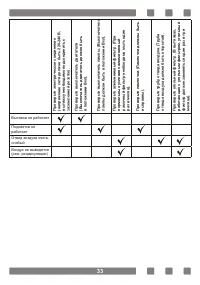
32 9. Если вытяжка не работает: Прежде чем связаться с сервисным центром проверьте, подключен ли кабель питания к электросети, а также состояние электрической сети в помещении; не предпринимайте никаких действий, которые могут повредить оборудование. Сервисное обслуживание и расходные материалы • Ра...