Page 2 - Copyright © 2005 Nokia. All rights reserved.
Copyright © 2005 Nokia. All rights reserved.Nokia, Nokia Connecting People, Nokia 6255, Pop-Port, and the Nokia Original Enhancements logos are trademarks or registered trademarks of Nokia Corporation. Other company and product names mentioned herein may be trademarks or trade names of their respect...
Page 3 - Contents; iii
Copyright © 2005 Nokia. All rights reserved. Contents For your safety ............................ vii Welcome ....................................... ix About your device ...................................... ixNetwork Services ........................................ ixShared memory ................
Page 7 - For your safety; vii
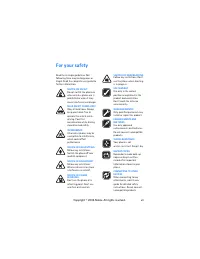
Copyright © 2005 Nokia. All rights reserved. For your safety Read these simple guidelines. Not following them may be dangerous or illegal. Read the complete user guide for further information. SWITCH ON SAFELY Do not switch the phone on when wireless phone use is prohibited or when it may cause inte...
Page 8 - viii
Copyright © 2005 Nokia. All rights reserved. EMERGENCY CALLS Ensure the phone is switched on and in service. Press the End key as many times as needed to clear the display and return to the main screen. Enter the emergency number, then press the Call key. Give your location. Do not end the call unti...
Page 9 - Welcome; About your device; Network Services; ix
Copyright © 2005 Nokia. All rights reserved. Welcome Congratulations on your purchase of the Nokia 6255 mobile phone. Your phone provides many functions which are practical for daily use, such as a hands-free loudspeaker, alarm clock, calculator, calendar, and more. Your phone can also connect to a ...
Page 10 - Shared memory; Find your phone label; Updates
Copyright © 2005 Nokia. All rights reserved. ■ Shared memory The following features in this device may share memory: contacts, text messages, photos, images, and tones in gallery, calendar notes, games, and applications. Use of one or more of these features may reduce the memory available for the re...
Page 11 - Phone at a glance; Keys and parts; Volume key
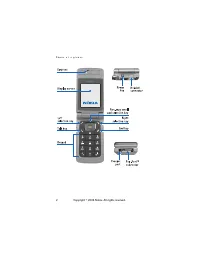
P h o n e a t a g l a n c e 1 1. Phone at a glance ■ Keys and parts Voice/shutter key • Short press — Starts and stops voice memo recorder. • Long press — Answer or make a call using the loudspeaker when the fold is closed. • Capture a picture when the camera is active. 1 Volume key 2 Front display/...
Page 13 - Quick keys
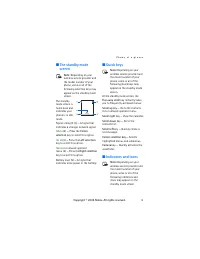
P h o n e a t a g l a n c e 3 ■ The standby mode screen Note: Depending on your wireless service provider and the model number of your phone, some or all of the following selection keys may appear on the standby mode screen. The standby mode screen is home base and indicates your phone is in idle mo...
Page 15 - Phone menus; The scroll method
P h o n e a t a g l a n c e 5 • Call and End keys: Press the Call key to place a call or to answer an incoming call. Press the End key to end a call or press and hold to return to the idle screen. ■ Phone menus Phone features are grouped according to function and are accessed through the main menus....
Page 16 - ’Go to’ functions; Choose ’Go to’ functions; Organise functions
P h o n e a t a g l a n c e 6 ■ ’Go to’ functions The Go to menu allows you to change the function of the Left selection key on your phone so that your most frequently used functions can be quickly accessed from the Go to menu on the standby mode screen. Choose ’Go to’ functions 1. At the standby mo...
Page 17 - okia; Set up your phone; Antenna; Remove the back cover
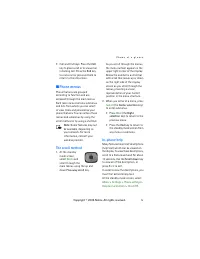
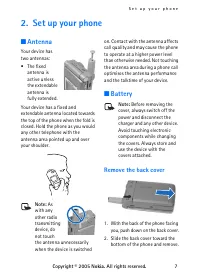
S e t u p y o u r p h o n e Copyright © 2005 N okia . All rights reserved. 7 2. Set up your phone ■ Antenna Your device has two antennas: • The fixed antenna is active unless the extendable antenna is fully extended. Your device has a fixed and extendable antenna located towards the top of the phone...
Page 18 - Remove the battery
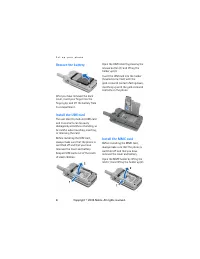
S e t u p y o u r p h o n e 8 Remove the battery After you have removed the back cover, insert your finger into the finger grip, and lift the battery from its compartment. Install the UIM card The user identity module (UIM) card and its contacts can be easily damaged by scratches or bending, so be c...
Page 19 - Replace the battery; Replace the back cover
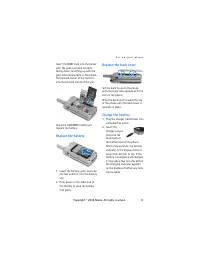
S e t u p y o u r p h o n e 9 Insert the MMC card into the holder with the gold-coloured contacts facing down, matching up with the gold-coloured contacts on the phone. The beveled corner of the card fits into the beveled corner of the slot. Close the UIM/MMC holder and replace the battery. Replace ...
Page 20 - Connect the headset; Make a call; Using the keypad
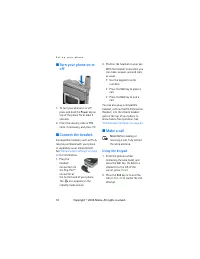
S e t u p y o u r p h o n e 10 ■ Turn your phone on or off 1. To turn your phone on or off, press and hold the Power key on top of the phone for at least 3 seconds. 2. Enter the security code or PIN code, if necessary, and press OK . ■ Connect the headset A compatible headset, such as HS-5, may be p...
Page 21 - Using the contacts list; Answer calls
S e t u p y o u r p h o n e 11 Using the contacts list At the standby mode screen, use the Scroll up or Scroll down key to scroll to the entry you wish to view. Press the Call key to make the call, or press Details to view details of the entry. Using the last dialled number At the standby mode scree...
Page 22 - Adjust the earpiece volume; Up arrow; Using the loudspeaker
S e t u p y o u r p h o n e 12 Your phone answers an incoming call when you open the fold. This is the default setting, but you can change the setting to Phone will not answer calls when fold is opened . From the standby mode screen, select Menu > Settings > Call settings > Answer when fold...
Page 23 - Keyguard; Lock the keypad
S e t u p y o u r p h o n e 13 1. Press Options during a call to display the following options: Loudspeaker / Normal — Activate or deactivate the loudspeaker while in a call. New call — Initiate a conference call. See ”Conference calling” on page 11 for information. Save — Save a number entered duri...
Page 24 - Standard mode
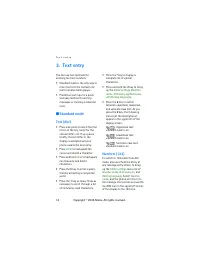
T e x t e n t r y 14 3. Text entry You can use two methods for entering text and numbers: • Standard mode is the only way to enter text into the contacts list and to rename caller groups. • Predictive text input is a quick and easy method for writing messages or creating a calendar note. ■ Standard ...
Page 25 - Predictive text input; Text entry
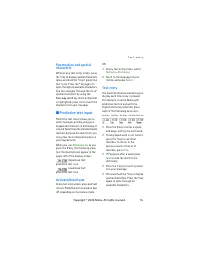
T e x t e n t r y 15 Punctuation and special characters While at any text entry screen, press the * key to display special characters (press and hold the * key if predictive text is on). Press the * key again to cycle through all available characters. You can navigate through the list of special cha...
Page 27 - Text messages; Write and send; Scroll
M e s s a g e s ( M e n u 1 ) 17 ■ Text messages Write and send 1. At the standby mode screen, select Menu > Messages > Text messages > Create message . To go quickly to the Create message display, press the Scroll left key from the standby mode screen. 2. Compose or reply to a message usin...
Page 28 - Templates; Read and reply; Scroll down; Options
M e s s a g e s ( M e n u 1 ) 18 3. To send the message, select Send > Send to number , Send to e-mail , or Send to many . Enter the recipient’s phone number or e-mail address or select Search to retrieve a number or e-mail address from Contact , and select OK . Templates Templates are short, pre...
Page 29 - Picture messages
M e s s a g e s ( M e n u 1 ) 19 Change sending options 1. At the standby mode screen, select Menu > Messages > Text messages > Message settings > Sending options to change sending options for all text messages. 2. To change sending options for one message, at the standby mode screen, se...
Page 30 - Download pictures
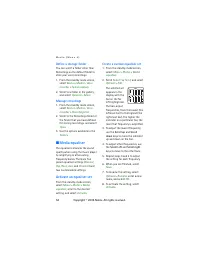
M e s s a g e s ( M e n u 1 ) 20 You cannot send a picture message using e-mail. Download pictures Note: This function can be used only if it is supported by your service provider. Only phones that offer compatible picture message features can receive and display picture messages. Contact your servi...
Page 31 - Multimedia messages; Object format not supported
M e s s a g e s ( M e n u 1 ) 21 ■ Multimedia messages A multimedia message can contain text, sound, and a picture. Or a multimedia message can contain a video clip. Your phone supports multimedia messages that are up to 300 kB. If the maximum size is exceeded, the phone may not be able to receive t...
Page 32 - MMS settings; Allow or block advertisements
M e s s a g e s ( M e n u 1 ) 22 MMS settings Before you can use the multimedia message feature, you must specify whether you want to receive message at all times or only if you are in the service provider’s home system. This is a network service. Check with your service provider for more informatio...
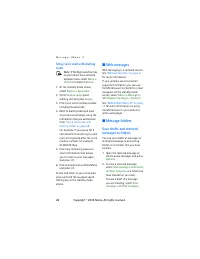
Page 36 - Voice messages; Save voice mailbox number
M e s s a g e s ( M e n u 1 ) 26 When you have a new multimedia message waiting and the memory for the messages is full, the indicator blinks and Multimedia memory full, view waiting msg. appears in the display. To view the waiting message, select Show . Before you can save the message, you need to ...
Page 37 - Automate voice mail; Insert dialling codes
M e s s a g e s ( M e n u 1 ) 27 • At the standby mode screen, select Menu > Messages > Voice messages > Listen to voice messages . Once you connect and the prerecorded greeting begins, follow the automated instructions to listen to your voice messages. View details of last voice mail This ...
Page 38 - Web messages; Message folders
M e s s a g e s ( M e n u 1 ) 28 Setup voice mail with dialling codes Note: If the Right selection key on your phone has a network operator menu, select Menu > Contact instead of Names . 1. At the standby mode screen, select Names > Speed dial . 2. Scroll to an (empty) speed dialling slot and ...
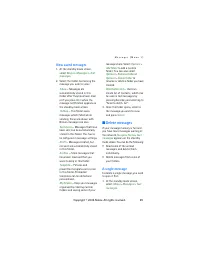
Page 39 - View saved messages; Delete messages; A single message
M e s s a g e s ( M e n u 1 ) 29 View saved messages 1. At the standby mode screen, select Menu > Messages > Text messages . 2. Select the folder containing the message you wish to view: Inbox — Messages are automatically stored in this folder after they have been read or if you press Back whe...
Page 40 - All messages in a folder; Voice tags; Scroll up or Scroll down
M e s s a g e s ( M e n u 1 ) 30 2. Scroll to the folder containing the message you wish to delete, and press Select . 3. Scroll to the message you wish to delete, and press Select . 4. Select Options > Delete . 5. Press OK to delete the message or Back to exit. All messages in a folder 1. At the...
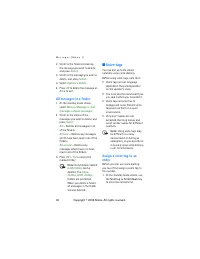
Page 41 - Play back
M e s s a g e s ( M e n u 1 ) 31 2. Highlight the contact you want to assign a voice tag, press Details > Options > Add voice tag > Select . 3. Press Start and speak clearly in to the microphone. Note: Do not press Quit unless you want to cancel the recording. The phone automatically stops ...
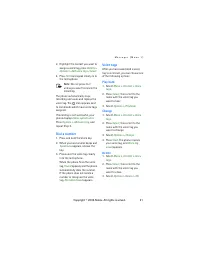
Page 42 - View missed calls
C a l l r e g i s t e r ( M e n u 2 ) 32 5. Call register (Menu 2) Call register stores information about the last 30 missed, 30 received, and 30 dialled calls. It also adds the total duration of all calls. When the number of calls exceed the maximum, the most recent call replaces the oldest. Whethe...
Page 43 - View dialled numbers; Call times; Delete call registers; Last call
C a l l r e g i s t e r ( M e n u 2 ) 33 2. Scroll to a name or number, and press Options . 3. Scroll to an option, and press View to view or activate the option. ■ View dialled numbers Dialled calls are previous numbers you have dialled from your phone: 1. At the standby mode screen, press the Call...
Page 44 - Dialled calls
C a l l r e g i s t e r ( M e n u 2 ) 34 Dialled calls To view the duration of all dialled calls, at the standby mode screen, select Menu > Call register > Call duration > Dialled calls' duration . To view the duration of dialled calls placed while in the home network or while roaming, sele...
Page 46 - Right selection; Add new contacts; Save a name and number
C o n t a c t s ( M e n u 3 ) 36 6. Contacts (Menu 3) The contacts list can hold up to 500 contacts with multiple numbers and text notes for each contact. The amount of numbers and text entries that you can save may vary, depending on length and the total number of entries in the contacts list. In t...
Page 47 - Set up voice tags; Caller groups; Setup a group
C o n t a c t s ( M e n u 3 ) 37 If you selected Add number , select General , Mobile , Home , Office , or Fax . If you selected Add detail , select E-mail address , Web address , Postal address , or Note . 3. Enter the number or text for the type you have selected, and press OK . 4. To change a num...
Page 48 - Set up speed dialling; Assign a key to speed dialling; Edit contacts list entries
C o n t a c t s ( M e n u 3 ) 38 Group ringing tone — Set the ringing tone for the group. Group logo — Turn the graphic for the caller group on or off or view the graphic. Group members — Add or remove members from the caller group. Set up speed dialling You can associate any entry in the contacts l...
Page 50 - View the contacts list; Search for a name; Configure settings
C o n t a c t s ( M e n u 3 ) 40 ■ View the contacts list 1. At the standby mode screen, select Names . The following options are displayed: Search — Find a name or select from a list. Add new contact — Add a contact to your contacts list. Edit name — Edit an existing name. Delete — Delete a name an...
Page 51 - Send a business card
C o n t a c t s ( M e n u 3 ) 41 ■ Send and receive contacts (business cards) You can send and receive an entry in your contacts list using text messaging, if supported by your wireless provider. Send a business card You can send a business card as a text message to a compatible phone or other handh...
Page 52 - Take a photo; Camera
C a m e r a ( M e n u 4 ) 42 7. Camera (Menu 4) You can take photos and record video clips with the built-in camera and adjust its settings. The camera lens is on the front of the phone. The colour display and the mini display on the front of the phone work as a viewfinder. The camera produces photo...
Page 53 - scroll; Other options
C a m e r a ( M e n u 4 ) 43 3. Select Back to take another photo, or press Options and choose from one of the following: Zoom — Zoom in closer before capturing a photo or get a closer look at the captured photo; use the Up/Down scroll keys to navigate around the photo. Send — Select Via multimedia ...
Page 56 - Folders
G a l l e r y ( M e n u 5 ) 46 8. Gallery (Menu 5) You can save pictures, video clips, recordings, and ringing tones to folders in the gallery, and add new folders to the ones already there. You can download images and tones using MMS, SMS, mobile Internet sites, or Nokia PC Suite. Note: Only device...
Page 59 - Play music tracks; Music player settings
M e d i a ( M e n u 6 ) 49 Play music tracks From the standby mode screen, select Menu > Media > Music player . The details of the first track on the default track list are shown. To play a track, scroll to the track that you want, and select Play or press the Scroll right key. To adjust the v...
Page 60 - Radio; Turn the radio on and off; Use the radio
M e d i a ( M e n u 6 ) 50 Warning: When using the stereo headset your ability to hear outside sounds may be affected. Do not use the stereo headset where it can endanger your safety. ■ Radio Your phone has an FM radio that also functions as an alarm clock radio. You can listen to the FM radio on yo...
Page 61 - Save a radio channel; Voice recorder; Make a recording
M e d i a ( M e n u 6 ) 51 To tune the radio manually, press the # key; then press the Scroll up key or the Scroll down key to search in increments of 0.05 MHz. To adjust the radio volume, press the Volume up and Volume down keys. When an application using a browser connection is sending or receivin...
Page 62 - Media equaliser; Activate an equaliser set; Create a custom equaliser set
M e d i a ( M e n u 6 ) 52 Define a storage folder You can select a folder other than Recordings as the default folder to store your voice recordings. 1. From the standby mode screen, select Menu > Media > Voice recorder > Select memory . 2. Scroll to a folder in the gallery, and select Opt...
Page 63 - Profiles; Personalise a profile
S e t t i n g s ( M e n u 7 ) 53 10. Settings (Menu 7) Use this menu to change profiles, main display settings, mini display settings, tone settings, time and date settings, call settings, phone settings, voice commands, enhancement settings, security settings, application settings, network settings...
Page 64 - Main display settings; Mini display settings; Wallpaper
S e t t i n g s ( M e n u 7 ) 54 Note: Timed profiles can be set up to 24 hours in advance. 1. At the standby mode screen, select Menu > Settings > Profiles . 2. Select the profile you wish to activate and set for timed expiration. 3. Select Timed . 4. Enter the time for the profile to expire,...
Page 65 - Tone settings; Time and date settings; Clock; Set the time
S e t t i n g s ( M e n u 7 ) 55 Colour schemes From the standby mode screen, select Menu > Settings > Mini display settings > Colour schemes > Blue , Brown , Grey , Green , Orange , Pink , Red , or Violet . Screen saver From the standby mode screen, select Menu > Settings > Mini d...
Page 66 - Time format; Date; Set the date
S e t t i n g s ( M e n u 7 ) 56 Time format At the standby mode screen, select Menu > Settings > Time settings > Clock > Time format > 24-hour or 12-hour . Date Show/hide the date At the standby mode screen, select Menu > Settings > Time settings > Date > Show date or Hid...
Page 67 - Call settings; Anykey answer; Power; Automatic redial; Answer when fold is opened; Calling card; Save information
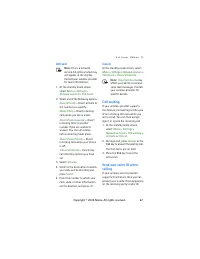
S e t t i n g s ( M e n u 7 ) 57 ■ Call settings Anykey answer Anykey answer allows you to answer an incoming call by briefly pressing any key except the Power key, Right selection key, or End key. At the standby mode screen, select Menu > Settings > Call settings > Anykey answer > On or...
Page 68 - Make calls; End; Call summary
S e t t i n g s ( M e n u 7 ) 58 Access no.+ phone no.+ card no. — Dial access number, phone number, then card number (+ PIN if required) Access no.+ card no.+ phone no. — Dial access number, card number (+ PIN if required), then phone number Prefix+ phone no.+ card no. — Dial the prefix (numbers th...
Page 69 - Phone settings; Phone language; Set type
S e t t i n g s ( M e n u 7 ) 59 ■ Phone settings Phone language 1. At the standby mode screen, select Menu > Settings > Phone settings > Phone language . 2. Scroll to the language of your choice and press Select . The phone language affects the time and date formats of the clock, alarm clo...
Page 70 - Voice commands; Activate a voice command
S e t t i n g s ( M e n u 7 ) 60 Welcome note You can select the text to appear in welcome screen when phone is powered on. At the standby mode screen, select Menu > Settings > Phone settings > Welcome note . Press Select , and enter the text and Save it. Help text activation Your phone dis...
Page 71 - Enhancement settings
S e t t i n g s ( M e n u 7 ) 61 2. When Speak now appears, pronounce the voice tag clearly into the microphone. When the phone finds the voice tag, Found: appears, and the phone plays the recognised voice tag through the earpiece. The function you requested is activated. Options After you have asso...
Page 73 - Security settings; Talk; PIN code; PIN code request
S e t t i n g s ( M e n u 7 ) 63 ■ Security settings If your wireless service provider supports these features, you may be able to change certain security settings in your phone such as PIN code request , Call restrictions , Security level , Access codes , and Voice privacy . To answer a call with p...
Page 74 - Call restrictions; Security level; Change security code
S e t t i n g s ( M e n u 7 ) 64 Call restrictions Call restrictions is a network service. See ”Network Services” on page ix for more information. If your wireless service providers supports this feature, then you can restrict the calls your phone can make and receive. When calls are restricted, cal...
Page 75 - Access codes; Voice privacy; Network; Roaming options
S e t t i n g s ( M e n u 7 ) 65 1. At the standby mode screen, select Menu > Settings > Security settings > Security level . 2. Enter 5-digit Security code: , and press OK . 3. Select None , Memory or Phone . Access codes The Access codes menu lets you change the security code and the PIN ...
Page 76 - Mode; Network services; Store a feature code; Call diverting
S e t t i n g s ( M e n u 7 ) 66 1. At the standby mode screen, select Menu > Settings > Network > Roaming options . 2. Select one of the following options: Home only — You can make and receive calls in your home area only. Automatic — The phone automatically searches for service in another...
Page 77 - Call waiting
S e t t i n g s ( M e n u 7 ) 67 Activate Note: This is a network service. All options listed may not appear in the display. Contact your wireless provider for more information. 1. At the standby mode screen, select Menu > Settings > Network services > Call divert . 2. Select one of the fol...
Page 78 - Choose ’Go to’ funtions; Scroll up
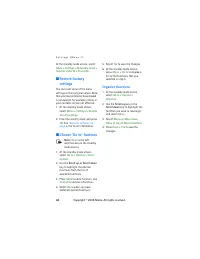
S e t t i n g s ( M e n u 7 ) 68 At the standby mode screen, select Menu > Settings > Network services > Send my caller ID > Yes or No . ■ Restore factory settings You can reset some of the menu settings to their original values. Data that you have entered or downloaded is not deleted, f...
Page 79 - Alarm clock; Set an alarm; Change the time; Set the alarm tone
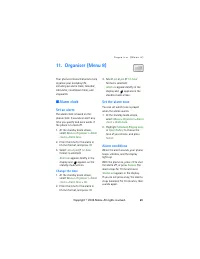
O r g a n i s e r ( M e n u 8 ) 69 11. Organiser (Menu 8) Your phone contains features to help organise your everyday life, including an alarm clock, calendar, calculator, countdown timer, and stopwatch. ■ Alarm clock Set an alarm The alarm clock is based on the phone clock. It sounds an alert any t...
Page 80 - Turn an alarm off; Calendar; Go to a date
O r g a n i s e r ( M e n u 8 ) 70 If the alarm time is reached while the device is switched off, the device switches itself on and starts sounding the alarm tone. If you press Stop , the device asks whether you want to activate the device for calls. Press No to switch off the device or Yes to make ...
Page 82 - Send a note; Receive notes
O r g a n i s e r ( M e n u 8 ) 72 Send a note 1. At the standby mode screen, select Menu > Organiser > Calendar . 2. Scroll to the date containing the note you wish to send. (Any days containing notes will be in bold font.) 3. Select Options > Day notes . 4. Scroll to the note you wish to ...
Page 83 - Calculator
O r g a n i s e r ( M e n u 8 ) 73 View a To-do note 1. From the standby mode screen, select Organiser > To-do list. 2. Scroll to a to-do note, and select View The to-do note appears in the display. Options while viewing to-do notes Add — Add another note (available only in header view). Deadline...
Page 84 - Mobile internet access
M o b i l e W e b ( M e n u 9 ) 74 12. Mobile Web (Menu 9) Minibrowser is a network service. See ”Network Services” on page ix for more information. Your phone has a built-in browser you can use to connect to selected services on the mobile internet. If your wireless service provider supports this f...
Page 85 - Phone keys; Receive a call while online
M o b i l e W e b ( M e n u 9 ) 75 After a brief pause, your phone attempts to connect to your wireless provider’s home page. If you receive an error message, your phone may not be set up for browsing. Contact your wireless provider to make sure that your phone is configured properly. ■ Navigate the...
Page 86 - Bluetooth connectivity
C o n n e c t i v i t y ( M e n u 1 0 ) 76 13. Connectivity (Menu 10) You can connect the phone to a compatible device using an IR or Bluetooth connection. You can also connect the phone to a compatible PC using IR, Bluetooth, or a data cable; and use the phone as a modem to enable connectivity from...
Page 87 - Pairing; Request conn. authorization
C o n n e c t i v i t y ( M e n u 1 0 ) 77 • Hands-free profile (HFP) • Service discovery profile (SDP) • Generic access profile (GAP) • Serial port profile (SPP) To ensure interoperability between other devices supporting Bluetooth technology, use Nokia approved enhancements for this model. Check w...
Page 88 - Settings
C o n n e c t i v i t y ( M e n u 1 0 ) 78 Settings You can define how your phone is shown to other devices with Bluetooth connectivity. From the standby mode screen, select Menu > Settings > Connectivity > Bluetooth > Bluetooth settings and one of the following: My phone's visibility — ...
Page 89 - Infrared; Send and receive data; Connection indicator; USB data transfer
C o n n e c t i v i t y ( M e n u 1 0 ) 79 ■ Infrared You can set up the phone to receive data through its IR port. To use an IR connection, transmission and reception must be to or from an IR compatible phone or device. Do not point the IR (infrared) beam at anyone’s eye or allow it to interfere wi...
Page 91 - Data transfer
C o n n e c t i v i t y ( M e n u 1 0 ) 81 ■ Data/fax calls Data or fax calls is a network service. See ”Network Services” on page ix for more information. If your wireless service provider supports this feature, you can set up the phone to send or receive data or fax calls when a terminal, such as ...
Page 92 - Games; Collections; Select application; Download
E x t r a s ( M e n u 1 1 ) 82 14. Extras (Menu 11) ■ Games 1. At the standby mode screen, select Menu > Extras > Games > Select game . 2. Scroll to a game, and press Open or the Call key. 3. Select one of the following options (if supported by the particular game): New game — Launches a ne...
Page 93 - PC Suite; Memory status
E x t r a s ( M e n u 1 1 ) 83 Before changing any certificate settings, you must make sure that you really trust the owner of the certificate and that the certificate really belongs to the listed owner. PC Suite Nokia PC Suite is a collection of powerful tools that you can use to manage your phone ...
Page 96 - Reference information; Battery information
R e f e r e n c e i n f o r m a t i o n 86 17. Reference information This section provides information about your phone’s batteries, enhancements, chargers, safety guidelines and technical information. Be aware that the information in this section is subject to change as batteries, chargers, and enh...
Page 97 - Charging times; Talk and standby times
R e f e r e n c e i n f o r m a t i o n 87 Do not dispose of batteries in a fire! Dispose of batteries according to local regulations. Please recycle when possible. Do not dispose as household waste. Charging times The following charging times are approximate with the BL-6C Li-Ion battery: Travel Ch...
Page 98 - Care and maintenance
C a r e a n d m a i n t e n a n c e 88 18. Care and maintenance Your device is a product of superior design and craftsmanship and should be treated with care. The suggestions below will help you protect your warranty coverage. • Keep the device dry. Precipitation, humidity and all types of liquids o...
Page 99 - Additional safety information; Operating environment; PACEMAKERS; HEARING AIDs
A d d i t i o n a l s a f e t y i n f o r m a t i o n 89 19. Additional safety information ■ Operating environment Remember to follow any special regulations in force in any area and always switch off your device when its use is prohibited or when it may cause interference or danger. Use the device ...
Page 100 - Vehicles
A d d i t i o n a l s a f e t y i n f o r m a t i o n 90 ■ Vehicles RF signals may affect improperly installed or inadequately shielded electronic systems in motor vehicles such as electronic fuel injection systems, electronic antiskid (antilock) braking systems, electronic speed control systems, ai...
Page 101 - Emergency calls; To make an emergency call:
A d d i t i o n a l s a f e t y i n f o r m a t i o n 91 ■ Emergency calls Important: Wireless phones, including this phone, operate using radio signals, wireless networks, landline networks, and user-programmed functions. Because of this, connections in all conditions cannot be guaranteed. You shou...
Page 103 - Index
93 Index A alarm clock 69 antenna 7 automate voicemail 27 auto-update 56 B back cover removing 7 replacing 9 batteries and chargers 86 battery charging 9 charging times 87 removing 8 replacing 9 talk and standby times 87 Bluetooth connectivity 76 business cards 41 C calculator 73 calendar 70 call di...