Page 2 - What Models Does This Manual Cover?; FTD2 Series
What Models Does This Manual Cover? FTD2 Series DVR Component Model #: DVR-FTD2-161 Camera Component Model #: CM-FTD4LS-BCM-FTD4LS-D FTD4 Series DVR Component Model #: DVR-FTD4-8DVR-FTD4-81DVR-FTD4-82 Camera Component Model #: CM-FTD4LS-BCM-FTD4LS-D FTD8 Series DVR Component Model #: DVR-FTD8-8DVR-F...
Page 3 - iii; both as much as you do.; Some Basic Info; Bluetooth; Thank you for choosing Night Owl Security!
iii We welcome you to the Night Owl family and thank you for choosing us to help safeguard your home or business. All of our products are proudly designed and engineered right here in the U.S.A. Night Owl complies with the U.S. government’s stance on protecting our nation from companies that violate...
Page 4 - nightowlsp; iv
Is Internet Required? While Internet is not required, it is STRONGLY RECOMMENDED. Without an Internet connection, you can still use your device’s Bluetooth ® Wireless Setup to get the product easily setup and configured. However, you will not be able to view or access your system remotely from a Sma...
Page 5 - Exporting Recordings for; Table of Contents
v Table of Contents FCC Warnings . . . . . . . . . . . . . . . . . vi Safety Instructions . . . . . . . . . . . . . . 1 Initial Setup . . . . . . . . . . . . . . . . . . 2 Step 1. Verify Your Package Contents . . . . . . . 2 Recorder Description . . . . . . . . . . 3 How to Use a Wired USB Mouse . ....
Page 6 - FCC Warnings; FCC; cause undesired operation.; FCC Compliance Statement; correct the interference by one or more of the following measures:; CAUTION
vi FCC Warnings FCC This device complies with Part 15 of the FCC Rules. Operation is subject to the following two conditions: (1) this device may not cause harmful interference and (2) this device must accept any interference received, including interference that may cause undesired operation. FCC C...
Page 7 - Safety Instructions; Inserting metal into the recorder case may cause electric shock.
1 Safety Instructions Use the provided power adapter . Do not use this product with a power source that applies more than the specified voltage. Never insert metal into the recorder case or its openings. Inserting metal into the recorder case may cause electric shock. Do not operate in wet or dusty ...
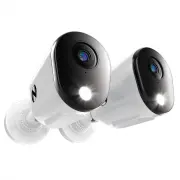
Page 8 - Initial Setup; Wireless Setup provides an A-Z setup right from the; Verify Your Package Contents; Step; The exact components of your system, images and quantities may; Wired BNC Camera / Accessories; If connecting to a TV or Monitor (Not
Initial Setup This portion of the manual will cover the initial setup and configuration of your system. Again, our Bluetooth ® Wireless Setup provides an A-Z setup right from the convenience of your Smart Device without the need for a TV or monitor. Night Owl STRONGLY RECOMMENDS that you complete th...
Page 9 - Recorder Description; The number of ports will vary; provided HDMI cable for viewing and system access.; is ready for use. The light will flash blue
Recorder Description 1. Video In (Wired BNC Cameras): Connect your cameras to one of the “Wired Cameras” Video Input Ports using the provided video power cable. The number of ports will vary based on your model number. NOTE: The recorder automatically detects the camera. Before turning the recorder ...
Page 10 - How to Use a Wired USB Mouse; Download the Night Owl Protect App and Create and Verify; security. Once the system has been configured, you can use the
How to Use a Wired USB Mouse Left / Select Button Right / Menu Button Scroll Wheel Live Viewing: Double-click the left button on any camera view in split-screen mode to bring it to full screen display. Double-click again to return to split-screen mode. Right-click to show the Tool Bar at the bottom ...
Page 11 - your account. For security purposes, a verification code will; Ensure you verify your email address.; process, to ensure we can quickly and efficiently assist you
5 1. Download the Night Owl Protect App from the Apple App or Google Play Store. If you have previously downloaded the app and created an account, proceed to Initial Setup. 2. Follow the prompts on the Night Owl Protect App to create your account. For security purposes, a verification code will be s...
Page 12 - Plug one end of the included HDMI cable; “How to Setup your System”; Enter your Series (located on the support sticker on the top of your; Are you more of a visual person? If so, watch our
6 Connect Your System (Hardware) Now that you have verified and familiarized yourself with the package contents of your new system, it is time to get the hardware connected. Step 3. 1. Visit Support.NightOwlSP.com A. Plug one end of the included HDMI cable into the HDMI port on the back of the DVR. ...
Page 13 - Perform the following steps to get the rest of the hardware setup!; confirm they function properly.
7 Perform the following steps to get the rest of the hardware setup! 1. Plug one end of the included Ethernet cable into the LAN port on the back of the DVR. NOTE: Night Owl recommends connecting to the Internet for the best user experience. 2. Plug the other end of the Ethernet cable into a port on...
Page 15 - Configure Your System; Option 1: Easy Bluetooth
9 IMPORTANT: If you have a TV or monitor connected, you will see setup information appear on the screen as you complete the Bluetooth ® setup. A TV or monitor is not required for this setup but can be used for viewing. Configure Your System Now that you have the Night Owl Protect App downloaded, hav...
Page 18 - “Live View”; Additionally, your recorder’s firmware; Firmware Version; your firmware is not current, our technical
12 7. Now you will see a message stating the device has been successfully added. 8. Tap “Live View” and enjoy live viewing, playback, save and share and all the additional features of your new system. NOTE: If you have not connected your recorder to the Internet, you will not be able to live view or...
Page 22 - ensure all cameras work before final installation.; Plan Your Installation; Electrical Interference:; Install the Cameras
Install the Cameras Step 5. 16 IMPORTANT: Before you begin this step, if you have not already done so, ensure all cameras work before final installation. Plan Your Installation When planning your installation, keep the following pointers in mind: Distance: The further the camera is from the recorder...
Page 23 - Additional Cameras; a) Adding Additional Wired BNC Cameras
17 2. Using a drill bit slightly smaller than the included screw anchors, drill into the mounting surface using the guide marks. 3. Insert the screw anchors. Line up the camera base holes with the screw anchors, insert the screws through the base and tighten to secure the camera in place. Ensure you...
Page 24 - Compatibility; of Wi-Fi devices that are compatible with your recorder.; Strength of Transmission Signal
18 *Recorder and Wi-Fi devices will vary based on your model number. See compatibility below. Compatibility Click your Series (located on the support sticker on top of your recorder) below for a list of Wi-Fi devices that are compatible with your recorder. IMPORTANT: For Wi-Fi IP cameras, the camera...
Page 25 - Connectivity; Download the Night Owl Protect App and
Connectivity IMPORTANT: To add a Wi-Fi IP camera or Smart Video Doorbell to your Bluetooth ® wired recorder both devices MUST be connected to the same Internet (Local Area Network). Adding a compatible Wi-Fi device is most easily achieved using the Night Owl Protect App. Hopefully you downloaded the...
Page 26 - “Devices”; connected to the same Internet (Local Area
2. Log in to the Night Owl Protect App from your Smart Device. 3. Tap on “Devices” icon within the App. 4. Next, tap on the “+” icon. 5. The app will search for the Wi-Fi device. Once it is discovered, tap on the Wi-Fi device. NOTE: As previously mentioned, please ensure both your Wi-Fi IP device an...
Page 27 - ANDROID ONLY; flashing. A flashing status light indicates the camera is in; “No, It Is Not Flashing”
6. ANDROID ONLY - You will be asked to disable your Smart Device’s mobile data while the app connects to the Wi-Fi device. Please exit the app and temporarily disable the data. You may turn it back on once the camera is connected. Once disabled, return to the app and tap on “Next.” 7. You will now b...
Page 29 - Once connected, you will hear “WooHoo! Setup; “Add Camera to My Recorder.”
11. Once connected, you will hear “WooHoo! Setup is complete!” You will then be asked if you would like to add your new Wi-Fi device to your recorder. Tap “Add Camera to My Recorder.” 12. Once added, please take a moment to name your new Wi-Fi device. Then tap on “Live View.” 13. You can now begin v...
Page 30 - Log In From a TV or Monitor; Smart Device or computer.; Log In with Night Owl Protect Account
Log In From a TV or Monitor While setup was easily achieved right from your Smart Device using Bluetooth ® , many of the system’s advanced features and settings can be adjusted from a TV or monitor. For customers who prefer accessing their system remotely, don’t worry. You can access many of your sy...
Page 31 - click Account; Resetting/Forgot Your Password; Log In with Local Password
A. Phone Number: (Option 1): Enter the phone number associated with your Night Owl Protect Account. B. Email/Username: (Option 2): Enter the email address or username associated with your Night Owl Protect Account. To sign in with your email address, you MUST first have verified your email in the ap...
Page 32 - Synced; Device Component Model:; are offline, the email will not be populated.; Registered Owner’s Username:; Log In Information Icon; “OK”
A. Username: Will have Admin entered, as this is the default username for the system. B. Password: Enter the local password you created during the startup wizard. C. Forgot Password?: Click here if you have forgotten your login password. See Resetting/Forgot Your Password section for more informatio...
Page 34 - Shows the current status of your recorder’s; Shows whether you currently do or do not have a device paired to the; Appendix; Displays the current date and time.; Additional Information (Right Side of Navigation Bar); drive that spins and moving it when powered on may cause damage.; Shut Down
G. Internet Connected/Not Connected: Shows the current status of your recorder’s Internet connection. If the icon is grayed out, you are not connected. See Appendix . H. Bluetooth ® : Shows whether you currently do or do not have a device paired to the recorder using Bluetooth ® . If the icon is gra...
Page 35 - View Layouts
This option lets you adjust how many connected cameras appear on screen and what order they appear in. You can easily adjust the layout using the preset options or customize it to suit your viewing needs. Double click on any camera screen to make it full screen. Then double click again to return to ...
Page 36 - Search Detected Events by Date:; Use the calendar to select the date(s) that have; Search Detected Events by Channel:; want to search for recordings.; Playback
The Playback menu is where you go to access events and replay them. You can easily search for, playback and save recordings right from the convenience of your smartphone or tablet, using our free mobile app. However, you may find it easier to do this from a TV or monitor. Additionally, from a TV or ...
Page 37 - 4H will display 24 hours in the timeline. 1H will display 1-hour
H. Event Filters: Recordings for the search criteria you entered will appear in the timeline. Check the event filters to further narrow down the search based off the type of event you are searching for, including; Motion events, Human Detection events, Facial Capture events or Vehicle events. The ev...
Page 38 - Exporting Recordings For Long-Term Storage; USB flash drive or external hard drive.; Format for Windows OS; WARNING; Formatting erases ALL data on the USB flash drive or external HDD.; Format; In the File System field select; Start; Formatting a USB Flash Drive or External Hard Drive
Exporting Recordings For Long-Term Storage As your recorder accumulates recordings, it eventually becomes full. When this happens, the oldest recordings stored are overwritten by the latest recordings. If there are recordings that you want to save long-term, you need to export them to a USB flash dr...
Page 39 - Format for Mac; Select; Applications > Utilities; and launch; Erase; in the Disk Utility Bar.; dropdown menu, and choose either MS-DOS
Format for Mac 1. Insert the USB flash drive or connect the external HDD into your Mac. 2. Select Applications > Utilities and launch Disk Utility. 3. Select the USB flash drive or external HDD in the sidebar in Disk Utility and click Erase in the Disk Utility Bar. 4. Create a name, click on the ...
Page 40 - click on; Exporting / Saving a Recording
From within the playback menu, you will search for and playback your recordings. When you have located a specific recording that you want to save long-term, simply click on “Export Event.” A A. Export Event: When the time indicator is on an event, this tab will appear. Clicking here lets you export ...
Page 41 - Shows the type of event (Motion, Human Detection, Facial Capture; Available Space in Device:
Export Destination A D B E F G H C A. From Channel: What channel the recording has been captured from. B. Date: Shows the date of the recording. C. Event Information: Shows the type of event (Motion, Human Detection, Facial Capture or Vehicle) as well as the start and end time of the event. D. Stora...
Page 42 - “Go back”; will return you to the live view screen.; About Menu; System Info
Clicking the System Info icon takes you to this screen where you can gain more insight into your system and some of its settings. Hover your mouse over the menu items to the left to learn more about that option and left-click one to proceed to that menu. Clicking “Go back” will return you to the liv...
Page 43 - which is which. Ensure you save your changes.; Click to check for new firmware:; The title says it all! Click here to perform a firmware
Device Name Firmware Version Use this menu to change the name of your recorder. It’s that easy! This may come in handy if you have more than one security system and want to quickly identify which is which. Ensure you save your changes. This screen will allow you to check for new firmware and manuall...
Page 44 - manual upgrade, click; “Continue”; to proceed with the firmware update.; Do NOT power off or
Whether you performed a search and found new firmware available or did a manual upgrade, click “Continue” to proceed with the firmware update. Your recorder will now update the firmware and reboot. Do NOT power off or disconnect anything from your recorder as the firmware is being updated! 38
Page 45 - display the new language.
Language Monitor Resolution You can choose from English, Spanish or French. Be sure to save your changes when finished. Your recorder, just like with the firmware update, will reboot to display the new language. Your TV or monitor must have a minimum resolution of 1080p. However, you can switch betw...
Page 47 - Daylight Savings Time:; Lets you enable or disable Daylight Savings Time when Sync; Camera Menu
A. Sync Date and Time: You can click here to change the setting to “Use Network” or “Off”. When set to “Use Network” (Preferred Method) the date and time will automatically adjust to the current date and time based upon your device’s IP address. This requires an Internet connection. When set to “Off...
Page 49 - Recording Settings; When you click on; “Recording Settings”; from the right-side of the menu, you will be
A. Event Based: Means the selected channel will record when human detection, facial capture, vehicle detection or standard motion detection occurs. *Select features do not apply to all models. B. Continuous: Allows you to switch that channel to record 24/7. Please keep in mind, recording continuousl...
Page 50 - Copy to Other Channels:; Select the other channel(s) you want to copy the settings to.; Copy Settings; “Copy Settings”
B A A. Copy to Other Channels: Select the other channel(s) you want to copy the settings to. B. Apply Changes: Ensure you save your changes, so they take effect. Copy Settings Remove Camera Option When you click on “Copy Settings” from the right-side of the Camera menu, you can easily take the setti...
Page 51 - Account Menu
Account Menu This menu provides access to your Night Owl Protect Account credentials. If you have downloaded and configured the Night Owl Protect App, you will see the screen below with the username, email and phone number linked to your account. If you have not downloaded and configured the Night O...
Page 52 - Storage Menu; perform a disk reformat.
Storage Menu This menu provides information regarding your recorder’s storage, such as capacity and available space. This is also where you will go if you need to reformat your hard disk drive (HDD). Your recorder is set to auto-overwrite by default, meaning older recordings will be recorded over to...
Page 53 - recorder during this process.; Diagnostics Menu; cameras and recorder.
You will be advised that all data will be permanently removed and notified regarding the status of the reformat. DO NOT disconnect or power down your recorder during this process. Diagnostics Menu Here you can run a device health check and see the status of your connected cameras and recorder. 47
Page 54 - “Diagnostics”; your system will begin running a device health; Please be patient while this check is run and DO NOT disconnect; Camera Diagnostics and System Diagnostics.; Will display the signal strength of that channel.; Camera Diagnostics (use scroll bar to see all options)
When you click on “Diagnostics” your system will begin running a device health check. Please be patient while this check is run and DO NOT disconnect anything for the recorder or your cameras. When the check is finished, you will see the following screen which shows your Camera Diagnostics and Syste...
Page 55 - Will display the status of the recorder’s Ethernet (LAN) port.; System Diagnostics; Will display the current firmware version of the connected; Network Menu
A. Hard Drive Health Check: Will display the status of the hard drive. “Good” means the hard drive is healthy and “Not Working” means the hard drive is having an issue. B. Space Available On Hard Drive: Shows you the amount of remaining free space on your hard drive. C. Ethernet Port Access: Will di...
Page 57 - Help and Support Menu; how-to video tutorials and more, simply visit
Help and Support Menu If you need more help with your system, don’t worry, we’ve got your covered. For a wide range of troubleshooting material such as your product manual, FAQ’s, how-to video tutorials and more, simply visit Support.NightOwlSP.com and enter the Series listed on the top of your reco...
Page 58 - Reset Menu; please export any recordings you want saved before continuing.
Reset Menu From this menu, you can restore the system’s settings to their default value or perform a factory reset. Both options will permanently delete your recordings, so please export any recordings you want saved before continuing. Restoring your settings means the recorder will restore its defa...
Page 60 - Resetting / Forgot Your Password; Reset Your Password from the Night Owl Protect App; Confirm Password field.; “Done”; when you are finished.; If you forgot your password:
Resetting / Forgot Your Password IMPORTANT: We value your privacy and work hard to keep your data secure. To securely reset your password, you can do so from the Night Owl Protect App or the Night Owl Web Portal. Reset Your Password from the Night Owl Protect App (Highly Recommended) The quickest an...
Page 61 - Forgot Your Local Password (Recorder Not Connected to the; recorder is offline, follow the steps below.; “Register New Device”
Forgot Your Local Password (Recorder Not Connected to the Internet) IMPORTANT: If you did not connect your recorder to the Internet during the initial setup and instead chose to create a local password or if your recorder is offline, follow the steps below. 1. With your recorder connected to a TV or...
Page 63 - Smart Detection Technology:; System can use Human Detection, Facial Capture and; Glossary
AC Powered Wireless: Means the cameras wirelessly communicate with the recorder / router, but must be powered on using the provided AC Camera Power Adapter. BNC: Means the cameras are hardwired to the recorder using BNC coaxial cabling. FTD2: 1080p HD Wired 2-Way Audio DVR System with Bluetooth® ena...
Page 64 - The UID is located on the support sticker on the top of your device.; General Recorder Information; User Information
Username: _______________________________________________________________________________________Password: ________________________________________________________________________________________Model Number: __________________________________________________________________________________UID: ____...
Page 65 - Exclusions; warranty shall not apply to installation or the removal and re-; Warranty
NIGHT OWL, LLC (“Night Owl”) provides the following warranty to the original retail purchaser only (the “Purchaser”) with respect to this product (the “Product”): For a period of one (1) year after the date of sale, the Product shall be free from manufacturing defects in material and workmanship. Pr...
Page 66 - Disclaimer
Night Owl does not make any claims or warranties of any kind whatsoever regarding the Product’s potential, ability or effectiveness to prevent, minimize or in any way affect personal or property damage or injury. Night Owl is not responsible for any personal damage, loss or theft related to the Prod...
Page 67 - Product support
Please visit Support.NightOwlSP.com Enter the Series listed on the Product Support Sticker into the Search bar.Access the support material needed. 1 2 3 For system manuals, troubleshooting guides, FAQs, video tutorials and more: Rev 230814 iPhone, iPad, Mac and Mac OS X are registered trademarks of ...