Page 2 - Contents
2 Contents Getting Started .............................................................................................................. 3 Package Contents ................................................................................................... 3Installing the Monitor Stand ................
Page 3 - Getting Started; Package Contents; Important
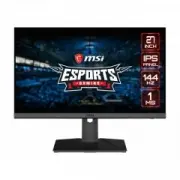
3 Getting Started This chapter provides you with the information on hardware setup procedures. While connecting devices, be careful in holding the devices and use a grounded wrist strap to avoid static electricity. Package Contents Monitor G2422C Documentation Quick Start Guide Accessories Stand wit...
Page 4 - Installing the Monitor Stand
4 Installing the Monitor Stand 1. Leave the monitor in its protective foam packaging. Align the stand bracket to the monitor groove. Tighten the stand bracket with screws. 2. Connect the base to the stand and tighten the base screw to secure the base. 3. Make sure the stand assembly is properly inst...
Page 5 - Adjusting the Monitor
5 Adjusting the Monitor This monitor is designed to maximize your viewing comfort with its adjustment capabilities. ⚠ Important ∙ Avoid touching the display panel when adjusting the monitor. -5 O 20 O
Page 6 - Monitor Overview
6 Monitor Overview 7 4 4 5 6 2 1 3 1 Power LED Lit in white after the monitor is turned on. If no signal input, the LED will turn into orange. Lit in orange when the monitor is in Stand-by mode. 2 Power Button & Navi Key 3 Kensington Lock 4 HDMI™ Connector 5 DisplayPort 6 Headphone Jack 7 Power ...
Page 7 - Connecting the Monitor to PC; AA
7 Connecting the Monitor to PC 1. Turn off your computer. 2. Connect the video cable from the monitor to your computer. 3. Assemble the external power supply & power cord. (Figure A) 4. Connect the external power supply to the monitor power jack. (Figure B) 5. Plug the power cord into the electr...
Page 8 - OSD Setup; Navi Key; Hot Key
8 OSD Setup This chapter provides you with essential information on OSD Setup. ⚠ Important All information is subject to change without prior notice. Navi Key The monitor comes with a Navi Key, a multi-directional control that helps navigate the On-Screen Display (OSD) menu. OK Up/Down/Left/Right: ∙...
Page 9 - OSD Menus; Gaming
9 OSD Menus Gaming 1st Level Menu 2nd/3rd Level Menu Description Game Mode User ∙ Use Up or Down Button to select and preview mode effects. ∙ Press the OK Button to confirm and apply your mode type. FPSRacingRTSRPG Night Vision OFF ∙ This function optimizes background brightness and is recommended f...
Page 11 - Professional
11 Professional 1st Level Menu 2nd Level Menu Description Pro Mode User ∙ Use Up or Down Button to select and preview mode effects. ∙ Press the OK Button to confirm and apply your mode type. ∙ The default setting “Eco” mode meets the requirements of TÜV Rheinland’s “Low Blue Light” standard and Eyes...
Page 13 - Setting
13 Setting 1st Level Menu 2nd Level Menu Description Language 繁體中文 ∙ Users have to press the OK Button to confirm and apply the Language setting. ∙ Language is an independent setting. Users’ own language setting will override the factory. When users set Reset to Yes, Language will not be changed. En...
Page 14 - Specifications
14 Specifications Model G2422C Size 23.6 inch Curvature 1500R Panel Type VA Resolution 1920 x 1080 (FHD) Aspect Ratio 16:9 Brightness (nits) 250 (typ.) Contrast Ratio 3000:1 Refresh Rate 180Hz Response Time ∙ 1ms (MPRT) ∙ 4ms (GTG) ∙ 8ms (Tr + Tf) I/O ∙ HDMI™ Connector x2 ∙ DisplayPort x1 ∙ Headphon...
Page 16 - Preset Display Modes
16 Preset Display Modes Standard Resolution HDMI™ DP VGA 640x480 @60Hz V V @67Hz V V @72Hz V V @75Hz V V SVGA 800x600 @56Hz V V @60Hz V V @72Hz V V @75Hz V V XGA 1024x768 @60Hz V V @70Hz V V @75Hz V V SXGA 1280x1024 @60Hz V V @75Hz V V WSXGA+ 1680x1050 @60Hz V V Full HD 1920x1080 @60Hz V V @144Hz V ...
Page 17 - Troubleshooting; The power LED is off.
17 Troubleshooting The power LED is off. • Press the monitor power button again. • Check if the monitor power cable is properly connected. No image. • Check if the computer graphics card is properly installed.• Check if the computer and monitor are connected to electrical outlets and are turned on. ...
Page 18 - Safety Instructions; Power
Safety Instructions ∙ Read the safety instructions carefully and thoroughly. ∙ All cautions and warnings on the device or User Guide should be noted. ∙ Refer servicing to qualified personnel only. Power ∙ Make sure that the power voltage is within its safety range and has been adjusted properly to t...
Page 20 - TÜV Rheinland Certification; TÜV Rheinland Low Blue Light Certification
20 TÜV Rheinland Certification TÜV Rheinland Low Blue Light Certification Blue light has been shown to cause eye fatigue and discomfort. MSI now offers monitors with TÜV Rheinland Low Blue Light certification to ensure users’ eye comfort and well-being. Please follow the instructions below to reduce...
Page 21 - Regulatory Notices; CE Conformity
21 Regulatory Notices CE Conformity This device complies with the requirements set out in the Council Directive on the Approximation of the Laws of the Member States relating to Electromagnetic Compatibility (2014/30/EU), Low-voltage Directive (2014/35/EU), ErP Directive (2009/125/EC) and RoHS direc...
Page 22 - WEEE Statement; Chemical Substances Information; Japan JIS C 0950 Material Declaration; India RoHS; Ukraine Restriction of Hazardous Substances
22 WEEE Statement Under the European Union (“EU”) Directive on Waste Electrical and Electronic Equipment, Directive 2012/19/EU, products of “electrical and electronic equipment” cannot be discarded as municipal waste anymore and manufacturers of covered electronic equipment will be obligated to take...