Page 2 - SPECIFICATIONS; You can use this bread maker to bake according to your taste.
2 Model: MRBRD13W Colour: White Rated Voltage: 220-240V~50Hz Rated Heating Power: 750W Rated Motor Power 100W No. of Programs : 14 Loaf sizes 3 Crust options 3 External Dimensions (W x D x H): 267 x 428 x 296mm Net Weight: 6.31kg SPECIFICATIONS Thank you for purchasing a Morphy Richards Bread Maker....
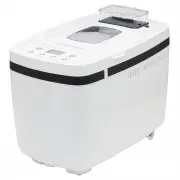
Page 3 - PRODUCT OVERVIEW
3 1. Dispenser2. Viewing window3. Control panel4. Dispenser release button5. Handle6. Main unit 7. Measuring cup8. Measuring spoon9. Kneading blades x 210. Baking pan11. Dough hook PRODUCT OVERVIEW 1 2 3 4 5 6 7 8 9 10 11
Page 4 - IMPORTANT SAFETY INSTRUCTIONS
4 WARNING: To reduce the risk of fire, electric shock, injury to persons or damage to property, follow basic precautions including the following: • If the power cord is damaged, it must be replaced by the manufacturer or its service agent or a similarly qualified person in order to avoid a hazard. •...
Page 7 - Proper use; READ CAREFULLY AND KEEP FOR FUTURE REFERENCE
7 Proper use • Only use your bread maker for baking bread in a household environment. Do not use the appliance for drying foodstuffs or other objects. • Do not use the bread machine outdoors. Use accessories recommended by the manufacturer only. Accessories not recommended may cause damage to the ap...
Page 8 - CONTROL PANEL; MENU
8 CONTROL PANEL MENU - Select the desired baking program. The program number and corresponding baking time will appear on the display. When pressing any button a beep will be heard, unless the appliance is operating. In this case, no beep will sound. CRUST - Select the degree of browning: Light >...
Page 9 - BEFORE FIRST USE; mentioned in the recipes.
9 BEFORE FIRST USE Before first use, please take a few minutes to read this instruction book and find a place to keep it handy for future reference. Please pay particular attention to the safety instructions. 1. Wash the Baking pan (10) and all accessories in hot soapy water and dry thoroughly. 2. W...
Page 10 - USING YOUR BREAD MAKER; Choose the desired crust colour by pressing the Crust button.
10 USING YOUR BREAD MAKER The Bread Maker has three settings to make either 900g, 1.15kg or 1.35kg loaves (approximate weight, dependent upon recipe). A beep signals when extra ingredients, such as fruit and nuts, can be added using the dispenser (1) so they don’t get chopped by the Kneading blades ...
Page 12 - PROGRAM DESCRIPTIONS
12 Select the desired baking program by pressing the menu button. The corresponding program number is shown on the display and detailed below. The baking time depends on the selected program combinations. 1. REGULAR This program is suitable for baking white or brown breads, which largely consist of ...
Page 13 - This program is for kneading dough only.
13 PROGRAM DESCRIPTIONS 8. BAKE If bread baked on a different program is too light or not baked through, use this program for additional baking. You can also bake ready-made dough with this program. The bread will be kept warm for nearly an hour after the end of the baking operation. This prevents t...
Page 15 - USING THE TIMER
15 The timer function enables delayed baking. Use the ‘TIME -’ & ‘TIME +’ buttons to set the desired end time. 1. Select a program. The display indicates the required baking time. Using the ‘TIME -’ & ‘TIME +’ buttons you can change the end time of baking in 10 minute increments. 2. Hold dow...
Page 16 - HINTS AND TIPS
16 HINTS AND TIPS • After a power supply failure the ingredients will have to be discarded and you must start again with fresh ingredients. • Place all recipe ingredients into the Baking Pan so that the yeast is not touching any liquid. • If adding any fruit & nuts to your bread, it should be pl...
Page 17 - MEASURING INGREDIENTS; Measuring Cup & Spoon; • Always add ingredients in the order they are listed in the recipe.
17 MEASURING INGREDIENTS The most important step when using your Bread maker is measuring your ingredients precisely and accurately. It is extremely important to measure liquid and dry ingredients properly or it could result in a poor baking result. Do not use standard kitchen teaspoons (tsp) or tab...
Page 18 - USING THE RIGHT INGREDIENTS; All Purpose Flour/Plain Flour
18 USING THE RIGHT INGREDIENTS Flours, while visibly similar, can be very different by virtue of how they were grown, milled and stored. You may find that you will have to experiment with different brands of flour to help you make that perfect loaf. Storage is also very important, as all flours shou...
Page 19 - OTHER INGREDIENTS; Place half a cup of lukewarm water into a small bowl or cup.; Sugar
19 OTHER INGREDIENTS Yeasts (Active Dry Yeast) Yeast through a fermentation process produces gas (carbon dioxide) necessary to make the bread rise. Yeast must be able to feed on sugar and flour carbohydrates in order to produce this gas. There are three different types of yeast available: fresh, tra...
Page 20 - Sunflower Oil
20 OTHER INGREDIENTS Sunflower Oil ‘Shortens’ or tenderises the texture of yeast breads. Butter or margarine can be used as a substitute. If butter or margarine is used directly from the refrigerator it should be softened first for easier blending during the mixing cycle. Baking Powder Baking powder...
Page 21 - Egg Glaze; Beat 1 egg and 1 tablespoon of water together, brush generously.; Melted Butter Crust; For a softer, shiny crust, brush just baked bread with milk or cream.; Sweet Icing Glaze
21 Milk Powder (tbsp) Milk Equiv. (ml) • 1 • 70 • 1 1/2 • 105 • 2 • 140 • 2 1/12 • 180 • 3 • 210 • 3 1/12 • 250 • 4 • 280 OTHER INGREDIENTS Give your baked bread a professional ‘bakery’ finish. Select one of the following special glazes to enhance your bread. Egg Glaze Beat 1 egg and 1 tablespoon of...
Page 22 - RECIPES
22 With a Bread Maker, even the most inexperienced baker can achieve the satisfying experience of baking a loaf of bread. Inside the Bread Maker, the dough is mixed, kneaded proved and baked without you being present. The Bread Maker can also just prepare dough, and when it’s ready, you shape, allow...
Page 27 - RECIPE BAKING TIMES
27 Program Crust Loaf Size Total Time Knead 1 Rise 1 Knead 2 Rise 2 Rise 3 Bake Keep Warm 1. Regular Light Medium Dark 900g 2:53 10 11 12 23 32 85 60 1150g 3:00 11 11 13 23 32 90 60 1350g 3:06 11 11 14 23 32 95 60 2. Fast L/M/D 1150g 2:40 11 11 13 10 35 80 60 3. French Light Medium Dark 900g 3:40 17...
Page 28 - TROUBLESHOOTING; Bread Sinks in the centre
28 TROUBLESHOOTING Bread Sinks in the centre Too much liquid or liquid too warm. Measure ingredients accurately. Use liquids at temperatures between 21°C and 28°C. Salt was not added, causing bread to over rise and collapse. Measure ingredients accurately. Too much yeast was added. Measure ingredien...
Page 30 - ERROR CODES; Be sure the Bread maker is completely cooled before storing away.
30 ERROR CODES WARNING: If the below error codes are shown on the display, please follow the steps below. If “HHH” is displayed after the program has started, it means that the temperature inside of bread pan is too high. You should stop the program and unplug from the power outlet immediately. Open...
Page 31 - MAINTENANCE; Glen Dimplex Australia Pty Ltd; WARRANTY
31 MAINTENANCE If the unit fails to operate efficiently, is broken or other problems arise, unplug and do not operate. Ask for advice by calling your local after sales service agent or the Customer Care Centre on 1300 556 816 (AU) / 0800 666 2824 (NZ). Please refer to the warranty card in the box fo...