Page 3 - Índice
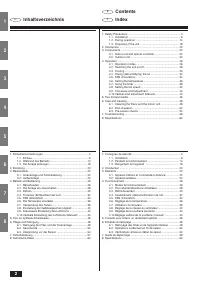
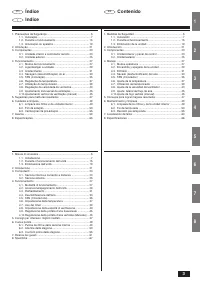
3 PR ES I 3 2 1 6 5 4 8 7 Índice Indice Contenido 1. Precauções de Segurança .......................................................... 5 1.1. Instalação ...................................................................... 71.2. Durante o funcionamento ............................................ ...
Page 4 - Carefully read the labels affixed to the main unit.; Safety Precautions
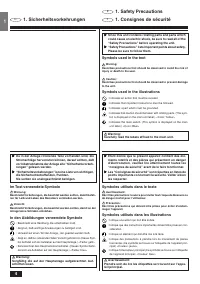
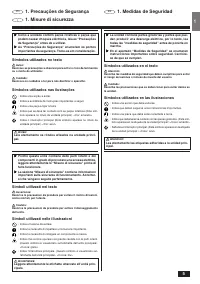
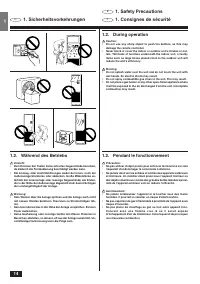
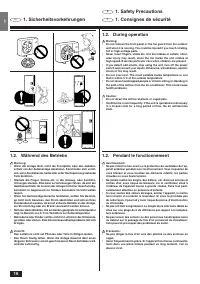
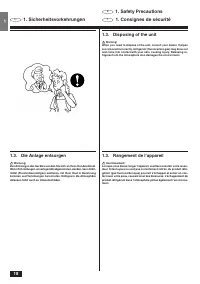
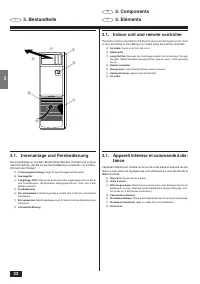
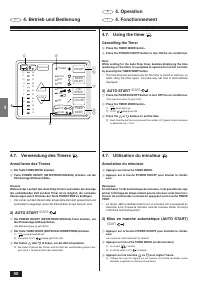
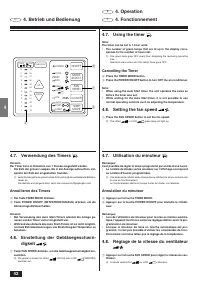
4 E D F s s s s s Since this unit contains rotating parts and parts whichcould cause an electric shock, be sure to read all of the“Safety Precautions” before operating the unit. s s s s s “Safety Precautions” lists important points about safety.Please be sure to follow them. Symbols used in the text...
Page 5 - Precauções de Segurança; Misure di sicurezza
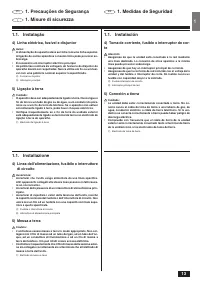
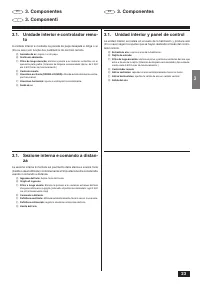
5 PR ES I 1 1. Precauções de Segurança s s s s s Como a unidade contém peças rotativas e peças quepodem causar choques eléctricos, leia as “Precauçõesde Segurança” antes de a utilizar. s s s s s As “Precauções de Segurança” enumeram os pontosimportantes da segurança. Tome-as em consideração. Símbolo...
Page 8 - ) Appareil extérieur
8 E D F 1.1. Installation 1) Outdoor unit Warning: • The outdoor unit must be installed on a stable, level surface, in aplace where there is no accumulation of snow, leaves or rubbish. • Do not stand on, or place any items on the unit. You may fall downor the item may fall, causing injury. Caution: ...
Page 10 - ) Tuyau d’évacuation
10 E D F 1. Safety Precautions 1.1. Installation 3) Drain hose Caution: Make sure that the drain hose is installed so that drainage can goahead smoothly. Incorrect installation may result in water leakage,causing damage to furniture. 1. Sicherheitsvorkehrungen 1.1. Einbau 3) Auslaufschlauch Vorsicht...
Page 11 - ) Tubo flessibile di drenaggio; Medidas de Seguridad; ) Manguito de drenaje
11 PR ES I 1 1. Precauções de Segurança 1.1. Instalação 3) Tubo de drenagem Cuidado: Assegure-se de que o tubo de drenagem está instalado de modoque a drenagem possa evacuar suavemente. Sendo instalado incor-rectamente, pode provocar fugas de água e danificar o mobiliário. 1. Misure di sicurezza 1.1...
Page 12 - brecher; Consignes de sécurité
12 E D F 1.1. Installation 4) Power line, fuse or circuit breaker Warning: • Make sure that the unit is powered by a dedicated line. Other ap-pliances connected to the same line could cause an overload. • Make sure that there is a main power switch. • Be sure to adhere to the unit’s voltage and fuse...
Page 13 - ) Linea dell’alimentazione, fusibile o interruttore
13 PR ES I 1 1. Precauções de Segurança 1.1. Instalação 4) Linha eléctrica, fusível e disjuntor Aviso: • A alimentação do aparelho deve ser feita com uma linha especial.A ligação de outros aparelhos a mesma linha pode provocar so-brecarga. • É necessário um interruptor eléctrico principal. • As potê...
Page 22 - tance
22 E D F 3.1. Indoor unit and remote controller The indoor unit is mounted on the floor of your room and puts out air (coolor dry) according to the settings you make using the remote controller. A Air intake: Sucks in air from the room. B Intake grille C Long-life filter: Removes dust and foreign ma...
Page 23 - to
23 PR ES I 3 3. Componentes 3.1. Unidade interior e controlador remo- to A unidade interior é montada na parede da peça desejada e dirige o ar(frio ou seco) em função dos parâmetros do controlo remoto. A Amissão de ar: aspira o ar do peça. B Grelha de admissão. C Filtro de longa duração: elimina a p...
Page 26 - Cooling; Kühlen; Refroidissement; Betrieb und Bedienung
26 E D F 4.1. Operation modes Cooling The air-conditioner works to cool the room to the selected temperature.The fan blows air continuously at the selected speed. DRY (Dehumidifying) • The compressor and the indoor unit fan are automatically turned ONand OFF repeatedly in combination to accommodate ...
Page 27 - Arrefecimento; Raffreddamento; Enfriado
27 PR ES I 4 4. Funcionamento 4.1. Modos de funcionamento Arrefecimento O ar condicionado funciona para arrefecer a peça segundo a temperaturaseleccionada. A ventoinha sopra continuamente ar à velocidade seleccio-nada. DRY (Desumidificação) • O compressor e a ventoinha da unidade interior ligam-se (...
Page 32 - l’air; B A
32 E D F 4. Operation 4.4. Drying (dehumidifying) the air 1 If the unit is OFF, press the POWER ON/OFF button to turn it ON. A The ON indicator should light up. 2 Press the MODE SELECT button and select the DRY mode. B The green DRY lamp goes ON. 3 If necessary, press the UP or DOWN buttons to set t...
Page 38 - STOP; STOP
38 E D F 4.7. Using the timer TIMER When using the timer function, the unit will automatically START/STOPafter the preset time has elapsed. AUTO START : The unit starts at a specified time. AUTO STOP : The unit stops operating at a specified time. TIMER OFF : The timer does not function. 1) AUTO STO...
Page 39 - ) ARRANQUE AUTOMÁTICO
39 PR ES I 4 4. Funcionamento 4.7. Utilização do temporizador TIMER Utilizando a função do temporizador, o aparelho passa automaticamentepara START/STOP (Arranque/Paragem) depois de transcorrido o tempopré-seleccionado. AUTO START (Arranque automático) : o aparelho entra em funciona- mento na hora e...
Page 40 - Cancelling the Timer; Annullieren des Timers; START; Annulation du minuteur; START
40 E D F 4.7. Using the timer TIMER Cancelling the Timer 4 Press the TIMER MODE button. 5 Press the POWER ON/OFF button to turn ON the air-conditioner. Note:While waiting for the Auto Stop timer, besides displaying the timeremaining on the timer, it is possible to operate the normal controlsby press...
Page 41 - Cancelamento do temporizador; Disattivazione del timer; Cancelación del temporizador
41 PR ES I 4 4. Funcionamento 4.7. Utilização do temporizador TIMER Cancelamento do temporizador 4 Carregue no botão TIMER MODE. 5 Carregue no botão POWER para ligar o ar condicionado. Nota:Enquanto aguarda o temporizador Auto Stop, em vez de visualizar otempo remanescente no temporizador, é possíve...
Page 42 - digkeit; Réglage de la vitesse du ventilateur
42 E D F 4. Operation 4.7. Using the timer TIMER Note:The timer can be set in 1-hour units.• The number of green lamps that are lit up in the display corre-sponds to the number of hours set. E One green lamp goes OFF every hour, displaying the remaining operatingtime.Operation starts when all of the...
Page 43 - nha; Ajuste de la velocidad del ventilador; lazione
43 PR ES I 4 4. Funcionamento 4.7. Utilização do temporizador TIMER Nota:O temporizador pode ser regulado em unidades de 1 hora.• O número das lâmpadas verdes acesas no visor corresponde aonúmero de horas regulado. E De hora em hora apaga-se uma lâmpada verde, visualizando o tempo defuncionamento re...
Page 44 - stroms
44 E D F 4. Operation 4.9. Crosswise wind adjustment 1 Press the LOUVER button to enter the swing mode. A The green lamp lights up. ON: to automatically diffuse wind crosswise. OFF: to blow out wind in any directions. 4.10. Vertical wind adjustment (Manual) The horizontal louver can manually be oper...
Page 45 - ção; sversale
45 PR ES I 4 4. Funcionamento 4.9. Ajustamento transversal da ventila- ção 1 Carregue na tecla LOUVER para activar o modo oscilante. A A lâmpada verde acende. ON: para difundir automaticamente ventilação transversal. OFF: para soprar em todas as direcções. 4.10. Ajustamento vertical da ventilação (m...
Page 48 - Cleaning the filters and the indoor unit; Filter removal; Pflege und Reinigung; anlage; Filterausbau; Entretien et nettoyage; Nettoyage des filtres et de l’appareil; Retrait du filtre
48 E D F Warning: • Always turn off the power, first on the remote controller and thenthe main switch, before cleaning or servicing the unit. • When installing or removing the filter or front panel, do not standon an unsteady surface. You may fall and injure yourself. Be alsocareful not to let dust ...
Page 49 - Cuidados e limpeza; terior; Remoção do filtro; na; Rimozione del filtro; Mantenimiento y limpieza; Limpieza de los filtros y de la unidad; Extracción del filtro
49 PR ES I 6 6. Cuidados e limpeza Aviso: • Desligue sempre a alimentação, primeiro no controlador remotoe depois no interruptor principal, antes de proceder à limpeza ouà manutenção do aparelho. • Ao instalar ou ao retirar o filtro ou o painel frontal, não permane-ça numa superfície instável. Pode ...
Page 52 - son
52 E D F 6.2. End-of-season s s s s s Press POWER ON/OFF to turn the unit off. s s s s s Turn off the main power switch. s s s s s Clean the filters and the indoor unit thoroughly. s s s s s Clean the outdoor unit and place a protective cover over it to keepout dirt and rubbish. 6. Care and cleaning...
Page 58 - Guide de dépannage
58 7 Vérifier les points suivants avant de solliciter toute intervention technique. Etat de la machine Ne fonctionne pas Souffle d’air mais celui-ci ne rafraî-chit pas. Fonctionne mais s’arrête peu après Remède Appuyer sur la touche ON/OFFlorsque le courant est rétabli.Activer l’alimentation princip...
Page 60 - Localización de fallos
60 7 Repase los siguientes puntos antes de solicitar algún servicio de reparación: El estado de la máquina No funciona. El aire sale pero no enfría. Se pone en marcha pero pronto sedetiene. Tratamiento Pulse el botón de ON/OFF des-pués de restablecer la corriente.Encienda la corriente principal.Camb...
Page 61 - Ricerca dei guasti
61 7 Prima di chiedere l’intervento di un tecnico, si prega di controllare i seguenti punti. Condizioni dell’unità L’unità non funziona. L’aria viene scaricata ma non diven-ta fredda. L’unità si arresta immediatamentedopo l’avvio. Soluzione Premere il pulsante di accensione/spegnimento (POWER ON/OFF...
Page 68 - — MEMO —