Mitsubishi Electric MR-LA580ER-GWH-A - Manuals
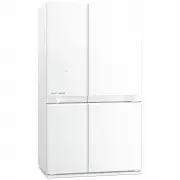
Mitsubishi Electric MR-LA580ER-GWH-A Refrigerator – User Manual in PDF format online.
Manuals:
User Manual Mitsubishi Electric MR-LA580ER-GWH-A


Summary
2 For your safety, please be sure to followthese instructions For your safety, please be sure to followthese instructions The types of danger that can result from improperhandling are explained in the sections below. ٹ The symbols illustrated below havethe following meanings. Mishandling can lead to...
3 Before use Operation Cleaning When in trouble CAUTION WARNING When something abnormal or unusualoccurs, turn off immediately and consult with“the store where you purchased the unit” orwith a “Mitsubishi Electric repair counter.” Do not use in a shed or a garage. If small animals damage the wiring,...
4 From Installation to Operation From Installation to Operation Use a dedicated outlet Use a dedicated outlet for the power supply that meets the rating specified on therating label. (The rating label is located on the door-liner of the refrigerator compartment.) The refrigerator will not be damaged...
Mitsubishi Electric Refrigerators Manuals
-
 Mitsubishi Electric MR-420EK-ST-A
User Manual
Mitsubishi Electric MR-420EK-ST-A
User Manual
-
 Mitsubishi Electric MR-458ER-SB-A
User Manual
Mitsubishi Electric MR-458ER-SB-A
User Manual
-
 Mitsubishi Electric MR-458ER-ST-A
User Manual
Mitsubishi Electric MR-458ER-ST-A
User Manual
-
 Mitsubishi Electric MR-458ER-W-A
User Manual
Mitsubishi Electric MR-458ER-W-A
User Manual
-
 Mitsubishi Electric MR-505ER-SB-A
User Manual
Mitsubishi Electric MR-505ER-SB-A
User Manual
-
 Mitsubishi Electric MR-505ER-ST-A
User Manual
Mitsubishi Electric MR-505ER-ST-A
User Manual
-
 Mitsubishi Electric MR-505ER-W-A
User Manual
Mitsubishi Electric MR-505ER-W-A
User Manual
-
 Mitsubishi Electric MR-508EK-SB-A2
User Manual
Mitsubishi Electric MR-508EK-SB-A2
User Manual
-
 Mitsubishi Electric MR-508EK-ST-A2
User Manual
Mitsubishi Electric MR-508EK-ST-A2
User Manual
-
 Mitsubishi Electric MR-508EK-W-A2
User Manual
Mitsubishi Electric MR-508EK-W-A2
User Manual
-
 Mitsubishi Electric MR-560EK-ST-A2
User Manual
Mitsubishi Electric MR-560EK-ST-A2
User Manual
-
 Mitsubishi Electric MR-560EK-W-A2
User Manual
Mitsubishi Electric MR-560EK-W-A2
User Manual
-
 Mitsubishi Electric MR-BF325EK-ST-A
User Manual
Mitsubishi Electric MR-BF325EK-ST-A
User Manual
-
 Mitsubishi Electric MR-BF325EK-ST-A2
User Manual
Mitsubishi Electric MR-BF325EK-ST-A2
User Manual
-
 Mitsubishi Electric MR-BF325EK-W-A
User Manual
Mitsubishi Electric MR-BF325EK-W-A
User Manual
-
 Mitsubishi Electric MR-BF390EK-OB-A
User Manual
Mitsubishi Electric MR-BF390EK-OB-A
User Manual
-
 Mitsubishi Electric MR-BF390EK-OB-A2
User Manual
Mitsubishi Electric MR-BF390EK-OB-A2
User Manual
-
 Mitsubishi Electric MR-BF390EK-ST-A2
User Manual
Mitsubishi Electric MR-BF390EK-ST-A2
User Manual
-
 Mitsubishi Electric MR-BF390EK-W-A2
User Manual
Mitsubishi Electric MR-BF390EK-W-A2
User Manual
-
 Mitsubishi Electric MR-CGX370EP-GBK-A
User Manual
Mitsubishi Electric MR-CGX370EP-GBK-A
User Manual