Page 2 - Contents
Description of the appliance . . . . . . . . . . . . . . . . . . . . . . . . . . . . . . . . . . . . . . . . . 4 Oven interior and accessories . . . . . . . . . . . . . . . . . . . . . . . . . . . . . . . . . . . . . . . . . 4Control panel . . . . . . . . . . . . . . . . . . . . . . . . . . . . . . ...
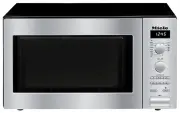
Page 4 - Oven interior and accessories; Description of the appliance
Oven interior and accessories a Appliance door b Door lock mechanism c Quartz grill d Control panel e Turntable f Grilling rack g Gourmet plate h Cover Description of the appliance 4
Page 5 - Control panel; Electronic clock with display
Control panel j Electronic clock with display k Rotary selector for microwave power,grill and combination programmes l Rotary selector for enteringtime and weight m Automatic programme buttons n Time of day button m o Minute minder button l p Memory button (to save a 1-3 stageprogramme sequence) q S...
Page 6 - Accessories supplied; Grilling rack; for; Gourmet plate; Optional accessories; Glass tray
Accessories supplied Grilling rack The grilling rack can be used for allfunctions with and withoutmicrowave power, except for Microwave Solo mode. To avoid the grilling rack being usedinadvertently on Microwave Solo, itshould not be kept inside themicrowave oven. Gourmet plate The Gourmet plate is a...
Page 7 - Caring for the environment
Disposal of the packingmaterial The transport and protective packinghas been selected from materials whichare environmentally friendly for disposaland can normally be recycled. Recycling the packaging reduces theuse of raw materials in themanufacturing process and alsoreduces the amount of waste in ...
Page 8 - Correct application; Warning and Safety instructions
This appliance complies with all relevant local and national safetyrequirements. Improper use of the appliance can, however,present a risk of both personal injury and material damage.To avoid the risk of accidents and damage to the appliance,please read these instructions carefully before installati...
Page 9 - Safety with children
~ When using the microwave function, any moisture will be vaporised. Therefore, if flammable materials are being dried in themicrowave, they may dry out and ignite. Never use the microwave tostore or dry items which could ignite easily. ~ This appliance is not intended for use by persons (including ...
Page 10 - Technical safety; A damaged appliance is dangerous. Check the appliance for any
~ Children should be supervised to ensure that they do not play with the appliance. ~ Danger of suffocation! Children may be able to wrap themselves in packing material or pull it over their heads with the risk ofsuffocation. Keep children away from any packing material. ~ Danger of burning! Childre...
Page 14 - Correct use; Danger of burning! The microwave oven gets hot during
~ This appliance must not be installed and operated in mobile installations (e.g. on a ship). ~ Reliable and safe operation of this appliance can only be guaranteed if it has been connected to the mains electricity supply. Correct use , Danger of burning! The microwave oven gets hot during grilling ...
Page 23 - Never place the hot glass tray (or any other hot cooking
~ The rack and Gourmet plate supplied with the appliance are designed to be compatible with microwaves and can therefore beused for grilling with or without the microwave function.However, do not use the rack and Gourmet plate at the same timeas the Gourmet plate will be damaged. Always place the Go...
Page 24 - Description of the functions
How the microwave ovenworks In a microwave oven there is a high-frequency tube called a magnetron.This converts electrical energy intomicrowaves. These microwaves aredistributed evenly throughout the oveninterior, and rebound off the metalsides of the oven interior to reach thefood from all sides. M...
Page 25 - Microwave Solo mode; – Five defrosting programmes; Description of functions
What can a microwave ovendo? In the microwave oven, food is cooked,reheated or defrosted quickly. You can use the microwave in thefollowing ways: – Food can be defrosted, reheated or cooked by entering a power level anda time. – Deep-frozen, ready meals can be defrosted and then reheated orcooked. –...
Page 26 - Material and shape; Metal; Suitable containers for microwave ovens
Microwaves – are reflected by metal. – pass through glass, porcelain, plastic and cardboard. – are absorbed by food. , Danger of burning! Containers which are not microwave-safe canbe destroyed, resulting in damageto the appliance. Material and shape The material and shape of containersused affect c...
Page 27 - Glassware; Porcelain is a suitable material.; Earthenware
Exceptions: – Ready-meals in aluminium foil dishes These can be defrosted and reheatedin the microwave oven, ifrecommended by the manufacturer.Important: Remove the lid and makesure the foil dish is at least 2 cm fromthe oven walls at all times.Important:As food is only heated from the top, it isbet...
Page 30 - The cover; Do not use a lid or cover
The cover – prevents too much steam escaping, especially when cooking foods whichneed longer to cook, such aspotatoes. – speeds up the cooking process. – prevents food from drying out. – prevents soiling in the oven interior. Always cover food with the coversupplied when cooking on MicrowaveSolo. Al...
Page 31 - Danger of suffocation! Children; Before using for the first time
After unpacking, let the appliancestand for approx. 2 hours at roomtemperature after transporting it toits final location before connecting itto the mains. During this time a temperatureequalisation occurs between theappliance and the ambienttemperature.This is important for the correctelectronic fu...
Page 33 - switch on; ON; switch off; OFF; Time of day display
Setting the time of day ^ Connect the appliance to the mainselectricity supply. 12:00 and the m symbol will flash in the display until the current time ofday is set. In the meantime the timeof day will start to run from 12:00, asthe clock will start as soon as theappliance is connected to the mainse...
Page 34 - Opening the door; Turntable; Closing the door; Push the door firmly shut.; Starting a programme; symbol and the power level; Operation
Opening the door ^ Press the " a " button to open the door. If the microwave oven is being used,opening the door will interrupt thecooking process. Placing a dish in themicrowave oven Ideally the dish should be placed in themiddle of the oven compartment. Turntable The turntable helps the fo...
Page 35 - door
When heating up food which cannot bestirred or turned during cooking, as witha plated meal, it is best to use a lowermicrowave power level. This ensures the heat is distributedevenly. Heat for long enough to cookthe food properly. ^ Set the required time using the timeselector. A duration of between...
Page 36 - continue a programme:; Altering entries; Microwave power level; Cancelling a process
Interrupting or restarting aprogramme At any time you can . . . . . . interrupt a process: ^ Press the Stop/C button, or open theappliance door. The time stops counting down. . . . continue a programme: ^ Close the door and press Start. The process will continue. Altering entries If you discover aft...
Page 37 - Programming durations; System lock; Activating the system lock
Quick start (programmable) Pressing the Start/ c button is sufficient to set the appliance operating onmaximum power.You can choose between threedurations which are stored in thememory: ^ 30 s: Press Start / c once ^ 1 min.: Press Start / c twice ^ 2 min.: Press Start / c three times Pressing the St...
Page 38 - Minute minder; Altering a minute minder entry
Minute minder The minute minder can be used to timeany activity in the kitchen, e.g. boilingeggs. The time set counts down in onesecond steps. ^ Press the l button. 0:00 flashes in the display and the l symbol lights up. ^ Use the time selector to set theminute minder time you require. ^ Press the S...
Page 40 - or; Changing the duration
Changing the duration The cooking duration can be changedduring operation. To do this, interruptthe cooking programme by pressingthe Stop/C button, and change theduration. Continue the cooking processby pressing the Start button.The cooking duration can also beextended during operation by pressingth...
Page 41 - Use; Heat the plate up on 450 W + Grill
Use The Gourmet plate gets extremelyhot when in use. Always use ovengloves when handling it to avoidburns. Place it on a suitable heat-resistant mat or pot rest. Before using for the first time Before using the Gourmet plate for thefirst time, fill it with 400 ml water andadd 30-40 ml vinegar or lem...
Page 42 - Some suggested uses; , 3–4 minutes each side; Recipes; Preparation time: 10 – 15 minutes
Some suggested uses Pre-heat the Gourmet plate directly onthe turntable for 5 minutes at 450 W +Grill L . Fish fingers (frozen), 150 g + 1 tbsp. oil L , 3–4 minutes each side Hamburgers, 2 burgers + 1 tbsp. oil L , 3–4 minutes each side Croquette potatoes (frozen), 10–12 +1 tbsp. oil L , 6–8 minutes...
Page 44 - Preparation time: 15 – 20 minutes; Pork fillet in a Roquefort sauce; Preparation time: 10 – 12 minutes
Pork fillets(Serves 2) Preparation time: 15 – 20 minutes 1 pork fillet (approx. 400 g)4 rashers streaky baconSalt, pepper10 g butter200 g sliced mushrooms200 ml double cream1 tbsp. brandy Cut the pork into 4 slices. Season eachslice with salt and pepper, and wrap ina rasher of streaky bacon. Place t...
Page 46 - Pineapple cake; Quick almond tart; Preparation time: 20 – 25 minutes
Pineapple cake Preparation time: 20 – 25 minutes For the cake:2 eggs80 g sugar1 1 / 2 ripe bananas 30 g chocolate chips100 g plain flour 3 / 4 tsp. baking powder Topping:1 tin pineapple pieces(drained weight 240 g)1 1 / 2 tbsp. brown sugar 1 1 / 2 tbsp. desiccated coconut Beat together the eggs and ...
Page 47 - Only use the cover supplied with; Cooking food from frozen; Operation - Automatic programmes
All of the Automatic programmes areweight dependent. The weight of the food can be shown ineither grams (g) or in pounds (lb) (see"Changing the settings"). After selecting a programme, enter theweight of the food. The microwaveautomatically calculates the timeaccording to the weight given. A...
Page 49 - Vegetables; Preparation time: 25 – 35 minutes; Recipes - Automatic programmes
Below are some recipe suggestions forthe Automatic programmes using the"Cooking fresh food" function ° ". These can be adapted to suit yourrequirements. It is important to follow the weightguidelines for the programmeconcerned. If the weight guidelinesare exceeded, the food will not cook...
Page 50 - Potatoes; Fish; Preparation time: 35 – 45 minutes
AC 2 À Potatoes This programme can be used to cooknew potatoes, boiled potatoes andbouillon potatoes. Enter the weight forthe potatoes and the cooking liquid. For new potatoes, wash and drain thepotatoes and place them in a cookingcontainer. Season with a little salt,cover and cook. When cooking new...
Page 51 - Kebabs; wooden skewers
AC 4 Á Kebabs Pork kebabs(8 skewers) Preparation time: 25 – 35 minutes+ 1 hour resting time 1 pork filet, approx. 300 g1 red capsicum2 onions For the marinade:4 tbsp. oilPepper, salt, sweet paprika and chillipowder 8 wooden skewers Cut the pork fillet into 16 cubes. Washthe capsicum and cut into bit...
Page 55 - Programming; Then select the duration.; Changing an entry
One favourite programme can besaved in memory. This programme canbe used for your most frequentlycooked recipe. The programme canhave up to 3 stages (e.g.: 1 minute at600 W, followed by 2 minutes on Grill,and finally 3 minutes at 150 W + Grill). Programming (The example given is for a 3-stageprogram...
Page 56 - Calling up your favourite programme; Press the Start button.
Calling up your favourite programme ^ Turn the power level selector to the12 o'clock position. ^ Press the M button. ^ Press the Start button. In the event of a power cut, thefavourite programme is no longersaved and must be re-entered. Saving a favourite programme (memory) 56
Page 57 - Changing the settings
You can change the standard defaultsettings by altering the "status" of thesetting. Please consult the chart for the differentoptions.The factory default settings are markedwith a star* in the chart. To change a setting, proceed asfollows: ^ Press and hold the m and M buttons at the same tim...
Page 58 - Setting
Setting Settings available (* factory default) P I Night dimming S 0 * S I Night dimming is deactivated. Night dimming is activated.The time of day display is switched off from11 pm to 4 am. P 2 Keeping warmfunction S I * S 0 The automatic warming function is activated. The automatic warming functio...
Page 59 - Tips on reheating; Always remove the lids from; Reheating
Select the following microwave powerlevels to reheat food: Drinks . . . . . . . . . . . . . . . . . . . . . 900 WFood . . . . . . . . . . . . . . . . . . . . . . 600 WFood for babies and toddlers . . . 450 W , We do not recommend heating or reheating food or drinks forbabies or young children in the...
Page 60 - After reheating; After reheating food, especially
Stir or turn food from time to time duringreheating. Stir the food from the outsidetowards the middle, as food heats morequickly from the outside. After reheating Be careful when removing a dishfrom the microwave oven. It may behot. Although heat is not normally producedin the container itself by th...
Page 61 - Cooking
Place the food in a microwave-proofdish and cover it. When cooking, it is a good idea toselect a power level of 900 W to startwith and then when the food is hot,reduce the power level to 450 W formore gentle continued cooking. For dishes such as rice or semolina pudding , first select a power level ...
Page 62 - Defrosting; For defrosting everything else.; Defrosting / Defrosting and reheating or cooking
Do not refreeze food once it hasthawed. Defrosted food should beused up as quickly as possible asfood soon loses its nutritional valueand goes off. Defrosted food mayonly be refrozen after it has beencooked. Defrosting Select the following microwave powersettings to defrost food: – 80 W For defrosti...
Page 63 - After bottling; Bottling
You can preserve small portions of fruitand vegetables in preserving jars withyour microwave. Prepare the jars in theusual way.Fill the jars up to 2 cm below the rim. Close the jars with clear adhesivetape or with clips suitable formicrowave use. Never use metal clips or jars withsrew-on lids. Do no...
Page 65 - The oven interior can get hot; Cleaning and care
Disconnect the microwave ovenfrom the power supply beforecleaning (e.g. switch off at thesocket and remove the plug). Do not use a steam cleaningappliance to clean this appliance.Pressurised steam could reach theelectrical components and cause ashort circuit. Housing, oven interior andinside of the ...
Page 66 - Appliance front
To neutralise odours in the oven, put acup of water with some lemon juice witha glass rod or suitable utensil placed init in the microwave oven and simmer fora few minutes. The door should be kept clean at alltimes and checked at regular intervalsfor any signs of damage. , If any damage is noticed, ...
Page 67 - Cover
To avoid damaging the surfaces ofyour appliance, do not use: – cleaning agents containing soda, ammonia, acids or chlorides, – cleaning agents containing descaling agents, – abrasive cleaning agents, e.g. powder cleaners and creamcleaners, – solvent-based cleaning agents, – stainless steel cleaners,...
Page 68 - Repairs may only be carried out; Problem solving guide
, Repairs may only be carried out by a suitably qualified andcompetent person authorised byMiele in accordance with nationaland local safety regulations. Repairsand other work by unqualifiedpersons could be dangerous. Themanufacturer cannot be held liablefor unauthorised work. Some minor problems ca...
Page 70 - – Miele; Warranty; After sales service
In the event of any faults which youcannot remedy yourself, pleasecontact: – Miele The contact details for Miele aregiven at the back of these operatinginstructions. When contacting Miele, please quotethe model and serial number of yourappliance. This information is given onthe data plate, which is ...
Page 71 - Before connecting the; data plate; situated at; Solar; Electrical connection
, Before connecting the appliance, ensure that it has notbeen damaged in any way. Do notuse a damaged appliance. The appliance is supplied with a mainscable and moulded plug ready forconnection to an AC single phase 220-240 V 50 Hz supply. Fuse protection is to be conducted asfollows: Connection to ...
Page 72 - Installation
When installing the appliance,ensure that there is sufficientventilation to and from the applianceboth underneath and to the rear.Do not block the ventilation gaps orblock the gap between the base ofthe appliance and the worktopsurface. A minimum installation height of850 mm from the floor to the ba...
Page 75 - Miele New Zealand Limited
75 www.miele.com.au Miele Center and Head Office Melbourne: 1 Gilbert Park DriveKnoxfield, VIC 3180 Miele Center South Melbourne: 206-210 Coventry StreetSouth Melbourne, VIC 3205 Miele Center and Office Sydney: 3 Skyline PlaceFrenchs Forest, NSW 2086 Miele Center and Office Brisbane: 39 Harvey Stree...