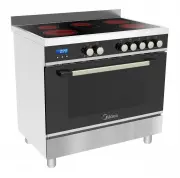
Midea MFS90GSS - Manuals
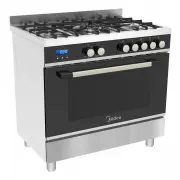
User Manual Midea MFS90GSS


Summary
Getting to know your new cooker Thank you for choosing one of our products. Our cookers are of simple, rational design. They are constructed to the best standards to ensure good service and outstanding safety. Please read this manual carefully; it will provide all the advice needed to allow you to o...
Clearances to combustible materials Any adjoining wall surface (side or rear) situated within 200mm of any hob burner must be a suitable non-combusti- ble material from the edge for a height of 150mm for the entire length of the cooker. Any combustible construction above the cooker must be at least ...
4 Gas installation must be made in accordance with AS5601; Also refer to rangehood manufacturers recommendation. Check gas presure, note the correct setting from the data plate sealed inside the front appliance drawer *. Stability bracketWARNING: In order to prevent accidental tipping of the applian...
Midea Ovens Manuals
-
 Midea 65DME40106-BK
User Manual
Midea 65DME40106-BK
User Manual
-
 Midea MCO44BL
User Manual
Midea MCO44BL
User Manual
-
 Midea MCOS34BL
User Manual
Midea MCOS34BL
User Manual
-
 Midea MFS90CSS
User Manual
Midea MFS90CSS
User Manual
-
 Midea MFS90ISS
User Manual
Midea MFS90ISS
User Manual
-
 Midea MO5BL
User Manual
Midea MO5BL
User Manual
-
 Midea MO9BL
User Manual
Midea MO9BL
User Manual
-
 Midea MO9SS
User Manual
Midea MO9SS
User Manual
-
 Midea MOC5BL
User Manual
Midea MOC5BL
User Manual
-
 Midea MOP9BL
User Manual
Midea MOP9BL
User Manual
-
 Midea MOP9SS
User Manual
Midea MOP9SS
User Manual
-
 Midea 65DEE30004
Manual
Midea 65DEE30004
Manual