Page 2 - CONTENTS
1 CONTENTS Safety Information..........................................................................................................................2 Transport & Installation..................................................................................................................5 Att...
Page 3 - SAFETY INFORMATION; Safety Notes
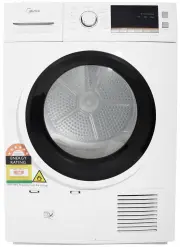
Congratulations on your new Midea heat pump dryer. This manual contains important information on the installation, use and care of your appliance. Please read this manual carefully before use. Follow instructions and keep the manual for future reference. SAFETY INFORMATION 2 CAUTION: HOT SURFACE! CA...
Page 5 - Electric Shock Hazard; Do not pull the power cord forcefully to pull out the mains plug.; Injury Danger; Do not lean on the opened door of the dryer.; Damage Danger; Do not operate the dryer without the filter door and filter base.; Explosion Danger; result in an explosion.; Information on Disposal
SAFETY INFORMATION 4 Electric Shock Hazard 1. Do not pull the power cord forcefully to pull out the mains plug. 2. Please do not plug/draw the mains plug with wet hands. 3. Do not damage the power cord and the power plug. Injury Danger 1. Do not disassemble and install the dryer under no instruction...
Page 6 - TRANSPORT & INSTALLATION; Transport; handle for delivery.; Installation Position; noise or vibration and effect the performance of the dryer.; Level Adjusting; Once in its permanent operating position, check that the dryer is; Power Supply Connection
TRANSPORT & INSTALLATION 5 Transport Move cautiously. Do not grasp any salient parts of machine. The machine door can not be used as the handle for delivery. If the dryer can't be transported in upright position, tilt it to the right (container) side but not more than 30°. Installation Position ...
Page 7 - Attention; Refresh; Advice; time and save energy consumption.
ATTENTION & ADVICE 6 Attention NOTE: The dryer should be left to stand still for at least 2 hours before it is connected to the power mains to allow the system to stabilize. Otherwise the heat pump could be damaged. 1. Before first use, please use the soft fabric to clean the inside drum. a) Put ...
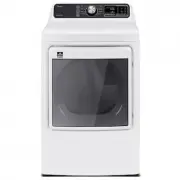
Page 8 - IDENTIFYING PARTS OF THE DRYER; External Drain Hose Installation
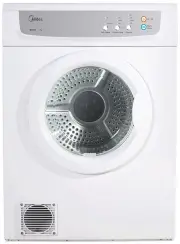
IDENTIFYING PARTS OF THE DRYER 7 Power cord Filter door Container Door Control panel Air inlet Filter base Filter cover Drum Hose holder External drainage hose External Drain Hose Installation The water container does not require t o be emptied when water is externally drained. Max . 120cm 200cm Ste...
Page 9 - QUICK START
QUICK START 8 1.Check if the container and filters have been cleaned up 3. Close the machine door 2. Open the door and load the laundry 4. Plug the power cord and press the 【 On/Off 】 key 8.Press the 【 】 key On/Off 7. Remove the laundry when 6. Press the 【 Start/Pause 】 button 9. Clean the filters and...
Page 10 - DESCRIPTION OF CONTROLS; Programme Selection Knob; Display
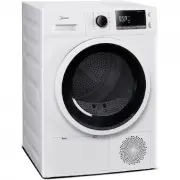
9 DESCRIPTION OF CONTROLS 1. Programme Selection Knob 2. Display Window 3. Function Buttons (Delay, Time, Intensity, My Cycle, Lamp, Signal, Anti-Crease, Child lock) 4. Start / Pause Button 5. On / Off Button 1 2 3 4 5 Display Delay start Child lock Remaining Time indicator / Error message Cycle pha...
Page 11 - PROGRAMME TABLE
10 PROGRAMME TABLE Programme Weight (max) Application / Properties Delay Tim e Cotton For cottons and coloureds made of cotton or linen. Extra 7.0kg To dry cotton pieces of clothing. Drying level: extra dry. Y N Standard To dry cotton pieces of clothing. Drying level: cupboard dry. Iron To dry cotto...
Page 12 - DRYING FUNCTIONS; Delay
11 DRYING FUNCTIONS 1. 【 Delay 】 With the delay function you can delay the programme start from 0 to 24 hours. When the programme starts, the delay start time begins to count down and the icon on the display blinks. Steps in details: (1). Load your laundry and make sure the machine door is closed. (...
Page 13 - Lamp
12 DRYING FUNCTIONS 5. 【 Lamp 】 Use to turn the lamp on or off. When the lamp function is on, the lamp inside the drum will light up for 3 minutes when door is closed or the dryer is in operation, or 1 minute when the door is open. 6. 【 Signal 】 Use to turn the buzzer on or off. Default setting of t...
Page 14 - OPERATION INSTRUCTION; Select the Programme
13 OPERATION INSTRUCTION Select the Programme 1. Press the 【 On/Off 】 key. When the LED display screen brightens up, rotate the programme knob to select the desired programme. 2. Select the 【 Delay 】 , 【 Time 】 , 【 Intensity 】 , 【 Signal 】 or 【 Anti-Crease 】 functions for additional option. 3. Press...
Page 15 - CLEANING & MAINTENANCE; Empty the Water Container; Clean the Filter Base
14 CLEANING & MAINTENANCE Empty the Water Container 1. Hold and pull out the water container with two hands. 2. Tilt the water container, pour out the condensed water and put the tank back to its place. Clean the Filter Door 1. Open the door. 2. Take out the filter door. 3. Clean the filter door: ...
Page 16 - Cleaning the Outer Surface and Inner Drum; To clean the cabinet and inner drum, use a damp cloth and wipe dry.; Clean the Heat Exchanger
15 CLEANING & MAINTENANCE Cleaning the Outer Surface and Inner Drum To clean the cabinet and inner drum, use a damp cloth and wipe dry. NOTE: Cleansers such as soap powder, abrasive cleaning power, alkali cleansers, chemical cloth, thinners, alcohol, acid petroleum products and hot water should ...
Page 17 - TROUBLESHOOTING GUIDE; Possible Cause / Solution
16 TROUBLESHOOTING GUIDE If the clothes dryer does not perform as expected, malfunctions, or an alarm is sounding, please check the following list of possible solutions. If a solution cannot be found or the problem persists, please contact Midea service (refer to page 17). Do not, under any circumst...
Page 18 - If service is required; Please retain proof of purchase for warranty claims.; Date of purchase
17 REPAIRS, SERVICE & WARRANTY It is hazardous for anyone installing, removing, repairing servicing or testing this appliance. Only an Authorised Service Person can carry out servicing or repairs to this appliance. If service is required Please retain proof of purchase for warranty claims. Model...
Page 19 - SPECIFICATIONS
18 SPECIFICATIONS Model MDHP07 Power supply 220-240V~ 50Hz Rated power 650W Refrigerant R134a Ambient temperature +5ºC ~ +35ºC Product dimensions (W x D x H) 595 x 622 x 845(mm) Rated drying capacity 7.0kg Net weight 53kg This dryer contains fluorinated greenhouse gases covered by the Kyoto Protocol....