Maytag MVWP575GW0 - Manuals
Maytag MVWP575GW0 – User Manual, Installation Manual in PDF format online.
Manuals:
User Manual Maytag MVWP575GW0







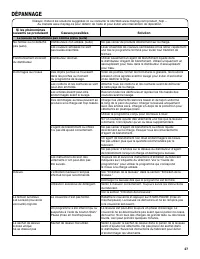
Installation Manual Maytag MVWP575GW0


Summary
2 You can be killed or seriously injured if you don't immediately You can be killed or seriously injured if you don't follow All safety messages will tell you what the potential hazard is, tell you how to reduce the chance of injury, and tell you what canhappen if the instructions are not followed. ...
3 Optional tools: Parts supplied: NOTE: All parts supplied for installation are in cardboard insert in the top of the washer. LOCATION REQUIREMENTS Select proper location for your washer, to improve performance and minimize noise and possible “washer walk.” Install your washer in a basement, laundry...
4 You will need: n A water heater set to 120°F (49°C). n A grounded electrical outlet located within 4 ft (1.2 m) of power cord on back of washer. n Hot and cold water faucets located within 3 ft (0.9 m) of hot and cold water fill valves on washer, and water pressure of 20–100 psi (138–690 kPa). n A...
Maytag Manuals
-
 Maytag MEDB765FC0
User Manual
Maytag MEDB765FC0
User Manual
-
Maytag MEDB765FC0
Installation Manual
-
 Maytag MSS25C4MGB00
User Manual
Maytag MSS25C4MGB00
User Manual
-
 Maytag MED8200FC0
User Manual
Maytag MED8200FC0
User Manual
-
Maytag MED8200FC0
Installation Manual
-
 Maytag MHW3505FW0
User Manual
Maytag MHW3505FW0
User Manual
-
Maytag MHW3505FW0
Installation Manual
-
 Maytag MGR8800DS0
User Manual
Maytag MGR8800DS0
User Manual
-
 Maytag MEDB880BW0
User Manual
Maytag MEDB880BW0
User Manual
-
Maytag MEDB880BW0
Installation Manual
-
 Maytag MEDX700XW0
User Manual
Maytag MEDX700XW0
User Manual
-
Maytag MEDX700XW0
Installation Manual
-
 Maytag MMV1174DS3
Installation Manual
Maytag MMV1174DS3
Installation Manual
-
 Maytag MVWX500XW2
User Manual
Maytag MVWX500XW2
User Manual
-
Maytag MVWX500XW2
Installation Manual
-
 Maytag MBF2258XEW6
User Manual
Maytag MBF2258XEW6
User Manual
-
Maytag MSS25C4MGZ00
User Manual
-
 Maytag MVWC555DW0
User Manual
Maytag MVWC555DW0
User Manual
-
 Maytag MDB4949SDH2
User Manual
Maytag MDB4949SDH2
User Manual
-
Maytag MDB4949SDH2
Installation Manual