Page 2 - MICROWAVE OVEN SAFETY; Your safety and the safety of others are very important.; DANGER; IMPORTANT SAFETY INSTRUCTIONS
2 MICROWAVE OVEN SAFETY Your safety and the safety of others are very important. We have provided many important safety messages in this manual and on your appliance. Always read and obey all safetymessages. This is the safety alert symbol. This symbol alerts you to potential hazards that can kill o...
Page 3 - Internet Connectivity Guide for Connected Appliances Only; Federal Communications Commission (FCC) Compliance Notice
3 IMPORTANT SAFETY INSTRUCTIONS When using electrical appliances basic safety precautions should be followed, including the following: WARNING: To reduce the risk of burns, electric shock, fire, injury to persons, or exposure to excessive microwave energy: � Use care when cleaning the vent-hood filt...
Page 4 - FCC Caution; OEM Responsibilities to comply with FCC Regulations
4 Under Industry Canada regulations, this radio transmitter may only operate using an antenna of a type and maximum (or lesser) gainapproved for the transmitter by Industry Canada. To reduce potential radio interference to other users, the antenna type and its gainshould be so chosen that the equiva...
Page 5 - General Cleaning; MICROWAVE OVEN DOOR EXTERIOR; GREASE FILTERS
5 MICROWAVE OVENMAINTENANCE AND CARE General Cleaning IMPORTANT: Before cleaning, make sure all controls are off and the microwave oven is cool. Always follow label instructions oncleaning products. Soap, water, and a soft cloth or sponge are suggested first, unlessotherwise noted. STAINLESS STEEL A...
Page 7 - Replacing Charcoal Filter:; Tools and Parts; Tools Needed
7 Replacing Charcoal Filter: The charcoal filter is behind the grease filter. It cannot be cleaned and should be replaced every 6 months, while the display shows thefilter alert “Change the Charcoal Filter and reset reminder in Settings”. To replace the charcoal filter: Disconnect power. Remove the ...
Page 8 - Parts Supplied
8 Parts Supplied Part Drawing Description Qty Where can find? Screw Pack 3/16-24 x 3" round-headbolts 2 A A. Inner Form in the cavity 1/4-20 x 3" flat-head bolts 2 Washers 2 3/16" toggle nuts 2 1/4" x 2" lag screws 2 #6 x 3/8" Sheet metalscrews 2 Power supply cordbushing 1 Da...
Page 9 - Location Requirements; Special Requirements; Product Dimensions
9 Cardboard Plate Upper cabinet templateand Wall template 1 C C. Outer Form in the Carton Literature Pack Literature 1 Mounting Pate Mounting plate 1 Check local codes. Check existing electrical supply. See “Electrical Requirements”. It is recommended that all electrical connections be made by a lic...
Page 10 - Installation Dimensions; Electrical Requirements; WARNING
10 Installation Dimensions NOTE: The grounded 3 prong outlet must be inside the upper cabinet. See the “Electrical Requirements” section. B C F G D E A A. 2" x 4" (5.1 cm x 10.2 cm)wall stud B. Grounded 3 prong outlet C. Upper cabinet depth (with door)*** D. 36" (91.4 cm) recommended* 30...
Page 11 - INSTALLATION; Installation Types
11 GROUNDING INSTRUCTIONS For a grounded, cord-connected appliance: This appliance must be grounded. In the event of amalfunction or breakdown, grounding will reduce the risk ofelectric shock by providing a path of least resistance forelectric current. This appliance is equipped with a cord havingan...
Page 12 - Find the Cardboard Plate; Possible Wall Stud Configurations
12 Find the Cardboard Plate The cardboard plate is used as wall template and upper-cabinettemplate. It is located on the outer foam in the carton. Find itbefore installation. Find the Wall Stud(s) NOTE: If no wall studs exist within the cabinet opening, do not install the microwave oven. See illustr...
Page 13 - Find the Flush Point; Cabinet; Mark Upper Cabinet
13 Find the Flush Point This product is designed to be flush with the cabinet, and the flush point should be found before installation. Don’t install with the front ofthe microwave oven located behind the front of the cabinet/door. Flush to Cabinet door Flush to Cabinet door Don’t install with the f...
Page 15 - Mark Rear Wall
15 Mark Rear Wall The microwave oven must be installed on a minimum of 1 wallstud, preferably 2, using a minimum of 1 lag screw, preferably 2.See “Find the Wall Stud(s)” section for find the wall studs. 1. Use a pencil to mark the power cord hole and two mountingnut holes. A A. Centerline 2. Align t...
Page 16 - Drill holes in Upper Cabinet; Drill holes in Rear Wall
16 6. Draw A and B two small circles, H and J is not necessary,depending on your need. A and B holes Drill holes in Upper Cabinet 1. Using a drill and the 0.75" (1.9 cm) hole saw, cut out thepower cord hole (A). 2. Drill two mounting nut holes (B), which are 3/8" (10 mm) holesat points “D” a...
Page 17 - Attach Mounting Plate to Wall
17 3. Drill holes at A and B, if the Wall studs are not located A and Bhole, do not drill A and B hole, and follow the belowinstruction. In addition to being installed on at least 1 wall stud, themounting plate must attach to the wall at both end holes. If theend holes are not over wall studs, use t...
Page 18 - Rotate Blower Motor; Rotate Blower Motor for Wall Venting Installation
18 4. Push the 2 bolts with toggle nuts through the drywall, andfinger tighten the bolts to make sure toggle nuts have openedagainst drywall. A B C D A. 3/16-24 x 3" round-head bolt B. Mounting plate C. Spring toggle nut D. Drywall 5. Insert lag screw(s) into the hole(s) drilled into wall stud(s...
Page 20 - Rotate Blower Motor for Roof Venting Installation
20 11. Check to make sure the 2 screws are secured properly in theblower motor screw holes, so that the motor cannot move. A B B A. Screws B. Blower motor screw holes 12. Return the damper plate to its original horizontal position. A A. Damper plate 13. Secure damper plate with 2 screws removed in S...
Page 21 - Install Damper Assembly
21 7. Return the damper plate to its original horizontal position. A A. Damper plate 8. Secure damper plate with screw removed in Step 1. A B A. Damper plate B. Screw 9. Repeat Step 14 from “Wall Venting Installation Only.” Install Damper Assembly If for recirculation installation, no need to instal...
Page 22 - Install the Microwave Oven
22 Install the Microwave Oven WARNING Excessive Weight Hazard Use two or more people to move and install or uninstallappliance. Failure to do so can result in back or other injury. IMPORTANT: The control side of the microwave oven is the heavy side. Handle the microwave oven gently. 1. Place a washe...
Page 23 - Complete Installation
23 Complete Installation 1. Check that all parts are now installed. If there is an extra part,go back through the steps to see which step was skipped. 2. Dispose of/recycle all packaging materials. WARNING Electrical Shock Hazard Plug into a grounded 3 prong outlet. Do not remove ground prong. Do no...
Page 26 - SEGURIDAD DEL HORNO MICROONDAS; Su seguridad y la de los demás son muy importantes.; PELIGRO; INSTRUCCIONES DE SEGURIDAD IMPORTANTES; CONSERVE ESTAS INSTRUCCIONES
26 SEGURIDAD DEL HORNO MICROONDAS Su seguridad y la de los demás son muy importantes. Hemos incluido muchos mensajes importantes de seguridad en este manual y en su electrodoméstico. Lea y obedezca siempretodos los mensajes de seguridad. Este es el símbolo de advertencia de seguridad. Este símbolo l...
Page 28 - Aviso de Conformidad con Industry Canada (IC)
28 Guía de Conectividad a Internet solo para Electrodomésticos Conectados IMPORTANTE: Usted es responsable de instalar debidamente su electrodoméstico antes del uso. Asegúrese de leer y seguir las instrucciones de instalación proporcionadas con su electrodoméstico. La conectividad requiere Wi-Fi y l...
Page 29 - Precaución de FCC; Responsabilidades del OEM de cumplir con las Normativas de la FCC
29 Precaución de FCC � Los cambios o las modificaciones sin aprobación expresa de Whirlpool Corporation podrían anular la autorización del usuario paraoperar el equipo. � Las antenas usadas para este transmisor deben instalarse de modo que se mantenga una distancia de separación mínima de 20 cmentre...
Page 30 - Limpieza
30 MANTENIMIENTO Y CUIDADO DEL HORNO MICROONDAS Limpieza G eneral IMPORTANTE: Antes de la limpieza, asegúrese de que todos los controles estén apagados y que el horno microondas esté frío. Siempre siga las instrucciones de las etiquetas de los productos de limpieza. En primer lugar, se sugiere el em...
Page 32 - Cómo sustituir el filtro de carbón:; Herramientas y piezas; Herramientas necesarias
32 Cómo sustituir el filtro de carbón: El filtro de carbón está detrás del filtro de grasa. No puede limpiarse y debe reemplazarse cada 6 meses, mientras la pantalla muestra laalerta de filtro “ Change the Charcoal Filter and reset reminder in Settings” (Cambiar el filtro de carbón y restablecer rec...
Page 33 - Piezas suministradas
33 Piezas suministradas Pieza Dibujo Descripción Cant. ¿Dónde puedo encontrar? Paquete de tornillos Pernos de cabezaredonda de 3/16-24 x 3" 2 A A. Espuma interior en la cavidad Pernos de cabezaredonda de 1/4 - 20 x 3" 2 Arandelas 2 Tuercas de soporte de 3/ 16" 2 Tirafondos de 1/4" x ...
Page 34 - Requisitos de Ubicación; Requisitos Especiales; Dimensiones del producto
34 Plantilla de cartón Plantilla del gabinetesuperior y plantilla de lapared 1 C C. Forma exterior en el cartón Paquete dedocumentación Documentación 1 Placa de montaje Placa de montaje 1 Verifique los códigos locales. Compruebe el suministro eléctrico existente. Consulte “Requisitos eléctricos”. Es...
Page 35 - ADVERTENCIA
35 Dimensiones de Instalación NOTA: El contacto de pared de conexión a tierra de 3 terminales debe estar dentro del gabinete superior. Consulte la sección“Requisitos Eléctricos”. B C F G D E A A. Viga de pared de 2" x 4" (5,1 cm x 10,2 cm) B. Contacto de 3 terminales con conexión a tierra C....
Page 36 - INSTRUCCIONES DE CONEXIÓN A; GUARDE ESTAS INSTRUCCIONES; INSTALACIÓN; Tipos de Instalación
36 Se necesita: � Un suministro eléctrico de 120 V, 60 Hz, CA solamente, de15 A o 20 A con fusible o disyuntor. Se recomienda: � Un fusible o un disyuntor retardador. � Un circuito separado que preste servicio solamente a estehorno microondas. INSTRUCCIONES DE CONEXIÓN A TIERRA Para la conexión de u...
Page 37 - Posibles configuraciones de las vigas de pared
37 Encontrar plantilla de cartón La plantilla de cartón se usa como plantilla de pared y delgabinete superior. Se encuentra en la espuma exterior del cartón.Encuéntrela antes de la instalación. Encuentre las vigas de pared NOTA: Si no hay pies derechos de pared dentro de la abertura del gabinete, no...
Page 38 - Encontrar el punto al ras
38 Viga de pared en orificios de extremo Figura 3 A A,D B C C D E E F A. Orificios de extremo (en laplaca de montaje) B. Línea central vertical de laabertura del gabinete C. Líneas centrales de las vigas de pared D. Orificios para los tirafondosE. Lengüetas de soporte F. Marcadores centrales de lapl...
Page 39 - Marque el gabinete superior
39 Marque el gabinete superior 1. Con una cinta, mida claramente y marque la línea centralvertical de la abertura. Asegúrese de que esté alineada con lalínea central de la pared vertical. A B A. Línea central del gabinete superior B. Línea central de la pared NOTA: La plantilla de cartón es apta par...
Page 40 - Marque la pared posterior
40 4. Utilice un lapicero para marcar un orificio para el cableeléctrico y dos orificios para la tuerca de montaje. A B A. Orificio para el cable eléctrico B. Orificios para la tuerca de montaje 5. Utilice un lapicero para marcar el orificio de ventilación delgabinete superior. Puede omitir este pas...
Page 43 - Fije la placa de montaje a la pared
43 Fije la placa de montaje a la pared 1. Coloque la placa de montaje en la pared. NOTA: Puede ser necesario utilizar varios espaciadores, entre la placa de montaje y la pared, para conseguir unaspecto más ‘enrasado’. Pegue los espaciadores antes decolocar la placa de montaje en la pared. Mida desde...
Page 44 - Gire el motor del soplador
44 Viga de pared en un orificio de extremo (Figura 3en la sección Ubique las vigas de pared) 1. Con las lengüetas de soporte de la placa de montaje mirando hacia adelante, inserte un perno de cabeza redonda de 3/16-24 x 3" a través del orificio de extremo que encaje en el orificio de 5/8" (1...
Page 47 - Instale el conjunto de la compuerta; Instalación del horno microondas
47 Instale el conjunto de la compuerta Si para la instalación de la recirculación, no es necesario instalarel conjunto de la compuerta, puede saltar esta sección. Yguárdela para utilizarla en el futuro. Instalación del conjunto de la compuerta paraventilación por la pared 1. Verifique que la hoja de...
Page 49 - Complete la instalación
49 Complete la instalación 1. Verifique que todas las piezas estén ahora instaladas. Si hayalguna pieza extra, vuelva a revisar todos los pasos para vercuál se omitió. 2. Deshágase de todos los materiales de embalaje o recíclelos. ADVERTENCIA Peligro de choque eléctrico Conecte a un tomacorriente co...
Page 52 - NOTES


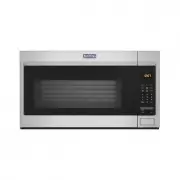
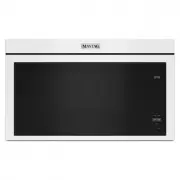 Maytag MMMF6030PW
Manual
Maytag MMMF6030PW
Manual
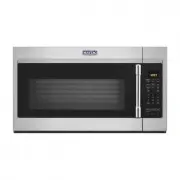
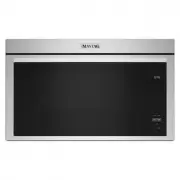 Maytag MMMF6030PZ
User Manual
Maytag MMMF6030PZ
User Manual
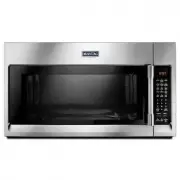
 Maytag MMMS4230PZ
User Manual
Maytag MMMS4230PZ
User Manual
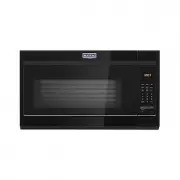 Maytag MMV1175JB
Manual
Maytag MMV1175JB
Manual
 Maytag MMV1175JZ
User Manual
Maytag MMV1175JZ
User Manual
 Maytag MMV5227JZ
User Manual
Maytag MMV5227JZ
User Manual
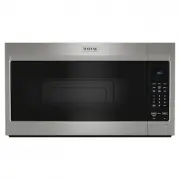
 Maytag MMV6190FZ
User Manual
Maytag MMV6190FZ
User Manual