Maytag MES8800FZ - Manuals
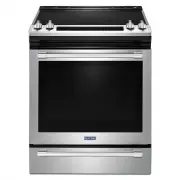
Maytag MES8800FZ Range – Manual, Installation Manual in PDF format online.
Manuals:
Manual Maytag MES8800FZ


Summary
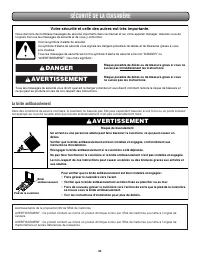
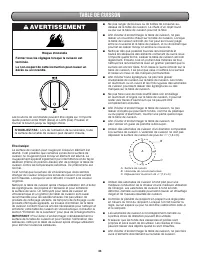
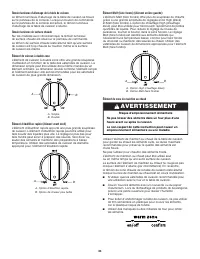
2 RANGE SAFETY The Anti-Tip Bracket The range will not tip during normal use. However, the range can tip if you apply too much force or weight to the open door without the anti-tip bracket fastened down properly. You can be killed or seriously injured if you don't immediately You can be killed or se...
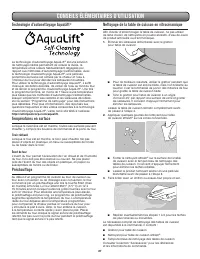
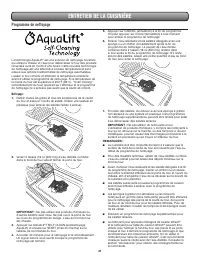
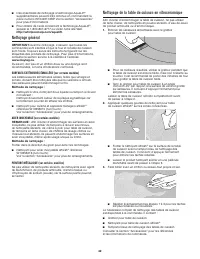
4 AquaLift ® Self-Cleaning Technology AquaLift ® Self-Cleaning Technology is a first-of-its-kind cleaning solution designed to minimize the time, temperature and odors that ordinarily come with traditional self-cleaning methods. With AquaLift ® Self-Cleaning Technology, an innovative coating on the ...
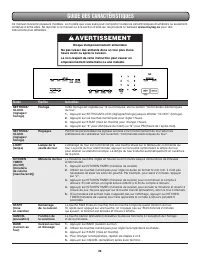
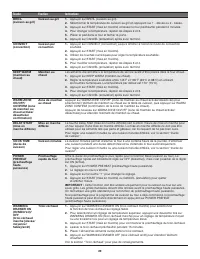
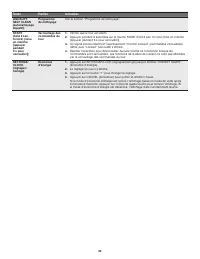
5 FEATURE GUIDE Keypad Feature Instructions SETTINGS/ CLOCK Clock The Clock can use a 12- or 24-hour cycle. See the “Electronic Oven Controls” section. 1. Press SETTINGS/CLOCK until “CLOCK” is displayed. 2. Use the number keypads to set the time of day. 3. Press START to change the time. 4. Press “3...
Installation Manual Maytag MES8800FZ


Summary
2 RANGE SAFETY You can be killed or seriously injured if you don't immediately You can be killed or seriously injured if you don't follow All safety messages will tell you what the potential hazard is, tell you how to reduce the chance of injury, and tell you what canhappen if the instructions are n...
3 INSTALLATION REQUIREMENTS Tools and Parts Gather the required tools and parts before starting installation. Read and follow the instructions provided with any tools listed here. Tools Needed Parts Supplied Check that all parts are included. ■ 10-32 hex nuts (attached to terminal block) (3) ■ Direc...
4 ■ Cabinet opening dimensions that are shown must be used. Given dimensions are minimum clearances. ■ The anti-tip bracket must be installed. To install the anti-tip bracket shipped with the range, see “Install Anti-Tip Bracket” section. ■ Grounded electrical supply is required. See the appropriate...
Maytag Ranges Manuals
-
 Maytag MER4600LS
Manual
Maytag MER4600LS
Manual
-
 Maytag MER4800PZ
User Manual
Maytag MER4800PZ
User Manual
-
 Maytag MER6600FZ
User Manual
Maytag MER6600FZ
User Manual
-
Maytag MER6600FZ
Manual
-
 Maytag MER7700LZ
User Manual
Maytag MER7700LZ
User Manual
-
Maytag MER7700LZ
Manual
-
 Maytag MER8800FZ
User Manual
Maytag MER8800FZ
User Manual
-
Maytag MER8800FZ
Manual
-
Maytag MER8800FZ
Troubleshooting Guide
-
Maytag MER8800FZ
Installation Manual
-
 Maytag MES8800PZ
User Manual
Maytag MES8800PZ
User Manual
-
Maytag MES8800PZ
Manual
-
 Maytag MET8800FZ
User Manual
Maytag MET8800FZ
User Manual
-
Maytag MET8800FZ
Manual
-
 Maytag MGR6600FB
User Manual
Maytag MGR6600FB
User Manual
-
Maytag MGR6600FB
Manual
-
Maytag MGR6600FB
Installation Manual
-
 Maytag MGR6600FW
User Manual
Maytag MGR6600FW
User Manual
-
Maytag MGR6600FW
Installation Manual
-
Maytag MGR6600FW
Manual