Page 2 - DRYER SAFETY
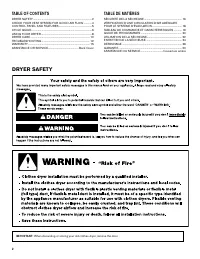
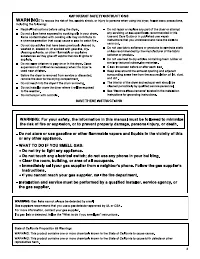
2 DRYER SAFETY IMPORTANT: When discarding or storing your old clothes dryer, remove the door.
Page 4 - INSTALLATION REQUIREMENTS; If using a power supply cord:
4 TOOLS AND PARTS Gather the required tools and parts before starting installation. Read and follow the instructions provided with any tools listed here. Tools needed for all installations: Level #2 Phillips screwdriver Wire stripper (direct wire installations) Parts needed: (Not supplied with dryer...
Page 5 - LOCATION REQUIREMENTS; DRYER DIMENSIONS
5 LOCATION REQUIREMENTS You will need: ■ A location allowing for proper exhaust installation. See “Venting Requirements.” ■ A separate 15 or 20-amp circuit needed for gas dryers and 30-amp circuit needed for electric dryers. ■ If using power supply cord, a grounded electrical outlet located within 2...
Page 6 - ELECTRICAL REQUIREMENTS -
6 Mobile home - Additional installation requirements: This dryer is suitable for mobile home installations. The installation must conform to the Manufactured Home Construction and Safety Standard, Title 24 CFR, Part 3280 (formerly the Federal Standard for Mobile home construction and Safety, Title 2...
Page 7 - ELECTRICAL REQUIREMENTS; GROUNDING INSTRUCTIONS; If your outlet looks like this:
7 4-wire receptacle (14-30R) ELECTRIC DRYER POWER HOOKUP- CANADA ONLY ELECTRICAL REQUIREMENTS It is your responsibility: ■ To contact a qualified electrical installer. ■ To be sure that the electrical connection is adequate and in conformance with Canadian Electrical Code, C22.1-latest edition and a...
Page 8 - GAS DRYER POWER HOOKUP -
8 GAS TYPE Natural Gas: This dryer is equipped for use with Natural gas. It is design- certified by CSA International for LP (propane or butane) gases with appropriate conversion. ■ Your dryer must have the correct burner for the type of gas in your home. Burner information is located on the rating ...
Page 9 - DRYER GAS PIPE; INSTALL LEVELING LEGS; Prepare dryer for leveling legs; For mobile home use
9 3/8" NPT dryer pipe NOTE: For a garage installation, the gas pipe height must be an additional 18" (460 mm) from the floor. GAS SUPPLY CONNECTION REQUIREMENTS ■ Use an elbow and a 3/8" flare x 3/8" NPT adapter fitting between the flexible gas connector and the dryer gas pipe, as ne...
Page 10 - ELECTRICAL CONNECTION; POWER SUPPLY CORD CONNECTION
10 MAKE ELECTRICAL CONNECTION - U.S.A. ONLY (EFFECTUER LE RACCORDEMENT ÉLECTRIQUE – ÉTATS-UNIS SEULEMENT) ELECTRICAL CONNECTION Electrical Connection Options Power Supply Cord 1. Choose electrical connection type Power supply cord 4-wire receptacle (NEMA Type 14-30R): Go to Power Supply Cord Connect...
Page 11 - -wire Power Supply Cord Connection
11 4-wire Power Supply Cord Connection IMPORTANT: A 4-wire connection is required for mobile homes and where local codes do not permit the use of 3-wire connections. Power supply cord 4-wire receptacle (NEMA Type 14-30R): Go to “4-Wire Power Supply Cord Connection”. Power supply cord 3-wire receptac...
Page 12 - -wire Power Supply Cord Connection; Connect remaining wires; Direct Wire Strain Relief; DIRECT WIRE CONNECTION
12 3-wire receptacle (NEMA type 10-30R) 3-prong plug Spade terminals with upturned ends Ring terminals Use where local codes permit connecting cabinet-ground conductor to neutral wire. 3-wire Power Supply Cord Connection 3. Connect remaining wires Connect remaining wires to outer terminal block scre...
Page 13 - -wire Direct Wire Connection
13 Put direct wire cable through the strain relief. The strain relief should have a tight fit with the dryer cabinet and be in a vertical position. Tighten strain relief screw against the direct wire cable. 2. Attach direct wire cable to strain relief 3-wire direct connection: Go to “3-Wire Direct C...
Page 14 - -wire Direct Wire Connection
14 Place hooked ends of remaining direct wire cable wires under outer terminal block screws (hooks facing right). Squeeze hooked ends together and tighten screws. Finally, reinsert tab of terminal block cover into slot of dryer rear panel. Secure cover with hold-down screw. Now, go to “Venting Requi...
Page 15 - Optional 3-wire Connection
15 1. Prepare to connect neutral ground wire and neutral wire B A E Remove center terminal block screw (B). Remove neutral ground wire (E) from external ground conductor screw (A). Optional 3-wire Connection You must verify with a qualified electrician that this grounding method is acceptable before...
Page 16 - VENTING; Connect gas supply to dryer; Plan pipe fitting connection; MAKE GAS CONNECTION -
16 VENTING REQUIREMENTS WARNING: To reduce the risk of fire, this dryer MUST BE EXHAUSTED OUTDOORS. IMPORTANT: Observe all governing codes and ordinances. Dryer exhaust must not be connected into any gas vent, chimney, wall, ceiling, attic, crawlspace, or a concealed space of a building. Only rigid ...
Page 18 - Special provisions for mobile homes:; Connect vent to exhaust hood; INSTALL VENT SYSTEM; Install exhaust hood; Determine vent length and elbows needed for best; Vent System Chart
18 Special provisions for mobile homes: Exhaust vent must be securely fastened to a noncombustible portion of mobile home and must not terminate beneath the mobile home. Terminate exhaust vent outside. Moblie Home Exhaust installation Connect vent to exhaust hood 2. Vent must fit over the exhaust ho...
Page 19 - LEVEL DRYER; CONNECT VENT; Connect vent to exhaust outlet; Move dryer to final location; Level Dryer
19 LEVEL DRYER Not Level LEVEL Not Level Check levelness of dryer from side to side. Repeat from front to back. NOTE: The dryer must be level for the moisture sensing system to operate correctly. CONNECT VENT 1. Connect vent to exhaust outlet Using a 4" (102 mm) clamp, connect vent to exhaust ou...
Page 21 - REVERSE DOOR SWING; Place towel on dryer
21 REVERSE DOOR SWING † ® TORX and T20 are registered trademarks of Acument Intellectual Properties, LLC. Place towel on dryer 1. Place towel on top of dryer to avoid damaging the surface. Remove screws attaching hinges to door. Remove screws from hinges 4. Lift door until top screws in dryer cabine...
Page 23 - TROUBLESHOOTING
23 Remove and transfer plugs 11. Remove the 4 screws that attach 2 plugs on the left side. Transfer plugs to opposite side using the same 4 screws. Insert screws in hinge holes on dryer cabinet 12. NOTE: 2 people may be needed to reinstall door. Insert screws into the bottom holes on left side of dr...
Page 24 - SÉCURITÉ DE LA SÉCHEUSE
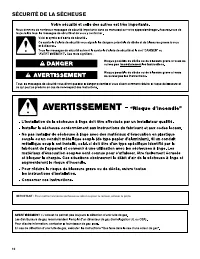
24 SÉCURITÉ DE LA SÉCHEUSE IMPORTANT : Pour mettre l’ancienne sécheuse au rebut ou pour la remiser, enlever la porte.
Page 26 - EXIGENCES D’INSTALLATION; OUTILLAGE ET PIÈCES
26 Niveau Mètre-ruban Pince Pièces fournies (tous les modèles) : Tournevis à lame plate Clé à molette avec ouverture jusqu’à 1" (25 mm) ou clé à douille hexagonale Cisaille de ferblantier (pour l’installation d’un nouveau conduit) Pistolet à calfeutrage et composé de calfeutrage (pour l’installa...
Page 27 - EXIGENCES D’EMPLACEMENT
27 Pièces nécessaires : (Non fourni avec la sécheuse) Consulter les codes locaux. Vérifier l’alimentation électrique et le circuit d’évacuation existants. Voir “Installations électriques” et “Exigences concernant l’évacuation” avant d’acheter les pièces. Les installations pour maison mobile nécessit...
Page 29 - RACCORDEMENT ÉLECTRIQUE DE LA; SPÉCIFICATIONS ÉLECTRIQUES
29 4-wire receptacle (14-30R) ■ Cette sécheuse est équipée d’un cordon électrique homologué par la CSA International à introduire dans une prise murale standard 14-30R. Le cordon mesure 5 pi (1,52 m). Veiller à ce que la prise murale se trouve à proximité de l’emplacement définitif de la sécheuse. P...
Page 30 - Conversion pour l’alimentation au propane :; SPÉCIFICATIONS DE L’ALIMENTATION EN GAZ
30 Conversion pour l’alimentation au propane : IMPORTANT : Un technicien qualifié doit effectuer la conversion. Ne pas entreprendre de convertir la sécheuse dans le cas d’une utilisation avec un gaz différent de celui indiqué sur la plaque signalétique sans d’abord consulter la compagnie de gaz. CAN...
Page 31 - Préparer la sécheuse pour
31 Conduit NPT de la sécheuse de 3/8" REMARQUE : Pour une installation dans un garage, prévoir 18" (460 mm) de plus à partir du sol pour la hauteur de la canalisation d’arrivée de gaz. Saisir fermement le corps de la sécheuse (et non pas le panneau de la console) puis reposer la sécheuse ave...
Page 32 - EXIGENCES CONCERNANT L’ÉVACUATION; L’ÉVACUATION; Conduit métallique rigide :; Raccorder l’alimentation en gaz; RACCORDEMENT AU GAZ -; Planifier la connexion
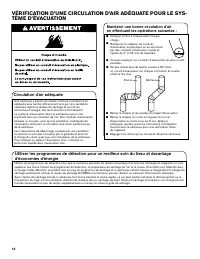
32 EXIGENCES CONCERNANT L’ÉVACUATION AVERTISSEMENT : Pour réduire le risque d’incendie, cette sécheuse doit EVACUER L’AIR A L’EXTERIEUR. IMPORTANT : Observer les dispositions de tous les codes et règlements en vigueur. Le conduit d’évacuation de la sécheuse ne doit pas être raccordé à une évacuation...
Page 34 - Installer le clapet d’évacuation; Tableau des systèmes d’évacuation
34 INSTALLATION DU SYSTÈME D’ÉVACUATION 12" min. (305 mm) 12" min. (305 mm) Installer le clapet d’évacuation 1. Installer le clapet d’évacuation et utiliser un composé de calfeutrage pour calfeutrer le côté extérieur de l’ouverture murale autour du clapet d’évacuation. Installations d’évacua...
Page 35 - RACCORDEMENT DU SYSTÈME; Placer la sécheuse
35 Raccordement du conduit d’évacuation au clapet 2. Le conduit doit être placé par dessus le clapet d’évacuation. Fixer ensemble le conduit et le clapet avec une bride de 4" (102 mm). Acheminer le conduit jusqu’à l’emplacement de la sécheuse en utilisant le chemin le plus rectiligne possible. É...
Page 36 - ÉTABLIR L’APLOMB DE LA SÉCHEUSE; Ajuster pieds de nivellement; ACHEVER L’INSTALLATION LISTE DE; Modèles électriques :; Réglage de l’aplomb de la sécheuse
36 ÉTABLIR L’APLOMB DE LA SÉCHEUSE Pas d’aplomb D’APLOMB Pas d’aplomb Vérifier l’aplomb de la sécheuse dans le sens transversal. Répéter l’opération dans le sens avant-arrière. REMARQUE : La sécheuse doit être d’aplomb pour que le système de détection d’humidité fonctionne correctement. Ajuster pied...
Page 39 - DÉPANNAGE
39 Retirer les bouchons d’obturation et les transférer 11. Ôter les 4 vis fixant les 2 bouchons d’obturation du côté gauche. Transférer les bouchons d’obturation au côté opposé à l’aide des mêmes 4 vis. Insérer les vis dans les trous de charnière de la caisse du sèche-linge 12. REMARQUE: Il faudra p...