Page 2 - DANGER; WARNING; which could cause property damage, personal injury, or death.; STRUCTURAL PROXIMITY AND SAFETY USAGE RECOMMENDATIONS; TRIP HAZARD THAT
2 Burning wood chips gives off carbon monoxide, which has no odor and can cause death. DO NOT burn wood chips inside homes, vehicles, tents, garages or any enclosed areas. USE ONLY OUTDOORS where it is well ventilated. CARBON MONOXIDE HAZARD DANGER IF YOU SMELL GAS: 1. Shut off gas to the appliance....
Page 3 - GENERAL WARNINGS AND SAFETY INFORMATION; READ ALL INSTRUCTIONS; WARNINGS & IMPORTANT SAFEGUARDS CONTINUED ON PAGE 4
3 GENERAL WARNINGS AND SAFETY INFORMATION • Always use unit in accordance with all applicable local, state and federal fire codes. • Before each use check all nuts, screws and bolts to make sure they are tight and secure. • Never operate unit under overhead construction such as roof coverings, carpo...
Page 5 - ADDING WOOD CHIPS OR CHUNKS; and; CHECK OUT MASTERBUILT.COM FOR MORE TIPS AND RECIPE VIDEOS.; SMOKER OPERATION - READ & FOLLOW ALL INSTRUCTIONS CAREFULLY
5 GETTING STARTED • Pre-season unit prior to first use. See PRE-SEASON INSTRUCTIONS . • Before starting the unit, see ADDING WOOD CHIPS OR CHUNKS . CAUTION - All surfaces are HOT and may cause burns. Use protective gloves or long, sturdy cooking tools when loading/ unloading food or racks, and when ...
Page 6 - SOAPY WATER TEST WARNINGS & PROCEDURES; WARNINGS; • Never use an open flame to test for gas leaks.; PERFORM “SOAPY WATER TEST” BEFORE EACH USE. SEE “SOAPY WATER TEST”; FUMES TO DIMINISH BEFORE LIGHTING SMOKER.; DURING ANY PORTION OF SOAPY WATER TEST IF BUBBLES CONTINUE TO
6 (Smoker shown on back for clarity only) Apply solution to gas cylinder valve Apply solution to hose regulator and the full length of the hose Failed test will present bubbles as shown below. Apply solution underneath control panel where burner and hose are connected WARNING SOAPY WATER TEST WARNIN...
Page 7 - REGULATOR, BURNER AND GAS VALVE CONNECTION & OPERATION; IGNITION INSTRUCTIONS
7 • Inspect hose before each use. If there are signs of abrasion, wear, cuts, or leaks, the hose must be replaced. DO NOT USE. • Inspect burner before each use. Check burner and burner venturi tube for insects and insect nests. A clogged tube can lead to a fire beneath unit. • Check to ensure the or...
Page 8 - In the event of a gas leak that cannot be stopped, or if a; MATCH LIGHT INSTRUCTIONS; in OFF position before connecting to gas cylinder.
8 Emergency Cause Possible Solution Gas leaking from cracked, cut or burned hose Damaged hose Turn off gas at LP cylinder. Replace hose. Contact Customer Service at 1300 174 876. Gas leaking from LP cylinder Failure due to rust or mishandled equipment Replace LP cylinder. Gas leaking from gas cylind...
Page 9 - TROUBLESHOOTING GUIDE
9 TROUBLESHOOTING SOLUTIONS: “CAUSES” LOW OR NO FLOW/VAPOR LOCK/EXCESS FLOW Symptom Cause Possible Solution Burner doesn’t light after pressing ignitor button Low/no gas flow 1. Turn burner control knob to “Off” position. 2. Turn gas cylinder valve knob to OFF. 3. Disconnect regulator from cylinder ...
Page 10 - PARTS LIST
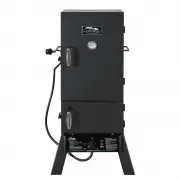
10 PARTS LIST PART NO QTY DESCRIPTION 1 1 Smoker Body 2 1 Large Smoker Door w/Logo Plate 3 1 Air Damper (pre-assembled) 4 2 Rear Legs 5 1 Control Panel 6 1 Burner Box 7 2 Door Handle 8 2 Body Handle 9 1 Flame Disk Bowl 10 1 Water Bowl 11 1 Water Bowl Holder 12 4 Cooking Grate 13 1 Temperature Gauge ...
Page 11 - HARDWARE LIST; • BEFORE ASSEMBLY READ ALL INSTRUCTIONS CAREFULLY.; DO NOT RETURN TO RETAILER; for assembly assistance, missing or damaged parts.
11 HARDWARE LIST (A) Qty-24 (B) Qty-4 (C) Qty-4 (D) Qty-1 • BEFORE ASSEMBLY READ ALL INSTRUCTIONS CAREFULLY. • ASSEMBLE UNIT ON A CLEAN, FLAT SURFACE. • TOOLS NEEDED: Adjustable Wrench, Phillips Head Screwdriver • Approximate assembly time: 35 minutes * Actual product may differ from picture shown *...
Page 12 - ASSEMBLY; Do not fully tighten screws until Step 4 is complete.
12 A 4 25 26 1 ASSEMBLY Actual product may differ from picture shown. 1 2 (A) X12 (A) X4 Do not fully tighten screws until Step 4 is complete. Leg frames may need to be adjusted during assembly. 25 26 5 A
Page 13 - Fully tighten all screws after Step 4
13 (A) X4 3 4 ASSEMBLY 6 Ignition Wire Piezo Ignitor Valve Orifice Venturi (B) X4 B 20 B Fully tighten all screws after Step 4 is complete. A A Flame Sensor
Page 14 - Repeat on opposite side.
14 A 8 1 5 ASSEMBLY 6 (A) X4 Repeat on opposite side. 13 D 2 (D) X1
Page 16 - Take out the racks to
16 9 11 10 21 21 12 ASSEMBLY 9 10 Take out the racks to clean after each use.
Page 17 - Take out the grease cup
17 1 22 1 18 24 ASSEMBLY 11 12 Take out the grease cup to clean after each use.
Page 20 - Customer Service; Monday to Friday 8am - 5pm EST
Do not return to place of purchase. For any queries or assistance call Customer Service (Australia Only) 1300 174 876 Hours of operation: Monday to Friday 8am - 5pm EST Keep your purchase receipt. This will be required to make any claims under the 12 month warranty. Rest assured, we’re here to help.