Page 2 - Overview; Window of vertical line
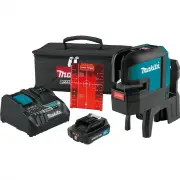
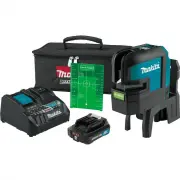
Overview Ov e rv ie w The Makita SK105D/SK105GD is a self-levellingcross-line laser. It is a reliable precision laser forany kind of tasks like levelling, plumbing, trans-fering and setting out right angles.It supports you on job side with two crossing ver-tical and horizontal lines. 1 Window of ve...
Page 3 - Technical data
Technical data T e c h n ic a ld a ta Makita SK105D/SK105GD 3 Des c ri pti on SK105D SK105G D Beam direction/fan angle Vertical / >1 6 0°, Horizontal / >180° Range* 25 m (82 ft) 35 m (115 ft) Range* with receiver 80 m (262 ft) Levelling accuracy ±0.3 mm/m = ±3.0 mm @ 10m (±0.004 in/ft = ±0.12 ...
Page 4 - Please note the following:; W ARNI NG
Technical data Please note the following: l Due to our continuing program ofresearch and development, the spe-cifications herein are subject to changewithout notice. l Specifications may differ from countryto country. l The weight may differ depending onthe attachment(s), including the bat-tery cart...
Page 5 - Introducti on; The safety instructions (see; Level l i ng l ock; Lev el l i ng unl oc k ed
Instrument Set-up In s tru me n tS e t-u p Introducti on The safety instructions (see Safety Instruc- tions ) and the user manual should be read through carefully before the product is usedfor the first time. The person responsible for the product mustensure that all users understand these dir-ectio...
Page 6 - Laser recei ver; Ins tal l i ng or remov i ng battery c artri dge; CAUT I O N
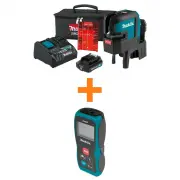
Instrument Set-up Laser recei ver To be able to detect the laser lines over long dis-tances or in unfavourable lighting conditions, alaser receiver can be used. We recommend the Makita LDX1 laserreceiver. Li -Ion battery Ins tal l i ng or remov i ng battery c artri dge CAUT I O N Always switch off t...
Page 7 - Maki ta CXT batteri es; Indi c ati ng the remai ni ng battery c apac i ty
Instrument Set-up Us i ng the USB adapter (opti onal ) Maki ta CXT batteri es Indi c ati ng the remai ni ng battery c apac i ty Only for battery cartridges with the indicator Press the check button (2) on the battery cartridgeto indicate the remaining battery capacity. Theindicator lamps (1) light u...
Page 8 - Operations; Swi tchi ng ON/Set key
Operations Op e ra tio n s Swi tchi ng ON/Set key If the i ns trument i s l oc k ed pres s l as er k ey 3ti mes to s wi tc h off: Bri ghtness reducti on Makita SK105D/SK105GD 8
Page 9 - Functi ons wi th unl ocked l evel l i ng; Verti c al l i nes and hori z ontal l i nes
Operations Functi ons wi th unl ocked l evel l i ng Verti c al l i nes and hori z ontal l i nes Hori z ontal l i ne Verti c al l i ne Makita SK105D/SK105GD 9
Page 10 - Functi ons wi th l ocked l evel l i ng; Hori z ontal l i ne
Operations Functi ons wi th l ocked l evel l i ng Hori z ontal l i ne Verti c al l i ne Hori z ontal l i ne ti l ted Makita SK105D/SK105GD 10
Page 11 - How to use the adapters and wall mount; Al i gnment of v erti c al l as er l i nes
How to use the adapters and wall mount Ho wto u s e th e a d a p te rs a n d wa llmo u n t L-adapter Put the instrument on L-adapter and fix it bythread. L-adapter can not be used when battery cart-ridge BL1040B or BL1041B is inserted. Al i gnment of v erti c al l as er l i nes Turn the instrument 3...
Page 12 - Wal l mount
How to use the adapters and wall mount Wal l mount (opti onal accessory) Turn the adjustment knob of the wall mount toloose and fix the slide for fine adjustment of thehorizontal line to the desired reference level. The wall mount is a single item and will not bedelivered with the L-adapter as shown...
Page 13 - Message Codes
Message Codes Me s s a g e Co d e s Makita SK105D/SK105GD 13 Las er LED Caus e Correc ti on ON Lights green Normal - ON Blinks green Normal, laser set at reducedbrightness OK - or press ON / Set key for 2seconds to get strong laser beam ON Lights red Instrument is at low power Change power supply OF...
Page 14 - Accuracy Check; Levelling lock; Level l i ng; Chec k i ng the ac c urac y of the l ev el l i ng
Accuracy Check A c c u ra c y Ch e c k Check the accuracy of your instrument reg-ularly and particularly before important meas-uring tasks. Check Levelling lock before checking the accuracy. Level l i ng Chec k i ng the ac c urac y of the l ev el l i ng Set the instrument on a tripod half-way betwee...
Page 15 - Verti cal and hori zontal l i ne; Chec k i ng the ac c urac y of the hori z ontal l i ne
Accuracy Check Verti cal and hori zontal l i ne Chec k i ng the ac c urac y of the hori z ontal l i ne Place the lock switch in the "Unlocked" position(see Levelling lock ). Position the instrument approx. 5 m away from the wall. Direct the instru-ment at the wall and switch on. Activate the...
Page 16 - Care; levelling accuracy
Care Ca re Never immerse the instrument in water. Wipe offdirt with a damp soft cloth. Never use aggressivecleaning agents or solvents. Treat the instrumentwith the same care that you would apply to bin-oculars or a camera. Dropping or violent shakingof the instrument may damage it. Check the instru...
Page 17 - Safety instructions; Areas of responsi bi l i ty; Using the product without instruction; Hazards i n use
Safety instructions S a fe ty in s tru c tio n s The person responsible for the instrumentmust ensure that all users understand thesedirections and adhere to them. Areas of responsi bi l i ty Res pons i bi l i ti es of the manufac turer of the ori -gi nal equi pment: Makita Corporation Anjo, 3-11-8,...
Page 18 - Battery tool use and care; Do not disassemble battery cartridge.
Safety instructions Battery tool use and care 1. Recharge only with the charger specifiedby the manufacturer. A charger that issuitable for one type of battery pack maycreate a risk of fire when used withanother battery pack. 2. Use power tools only with specifically des-ignated battery packs. Use o...
Page 19 - Ti ps for mai ntai ni ng max i mum battery l i fe:; Li mi ts of use; Refer to section; Di sposal; Transport; Trans port of i ns trument
Safety instructions CAUT I O N Only use genuine Makita batteries. Use of non-genuine Makita batteries, or batteries that havebeen altered, may result in the battery burstingcausing fires, personal injury and damage. It willalso void the Makita warranty for the Makita tooland charger. Ti ps for mai n...
Page 20 - El ectromagneti c Compati bi l i ty; ISED s tatement (appl i c abl e i n Canada)
Safety instructions El ectromagneti c Compati bi l i ty (EMC) W ARNI NG The instrument conforms to the most stringentrequirements of the relevant standards and reg-ulations. However, the possibility of causing inter-ference in other instruments cannot be totallyexcluded. FCC statement (appl i cabl e...
Page 21 - Laser cl assi fi cati on; Wav el ength; Label l i ng
Safety instructions Laser cl assi fi cati on The instrument produces visible laser beams,which are emitted from the instrument. It is a Class2 laser product in accordance with: l IEC60825-1 : 2014 „Radiation safety oflaser products“ Laser Cl ass 2 products Do not stare into the laser beam or direct ...
Page 22 - Optional accessories
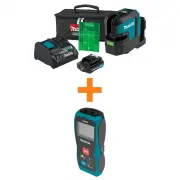
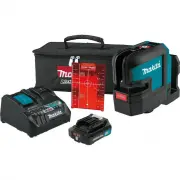
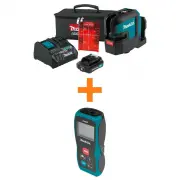
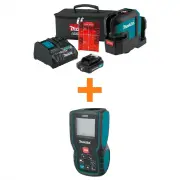
Optional accessories Op tio n a la c c e s s o rie s CAUT I O N These accessories or attachments are recom-mended for use with your Makita tool specified inthis manual. The use of any other accessories orattachments might present a risk of injury to per-sons. Only use accessory or attachment for its...