Page 2 - Safety Warnings
2 Safety Warnings Your safety is important to us.Please read this information before using your cooktop. The appliance is not to be used by persons (including children) with reduced physical, sensory or mental capabilities,or lack of experience and knowledge,unless they have been given supervision...
Page 4 - Top
4 Congratulations on the purchase of your new Induction Hob. We recommend that you spend some time to read this Instruction / Installation Manual in order to fully understand how to install correctly and operate it. For installation, please read the installation section. Read all the safety instruct...
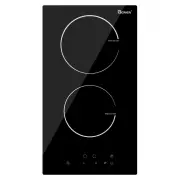
Page 5 - Heating zone Power; User interface
5 Heating zone Power Heating Zone Max.Power ( 220-240V~ 50/60Hz ) 1200W/1500W ( Booster ) (230~) 2000W/2300W ( Booster ) (230~) Total Rating Power ( GITS352G3 -US ) 3500W(230~) Reference Description A Zone select key B Child lock key C ON/OFF key D Power regulating key(reduce) E Power regulating key...
Page 6 - Heat Settings
6 Heat Settings The settings below should only be taken as a guide. The power of the induction coils will vary depending on the size and material of the pan. For this reason it is possible that the settings will need to be adjusted slightly to suit your pans. As you use the hob, you will get to know...
Page 7 - Hints and Tips; Possible
Hints and Tips Problem Possible causes What to do The hob cannot be turned on. No power. Make sure the hob is connected to the power supply and that it is switched on. Check whether there is a power outage in your home or area. The touch controls are difficult to operate. Make sure the touch control...
Page 8 - Before using your New Induction Hob; Using the Touch Controls; A Word on Induction Cooking
8 technology.It works by electromagnetic vibrations generating heat directly in thepan,rather than indirectly through heating the glass surface.The glass becomeshot only because the pan eventually warms it up. Before using your New Induction Hob • Read this guide,taking special note of the ‘Safety W...
Page 9 - Choosing the right Cookware
9 • You can check whether your cookware is suitable by carrying out a magnet test.Move a magnet towards the base of the pan.If it is attracted,the pan is suitable for induction. • If you do not have a magnet: 1. Put some water in the pan you want to check. 2. If does not flash in the display and the...
Page 10 - Using your Induction Hob; To start cooking; alternately with the heat setting
10 Using your Induction Hob To start cooking 1. Touch the ON/OFF key(C)” ”for 3 seconds. After power on,the buzzer beeps once,all displaysshow “– “,indicating that the induction hob hasentered the state of standby mode. 2. Place a suitable pan on the cooking zone thatyou wish to use. • Make sure the...
Page 13 - Using the Timer as a Minute Minder
13 Using the Timer as a Minute Minder If you are not selecting any cooking zone 1. Make sure the cooktop is turned on. Note: you can use the minute minder even if you’re not selecting any cookingzone. 2. Touch the Timer key(F)“ ”.The minder indicator will start flashing “10”,and you can set the time...
Page 14 - If the timer is set on one zone:
1 4 Setting the timer to turn one or more cooking zones off If the timer is set on one zone: 5. When cooking timer expires,the corresponding cooking zone will be switch off automatically.Other cooking zone will keep operating if they are turnedpreviously. 6. when using “the timer as an alarm” and “t...
Page 15 - Failure Display and Inspection; Technical Specification; Cooking Hob; Supply Voltage
1 5 Failure Display and Inspection If an abnormality comes up,the induction hob will enter the protective state automatically and display corresponding protective codes: Error Message Possible Cause What to do No pot or pot not suitable; Replace the pot; ER03 Water or pot on the glass over the contr...
Page 16 - Installation; Selection
1 6 Installation Selection of installation equipment Cut out the work surface according to the sizes shown in the drawing.For the purpose of installation and use,a minimum of 5 cm space shall be preserved around the hole.Be sure the thickness of the work surface is at least 30 mm.Please select heat-...
Page 17 - Before you install the hob,make sure that
1 7 A(mm) B(mm) C(mm) D E 760 50 mini 20 mini Air intake Air exit 5mm Before you install the hob,make sure that • The work surface is square and level, and no structural members interfere with space requirements. • The work surface is made of a heat-resistant material. • If the hob is installed abov...
Page 19 - Cautions; Connecting the hob to the mains power supply
Cautions 1. The induction hotplate must be installed by qualified personnel or technicians. We have professionals at your service.Please never conduct the operation byyourself. 2. The hob will not be installed directly above a dishwasher,fridge,freezer, washing machine or clothes dryer,as the humidi...
Page 20 - This appliance requires a 32 Amp Miniature Circuit Breaker.
20 This appliance requires a 32 Amp Miniature Circuit Breaker. • If the cable is damaged or to be replaced, the operation must be carried out the by after-sale agent with dedicated tools to avoid any accidents. • If the appliance is being connected directly to the mains an omnipolar circuit-breaker ...