Page 2 - TABLE OF CONTENTS
2 TABLE OF CONTENTS Package Contents . . . . . . . . . . . . . . . . . . . . . . . . . . . . . . . . . . . . . . . . . . . . . . . . . . . . . . . . . . . . . . . 3 Safety Information . . . . . . . . . . . . . . . . . . . . . . . . . . . . . . . . . . . . . . . . . . . . . . . . . . . . . . . . . . ...
Page 3 - Infrared Heater
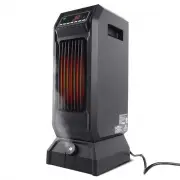
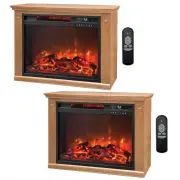
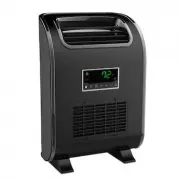
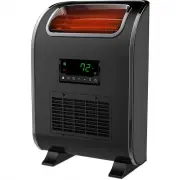
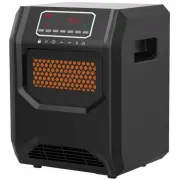
3 PACKAGE CONTENTS A C E D F B C ° F ° PART DESCRIPTION QUANTITY A Infrared Heater 1 B Remote Control 1 C Control Panel (pre assembled to Infrared Heater (A)) 1 D Filter Cover (pre assembled to Infrared Heater (A)) 1 E Master Power Switch (pre assembled to Infrared Heater(A)) 1 F Temperature Sensor ...
Page 4 - SAFETY INFORMATION; IMPORTANT SAFETY INSTRUCTIONS
4 SAFETY INFORMATION Please read and understand this entire manual before attempting to assemble, operate, or install the product . IMPORTANT SAFETY INSTRUCTIONS WARNING: POTENTIAL ELECTRICAL HAZARD IF NOT ADHERED TO . When using electrical appliances, basic precautions should always be followed to ...
Page 6 - FREQUENTLY ASKED QUESTIONS; translations for different wattages .; WATTAGE; can expect up to 24 hours to completely heat up .
6 FREQUENTLY ASKED QUESTIONS Please review these frequently asked questions on the next few pages prior to using your heater . Q. My heater emits a strange odor when I first open the box and when I turn the heater on for the first time. Why is this happening?A . This is normal . This heater is treat...
Page 7 - with a certified electrician .
7 FREQUENTLY ASKED QUESTIONS Q. The temperature on my heater does not match the temperature display on my wall, or external thermostat. Why?A. This is completely normal . The temperature display on your heater may vary from the temperature display on another thermostat (like the one mounted to your ...
Page 11 - Note: Press and hold the ambient temperature; OR
11 OPERATING INSTRUCTIONS 1 . Turn the heater on or off by pressing the Power button on the control panel (C) or by pressing the Power button on the remote control (B) . Once the power is off, heating elements will stop working first . The fan will continue working for up to 90 seconds to dispense r...
Page 12 - OPERATING INSTRUCTIONS; Note: Do not mix old and new batteries . Do not
12 OPERATING INSTRUCTIONS 4 . To set the timer power off, start the unit and press the Timer button on the control panel (C) or remote control (B) . Note: The timer-power-off function can only be set when the heater is in power-on mode . The digital display on the control panel (C) changes from the ...
Page 13 - CARE AND MAINTENANCE; unplug the unit, and allow it to cool completely .; CAUTION: DO NOT let liquid enter the heater .; original packaging to repack the unit .; CLEANING THE AIR FILTER; and allow parts to completely dry .; WARNING: Do not use the heater without the filter assembly in place .
13 CARE AND MAINTENANCE WARNING: Before performing any maintenance task, turn off the power switch in the rear of the unit, unplug the unit, and allow it to cool completely . 1 . To keep the heater clean, clean the outer shell with a soft, damp cloth . Use a mild detergent if necessary . After clean...
Page 14 - ONE-YEAR LIMITED WARRANTY; removed are not eligible for warranty coverage .
14 ONE-YEAR LIMITED WARRANTY The manufacturer warrants this heater against defects in materials and workmanship on functional parts, for a period of 1 year from the original date of purchase . Your sales receipt showing the date of purchase of the product is your proof of purchase . Keep it in a saf...
Page 16 - Printed in China; lifesmart; PLEASE REMEMBER TO REGISTER YOUR WARRANTY:
Printed in China lifesmart ® is a registered trademark of Supply Chain Sources., All Rights Reserved. PLEASE REMEMBER TO REGISTER YOUR WARRANTY: web: www.lifesmartcomfort.com email: [email protected] 16