Liebherr SWTNES 3010 - Manuals
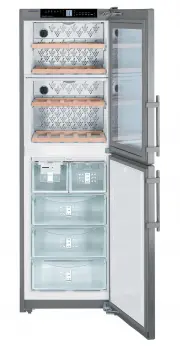
User Manual Liebherr SWTNES 3010


Summary
Contents 1 Appliance at a glance............................................ 2 1.1 Description of appliance and equipment.................. 2 1.2 Range of appliance use............................................ 2 1.3 Conformity................................................................ 3 1.4 ...
materials and products subject to the Medical Devices Directive 2007/47/EC - Use in potentially explosive areas Improper use of the appliance can lead to damage to or spoilage of the stored goods. Climate rating definitions The appliance is set to operate within specific ambient temperature limits a...
3 Controls and displays 3.1 Operating and control elements Fig. 3 (1) Alarm button (14) On/Off button, wine zone (2) SuperFrost button (15) Zone button (3) On/Off button, freezer compartment (16) Light button (4) Down setting button, freezer compartment (17) Fan button (5) Up setting button, freezer...
Liebherr Refrigerators Manuals
-
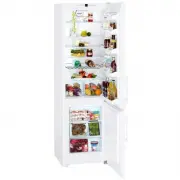 Liebherr C 4023
User Manual
Liebherr C 4023
User Manual
-
 Liebherr C5740IM
User Manual
Liebherr C5740IM
User Manual
-
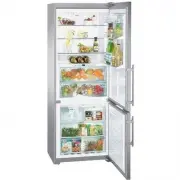
 Liebherr CBN 3656 Premium
User Manual
Liebherr CBN 3656 Premium
User Manual
-
 Liebherr CBNes 5167
User Manual
Liebherr CBNes 5167
User Manual
-
 Liebherr CBNES6256
User Manual
Liebherr CBNES6256
User Manual
-
 Liebherr CBNPes 5167 PremiumPlus
User Manual
Liebherr CBNPes 5167 PremiumPlus
User Manual
-
 Liebherr CBPesf 4033
User Manual
Liebherr CBPesf 4033
User Manual
-
 Liebherr CN 4003 NoFrost
User Manual
Liebherr CN 4003 NoFrost
User Manual
-
 Liebherr CN 5156 Premium NoFrost
User Manual
Liebherr CN 5156 Premium NoFrost
User Manual
-
 Liebherr CNes 4013 Comfort NoFrost
User Manual
Liebherr CNes 4013 Comfort NoFrost
User Manual
-
 Liebherr CNes 4013_CNes 4023
User Manual
Liebherr CNes 4013_CNes 4023
User Manual
-
 Liebherr CNes 4066 Premium NoFrost
User Manual
Liebherr CNes 4066 Premium NoFrost
User Manual
-
 Liebherr CNesf 4003 Comfort NoFrost
User Manual
Liebherr CNesf 4003 Comfort NoFrost
User Manual
-
 Liebherr CNesf 5113 Comfort NoFrost
User Manual
Liebherr CNesf 5113 Comfort NoFrost
User Manual
-
 Liebherr CNP 4056 Premium NoFrost
User Manual
Liebherr CNP 4056 Premium NoFrost
User Manual
-
 Liebherr CNPEF4416
User Manual
Liebherr CNPEF4416
User Manual
-
 Liebherr CPesf 3413_CPesf 3813
User Manual
Liebherr CPesf 3413_CPesf 3813
User Manual
-
 Liebherr CS-1400R
User Manual
Liebherr CS-1400R
User Manual
-
 Liebherr CS-1400R-IM
User Manual
Liebherr CS-1400R-IM
User Manual
-
Liebherr CS-1410-L
User Manual