Liebherr SGNPES4365LH - Manuals
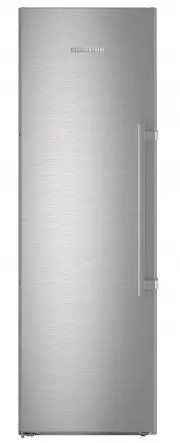
User Manual Liebherr SGNPES4365LH


Summary
Contents 1 Appliance at a glance............................................ 2 1.1 Overview of the appliance and its equipment........... 2 1.2 Appliance range of use............................................. 2 1.3 Conformity................................................................ 3 1.4 P...
The following applications are expressly forbidden: - Storing and refrigerating medicines, blood plasma, laboratory preparations or similar substances and products based on the Medical Device Directive 2007/47/EC - Use in outdoor areas with very high humidity. - Use in areas at risk of explosions - ...
Model* a [mm] * b [mm] * c [mm] * d [mm] * e [mm] * f [mm] * g [mm] * h [°]* GN(P) 38.. 700 1350 685 x 750 x 794 x 1362 x 1015 115 GN(P) 41.. / GN 5050 1550 GN(P) 46.. / LTGN 312 1750 GN(P )52.. 1950 x If you are using wall spacers, add 15 mm (see 4.2) to the dimensions.With the door open, the dimen...
Liebherr Freezers Manuals
-
 Liebherr G 1213-20
User Manual
Liebherr G 1213-20
User Manual
-
 Liebherr G 4013
User Manual
Liebherr G 4013
User Manual
-
 Liebherr GN 1923
User Manual
Liebherr GN 1923
User Manual
-
 Liebherr GN 2723
User Manual
Liebherr GN 2723
User Manual
-
 Liebherr GN 3023
User Manual
Liebherr GN 3023
User Manual
-
 Liebherr GNes 3076
User Manual
Liebherr GNes 3076
User Manual
-
 Liebherr GP 1213
User Manual
Liebherr GP 1213
User Manual
-
 Liebherr GP 1376-20
User Manual
Liebherr GP 1376-20
User Manual
-
 Liebherr GP 3513
User Manual
Liebherr GP 3513
User Manual
-
 Liebherr GX 823
User Manual
Liebherr GX 823
User Manual
-
 Liebherr IG 1156
User Manual
Liebherr IG 1156
User Manual
-
 Liebherr IG 956
User Manual
Liebherr IG 956
User Manual
-
 Liebherr MF-1851
User Manual
Liebherr MF-1851
User Manual
-
Liebherr MF-2451
User Manual
-
Liebherr MF-3051
User Manual
-
Liebherr MF-3651
User Manual
-
 Liebherr MRB-2400
User Manual
Liebherr MRB-2400
User Manual
-
Liebherr MRB-3000
User Manual
-
Liebherr MRB-3600
User Manual
-
 Liebherr SF5291
User Manual
Liebherr SF5291
User Manual